
There are a couple of routes to hike between Mui Wo and Discovery Bay. One is the relatively easy and shorter route via the Trappist Haven Monastery, and the other is the more challenging and scenic hike along Lo Fu Tau Country Trail (Tiger’s Head).
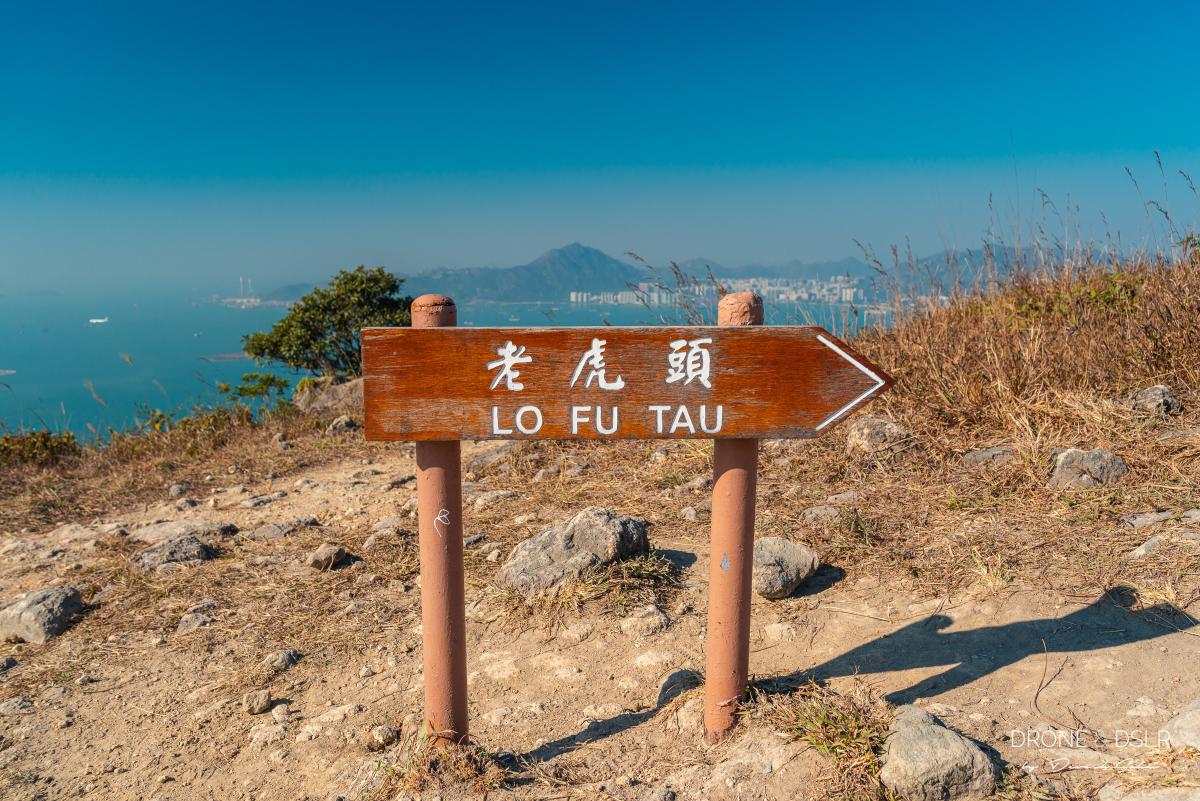
The Lo Fu Tau Country Trail technically doesn’t connect the two neighbourhoods on Lantau Island but is a 3.4 km section of the trail between them. At one end of the trail is Lo Fu Tau, also known as Tiger’s Head, the tallest hill in Discovery Bay. And on the other end is the Hong Kong Olympic Trail.
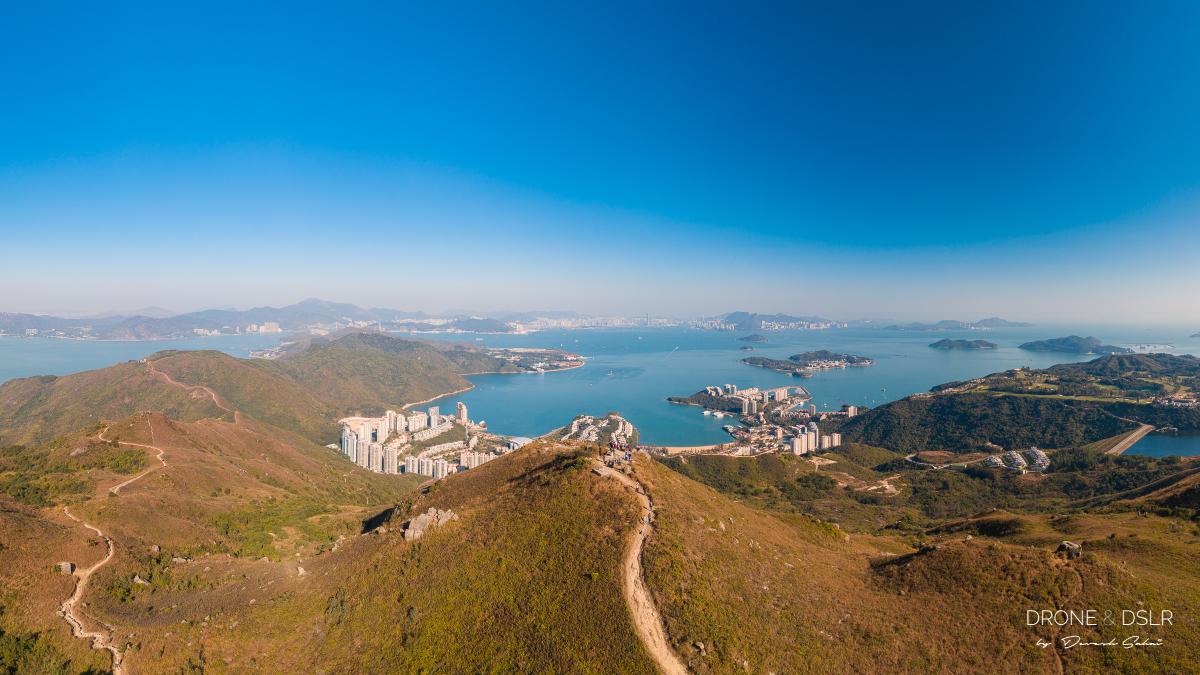
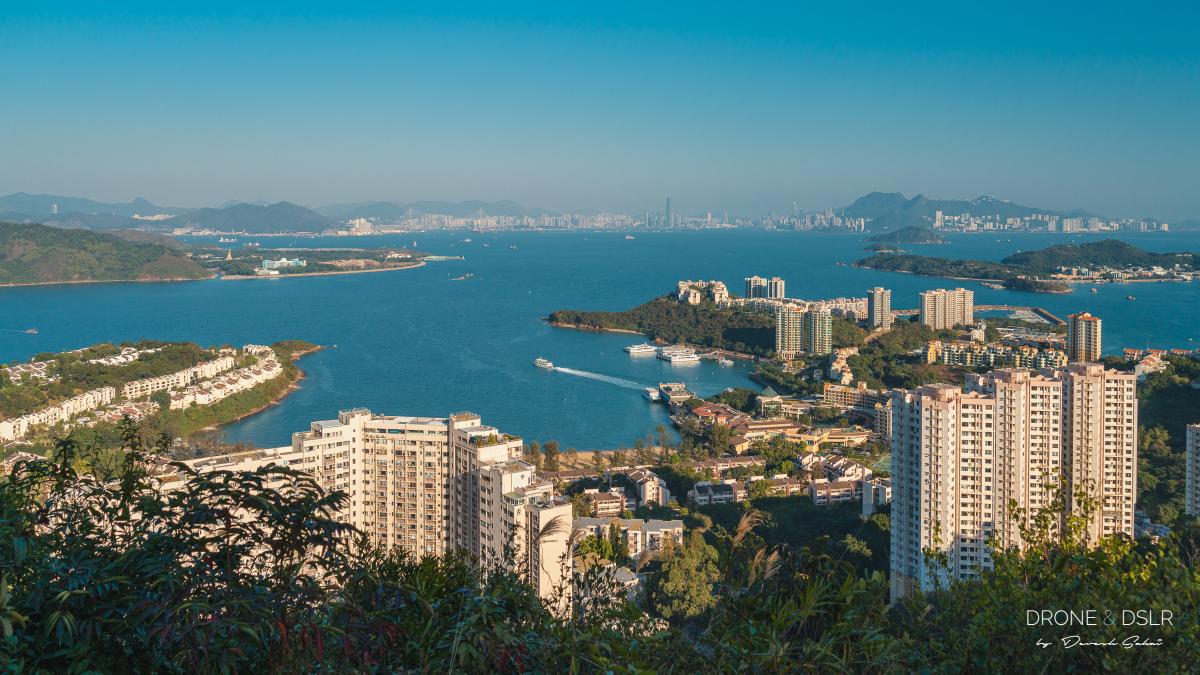
Aerial panorama from above Lo Fu Tau Viewing Point
For me, the Lo Fu Tau Country Trail is another quintessential example of hiking in Hong Kong – a rugged country trail, with glimpses of a world-class city on either side.
Mui Wo to Discovery Bay via Lo Fu Tau Country Trail
A quick note about the route in the map below. I ended up taking a longer, scenic route up to Mong To Au Shelter Pavilion, which I wouldn’t advise. Hence, the distance shown on the map is slightly longer than the recommended route.

Lo Fu Tau Country Trail map and elevation profile
You can complete this hike in either direction – from Mui Wo to Discovery Bay, or from Discovery Bay to Mui Wo. There are pros and cons of choosing which side to start on. I prefer the route from Mui Wo to Discovery Bay for a couple of reasons.
The most important of which is that the hike up to Lo Fu Tau (Tiger Head) is quite treacherous from Discovery Bay. It’s rugged, steep, and full of loose gravel and rocks. However, I completely understand that the loose gravel can be tricky while coming down and some might prefer to hike up instead of down.

Looking at Tiger’s Head from Discovery Bay
Once you go through this guide and get an idea of the terrain, it’s your choice where to start this hike. However, for the sake of this guide, we will hike from Mui Wo to Discovery Bay.
Starting point
To start this hike, make your way to Mui Wo. If you’re coming from Central, catch the ferry from Central Pier Number 6. The ferries run quite frequently as you can see from their schedule.
Or if you’re coming from Tung Chung, you can catch bus 3M to Mui Wo.
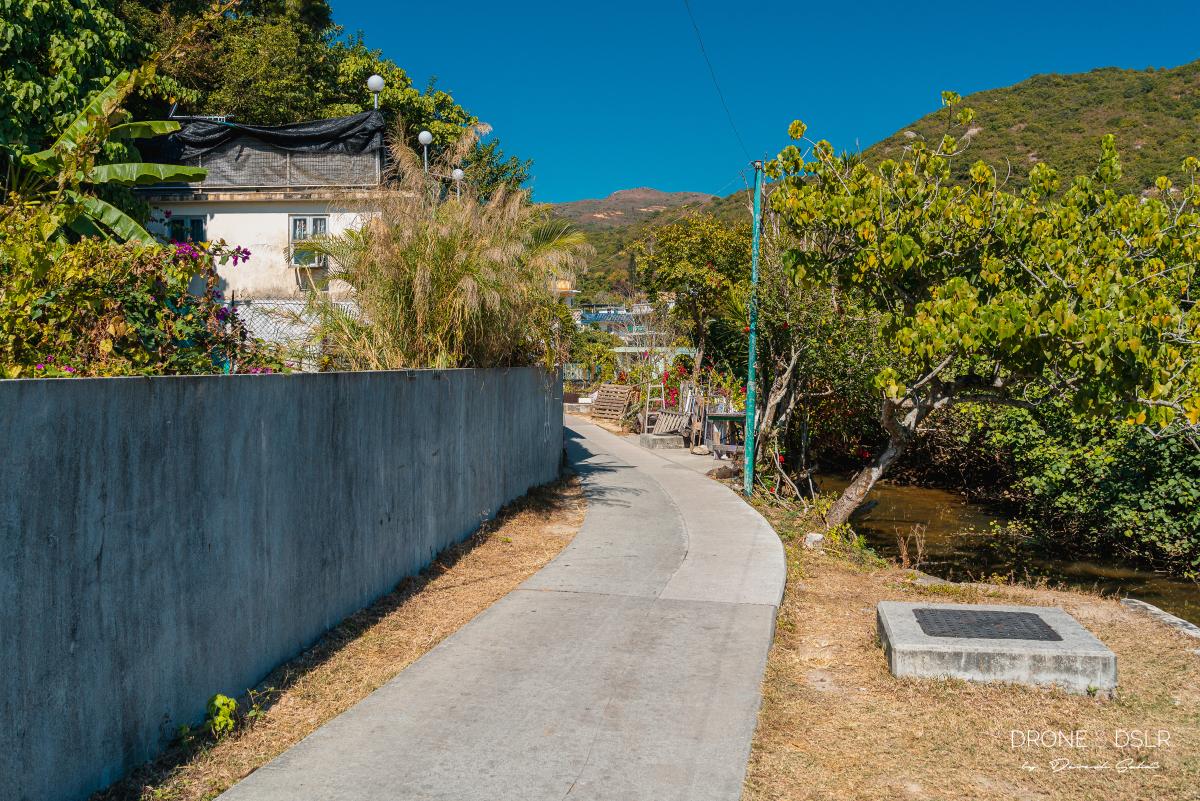
Mui Wo Ferry Pier to Silvermine Waterfall
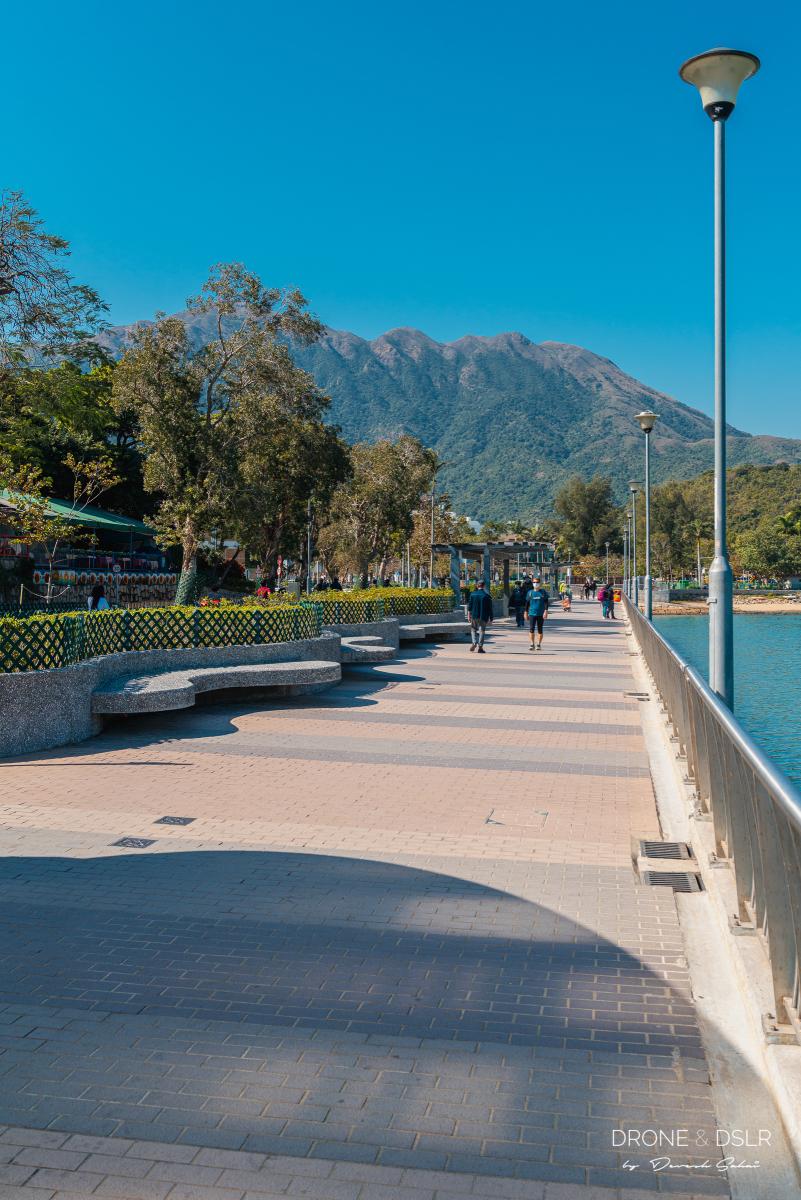
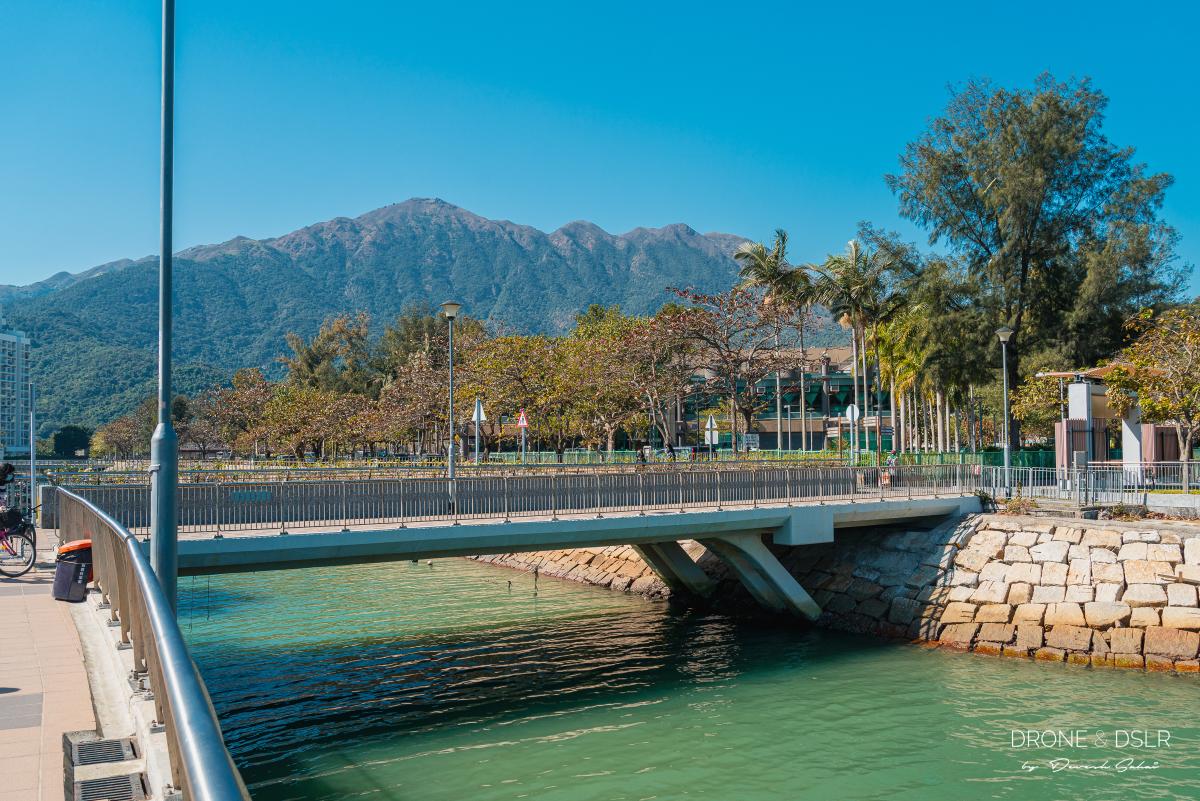
Once you exit the ferry pier, walk along the Mui Wo Waterfront Promenade till you reach the bridge on the River Silver. Turn right, and cross the bridge towards Silvermine Beach and Silvermine Beach Resort.
-

- The Mui Wo Waterfront Promenade
-
- Turn right on this bridge towards Silvermine Beach
Immediately after Silvermine Beach Resort, turn left and walk alongside the resort’s wall till you reach the lane at the back. Once at the lane, turn right and walk beside the village houses.
-
- Turn left and walk beside Silvermine Beach Resort
-
- Walk beside the houses
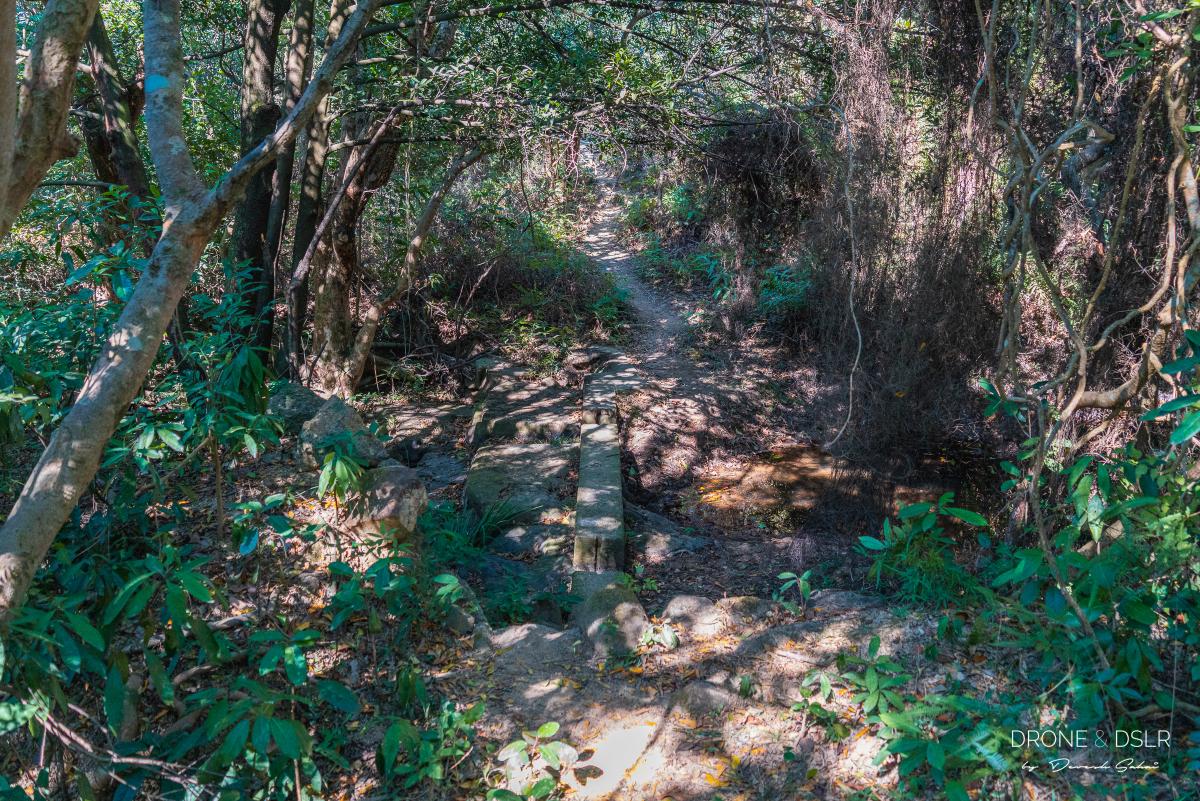
Soon you’ll come across a fork in the path. Here, turn left onto the trail that leads you to Silvermine Cave (follow the sign). The path cuts through the back of the village and merges with the Hong Kong Olympic Trail, next to Silvermine Waterfall.
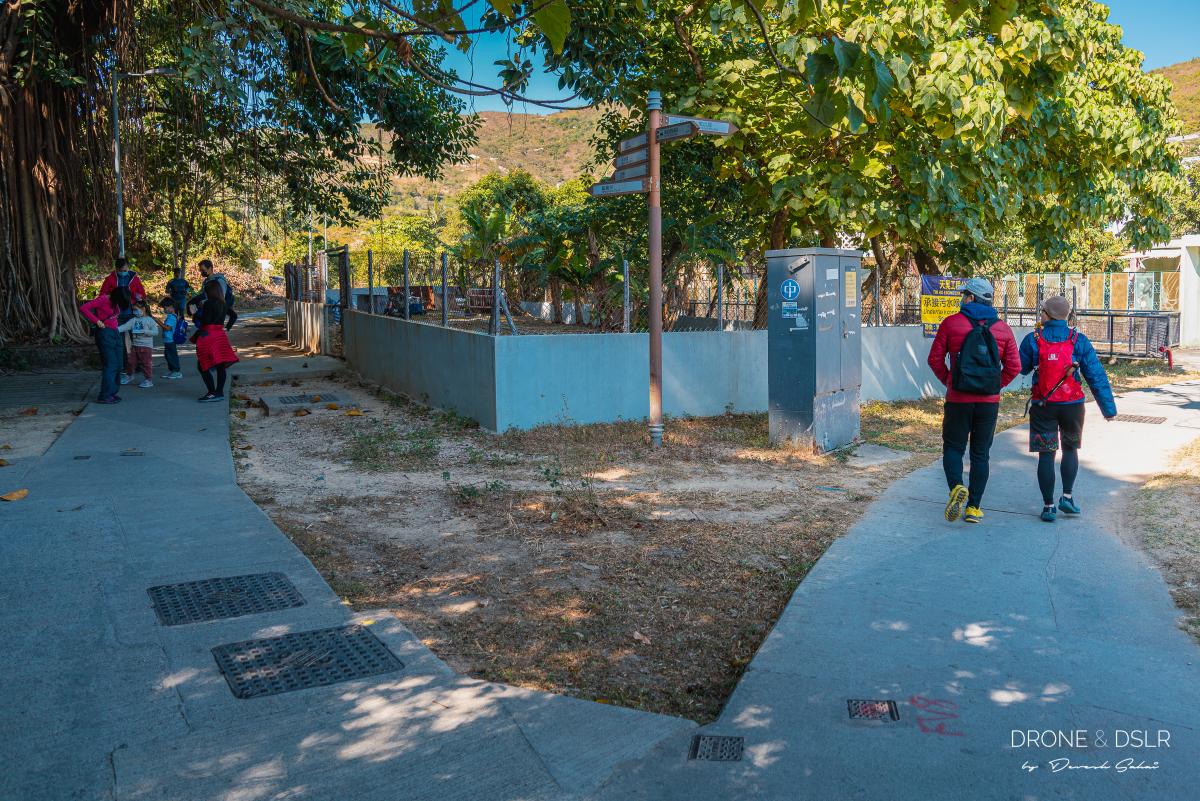
Turn left towards Silvermine Cave
Once you reach Silvermine Waterfall, feel free to take a break. The waterfall is quite lush and beautiful, especially after the rainy season. You can follow our guide to the Silvermine Waterfalls if you ever want to return to this scenic spot.
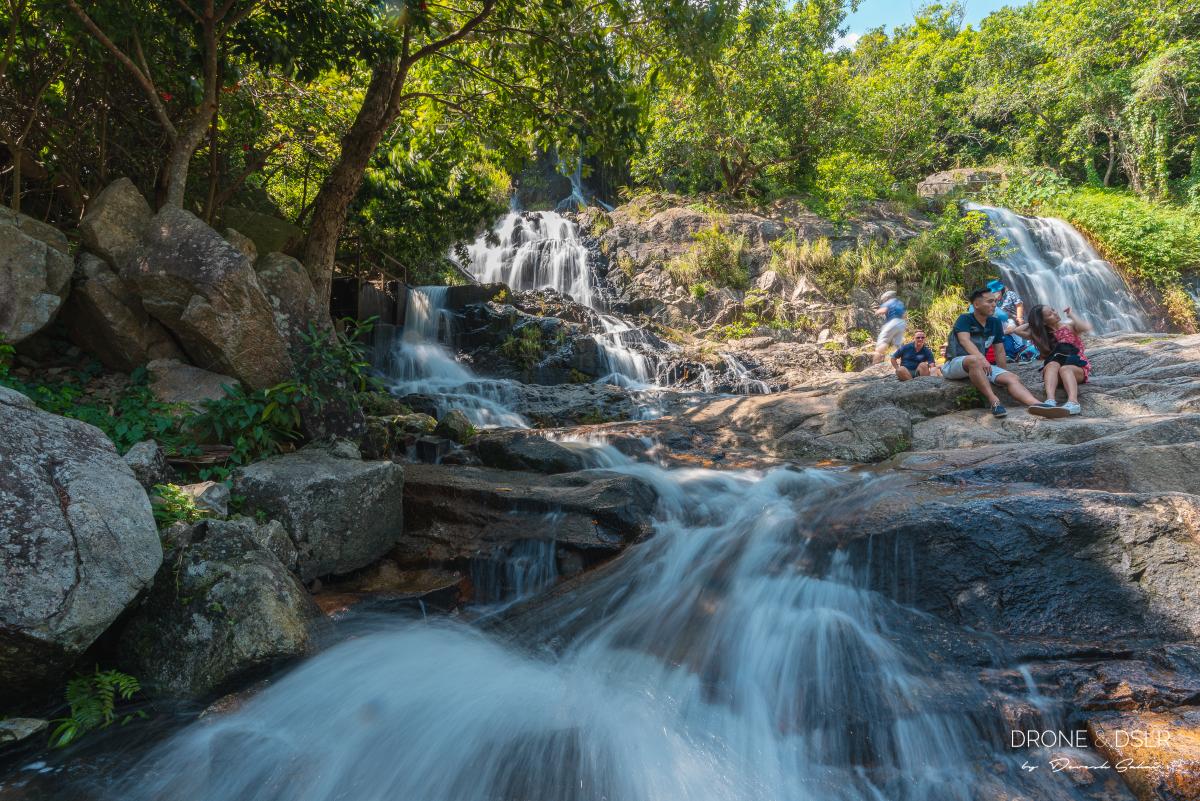
People enjoying the waterfalls
Towards Mong To Au Shelter Pavilion
From the Silvermine Waterfall, continue on the Hong Kong Olympic Trail towards Silvermine Cave.
The Hong Kong Olympic Trail, or the “Islands Nature Heritage Trail”, is a 6.5 km trail between Mui Wo and Tai Ho Wan, a large bay next to the airport.

Walk up the trail on the left to get to Silvermine Cave
The trail begins its uphill climb from next to the waterfall. And just above the waterfall is the Silvermine Cave. You can learn all about the Silvermine Cave and its history in our post about discovering Mui Wo. But if you’re curious, take a quick peek at the cave and then return to the trail.
About 700 metres from Silvermine Cave is another hidden gem – Pearl Falls. Although this waterfall isn’t visible from the trail itself, you can follow our guide and make a short detour to see it.
Whether you take the detour or not, stay on the Hong Kong Olympic Trail for the next 900 metres till you arrive at the Mong To Au Shelter Pavilion.
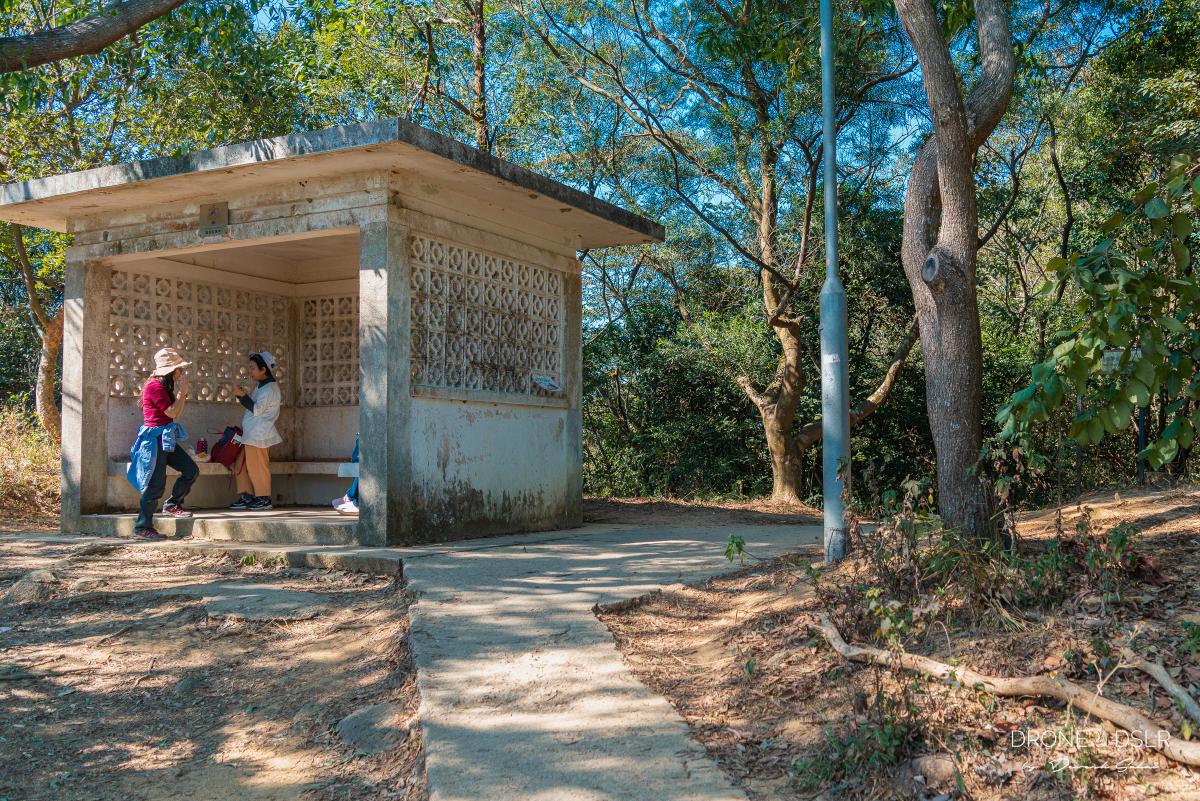
Mong To Au Shelter Pavilion
Mong To Au Shelter Pavilion to Lo Fu Tau Country Trail
So, there are two routes to get to Lo Fu Tau Country Trail from Mong To Au Shelter Pavilion. You can continue along the Hong Kong Olympic Trail for another 600 metres till the start of the Lo Fu Tau Country Trail. Or you could take a shortcut through the woods that will save you 800 metres of walking.
For now, continue past Mong To Au Shelter Pavilion for another 150 metres till the trail curves left. If you continue on the trail for another 600 metres, you will reach the start of Lo Fu Tau Country Trail. But to take the shortcut, turn right and walk through the grass. Once you reach the trees at the end of the grassy patch, turn left.

Turn left to continue on the Hong Kong Olympic Trail. Turn right for the shortcut.
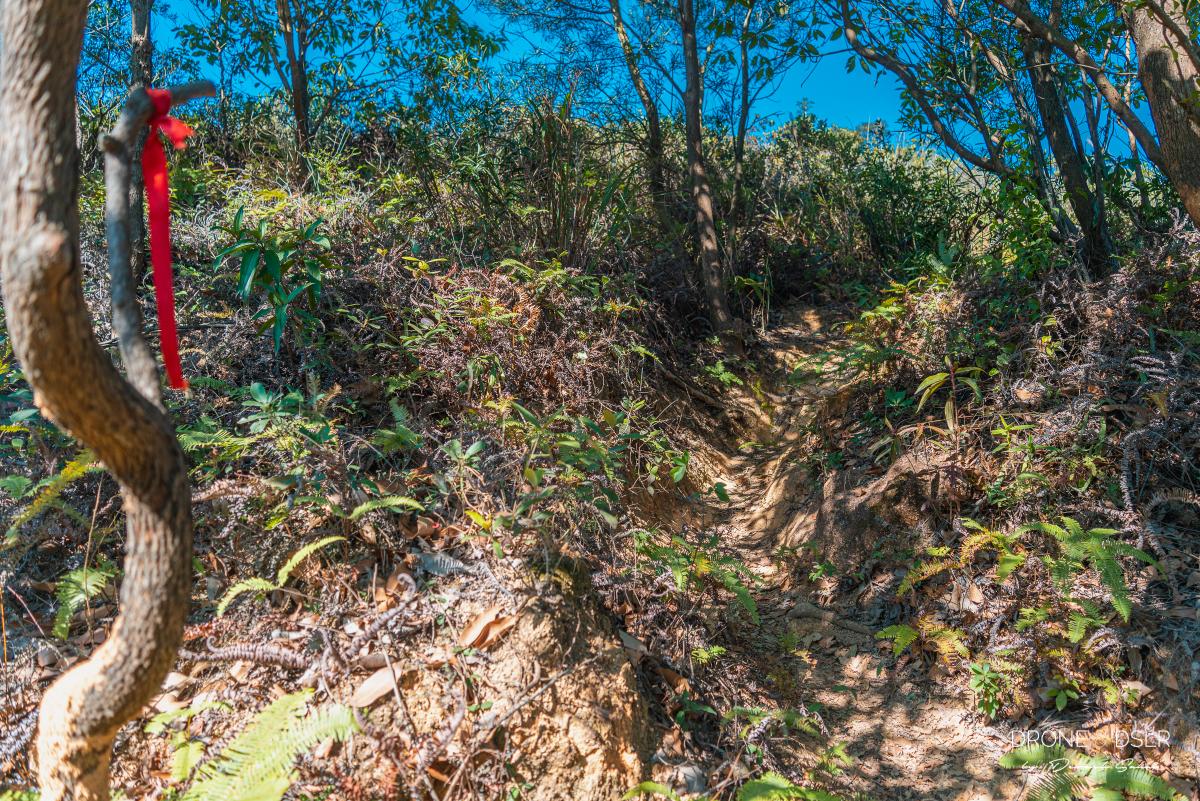
From this point, continue along the unmarked trail, and keep an eye out for colourful ribbons that act as markers. You’ll know if you’re on the right track if you cross a small stream.
-
- Walkthrough the grass

-
- Cross the stream
Continue on the trail as it cuts through the bushes before merging with Lo Fu Tau Country Trail. Once you reach Lo Fu Tau Country Trail, you should be able to see Tai Ho Wan and the North Lantau Highway straight ahead.
-
- Follow the ribbon markers if ever in doubt
-
- Where the shortcut meets Lo Fu Tau Country Trail

If you had taken the Hong Kong Olympic Trail route, it would have been a 1.2 km hike to arrive here. But the shortcut cuts it down to 400 metres, thereby saving you approximately 800 metres.
Lo Fu Tau Country Trail
The hike from here on is relatively straightforward. It’s a gradual incline all the way, with a few steep sections.
To me, Lo Fu Tau Country Trail feels like an urban oasis in Hong Kong! Here you are on a rugged hiking trail in the wilderness but surrounded by an urban metropolis on either side.
The rocky terrain of Lo Fu Tau Country Trail
To begin the hike on Lo Fu Tau Country Trail, turn right from where the shortcut meets the trail. The trail initially runs alongside the Discovery Bay Golf Club. Needless to say there is a stark difference between the lush grass below and the path that you’re walking on.

The Discovery Bay Golf Club seen from Lo Fu Tau Country Trail
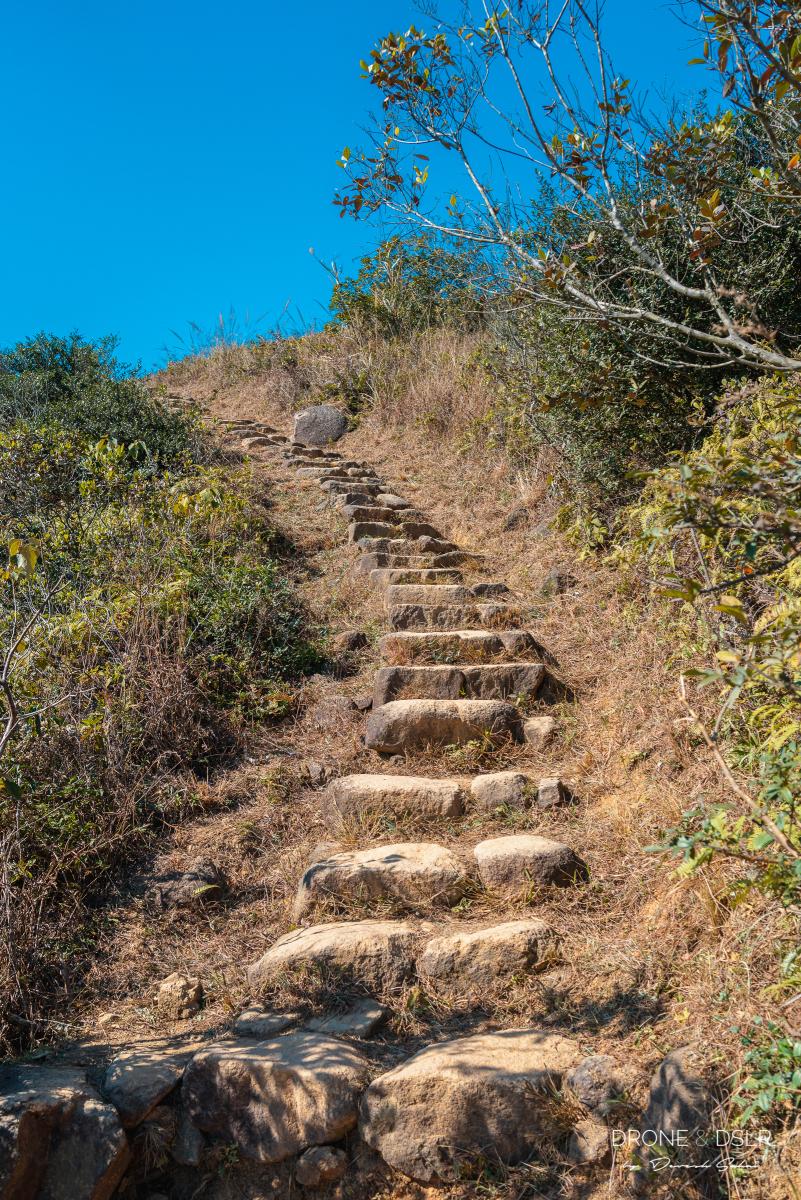
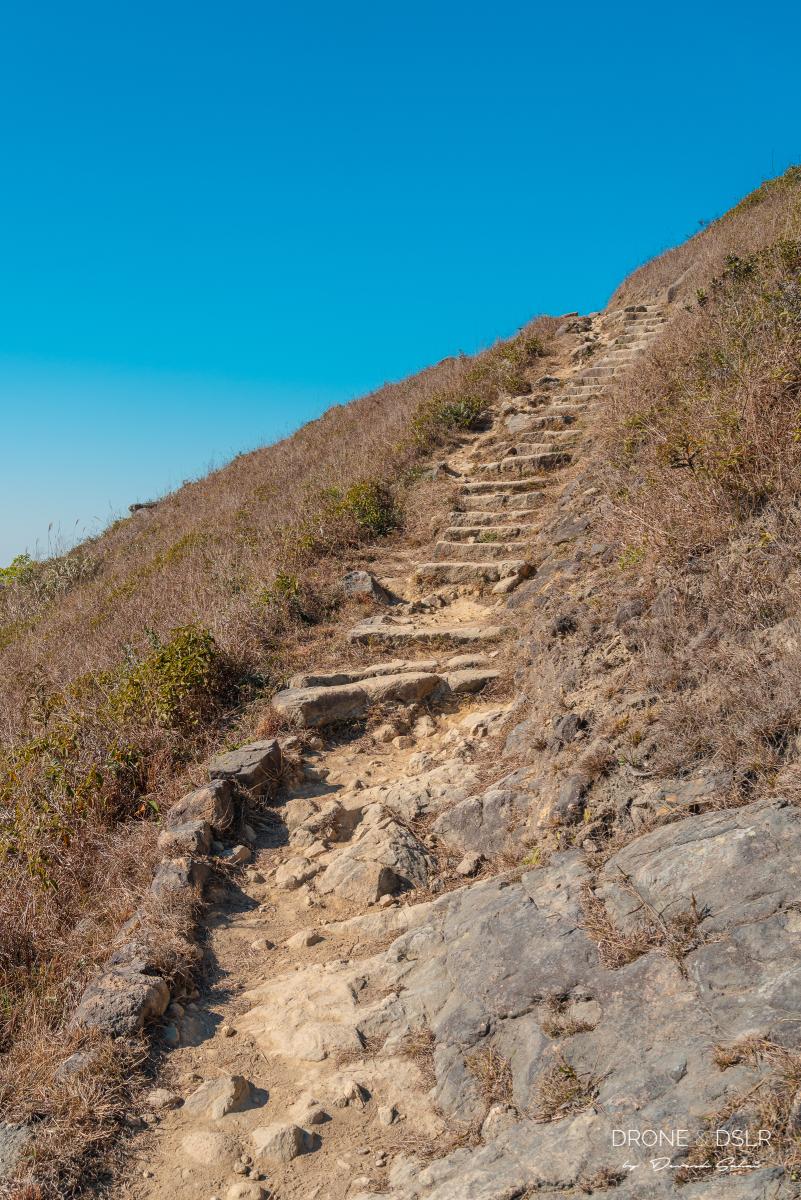
After the golf club, the trail continues at a gentle incline before reaching a steep flight of uphill steps. Fortunately, this climb is relatively short. And once you reach the top, the trail returns to a relatively flat surface again.
-
- The steps after the golf club

-
- The steep steps
The Standing Rock
For me, the next section of the trail is characterised by interesting-looking rock formations and boulders that are quite picturesque.
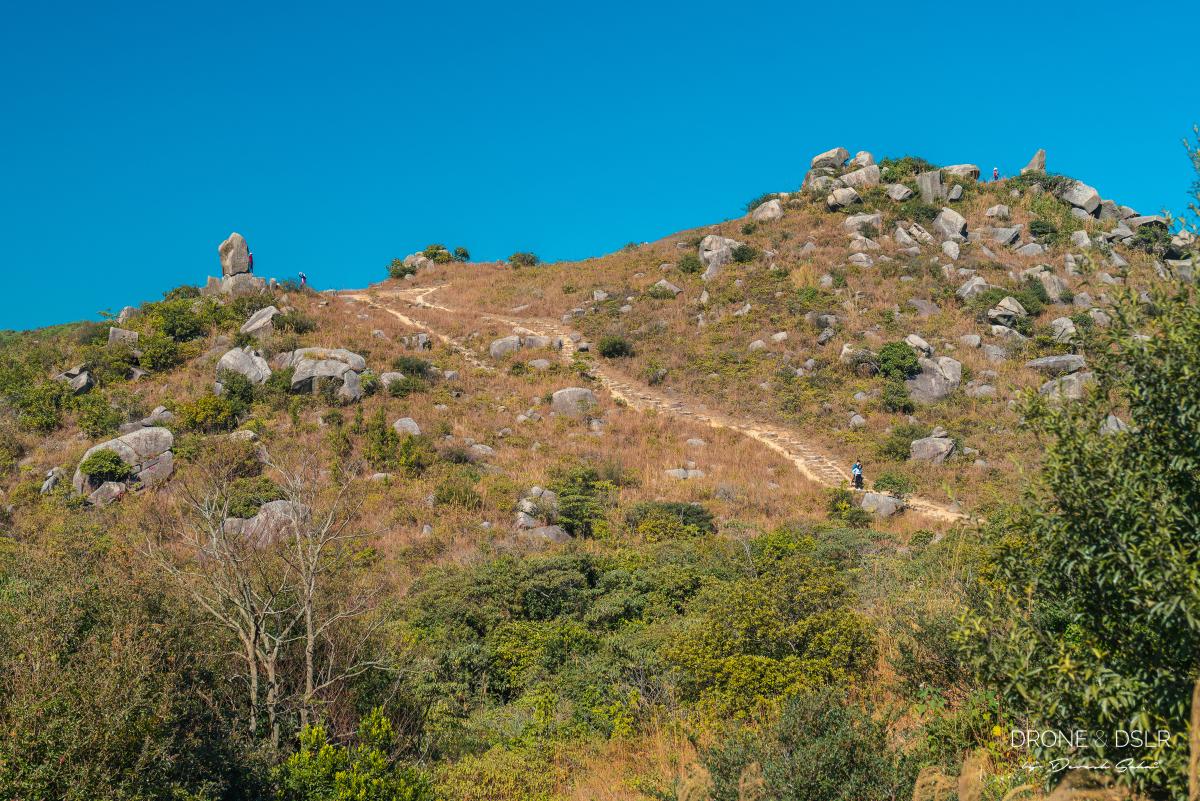
So many rocks and boulders ahead
A few hundred metres ahead is your first rocky encounter – a massive boulder right in the middle of the trail. It’s hard to miss it!

Big boulder in the middle of the trail
After this roadblocking boulder, the trail continues around the hill and then up a flight of steps. At the end of the steps is the Standing Rock, an obvious name for a large rock that stands upright.
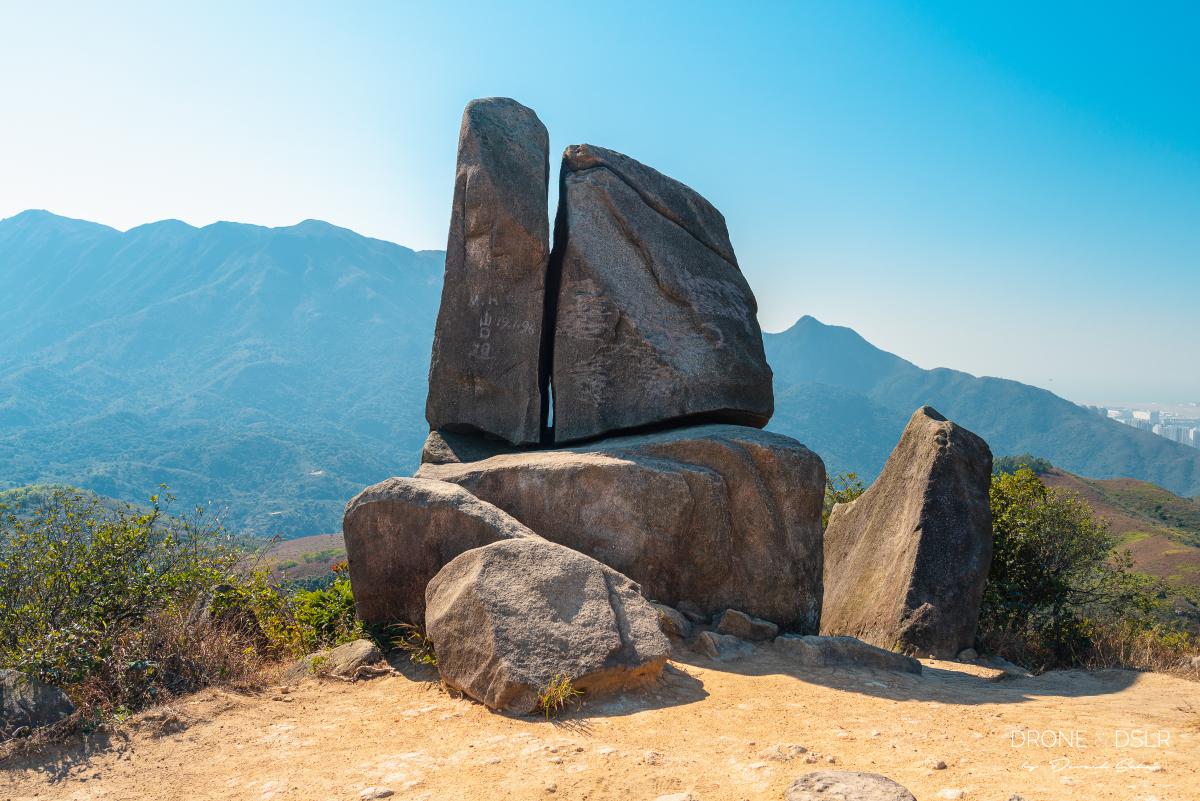
The Standing Rock
And opposite the Standing Rock, about 50 metres ahead, is another group of rocks in the form of a ledge. The ledge rock makes for a very Insta-worthy shot!

The rocks in the form of a ledge
To Lo Fu Tau (Tiger’s Head)
The next section of the trail is the most scenic in my opinion. From Standing Rock, the Lo Fu Tau Country Trail continues along the Discovery Bay Reservoir.

The beautiful Lo Fu Tau Country Trail
From the trail, you can see the reservoir, the Discovery Bay Golf Club, and even the Hong Kong skyline on a clear day. And on the other side, you can catch a glimpse of Hong Kong Airport.
-
- The views of Discovery Bay Reservoir and Golf Club to your right

-
- Views of Hong Kong Airport to your left
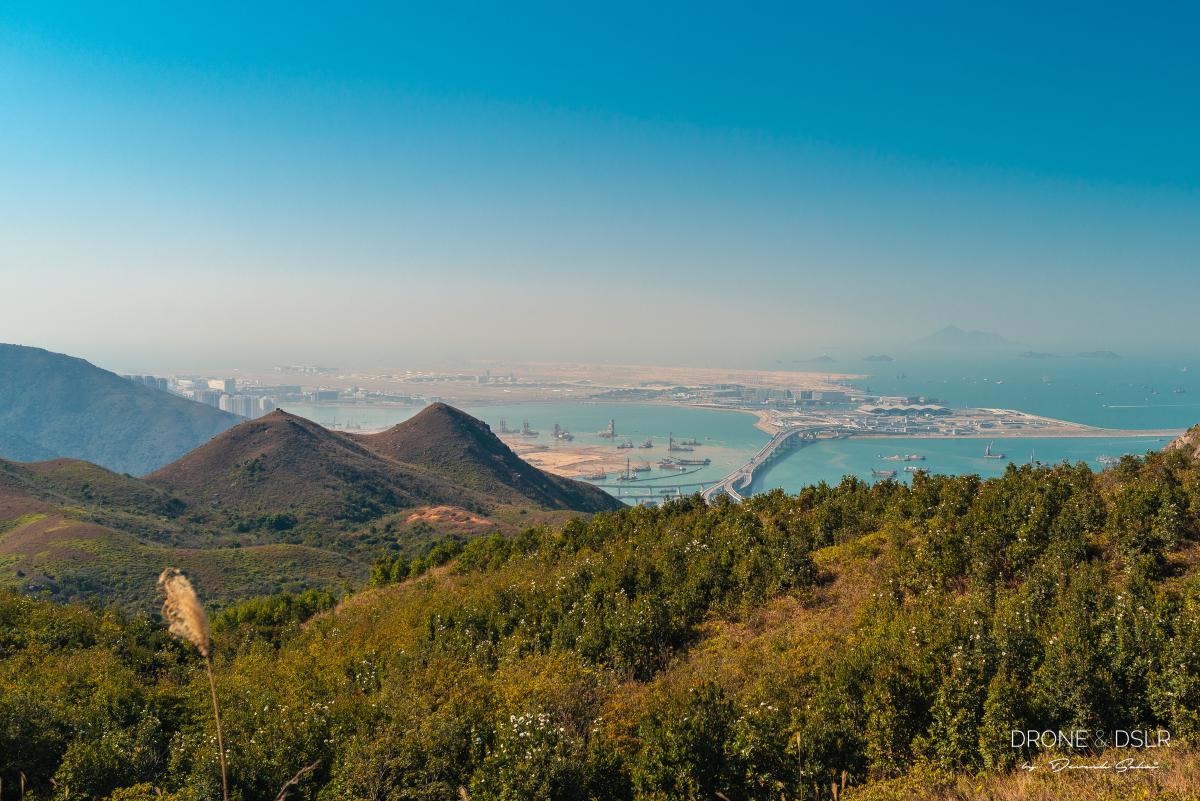
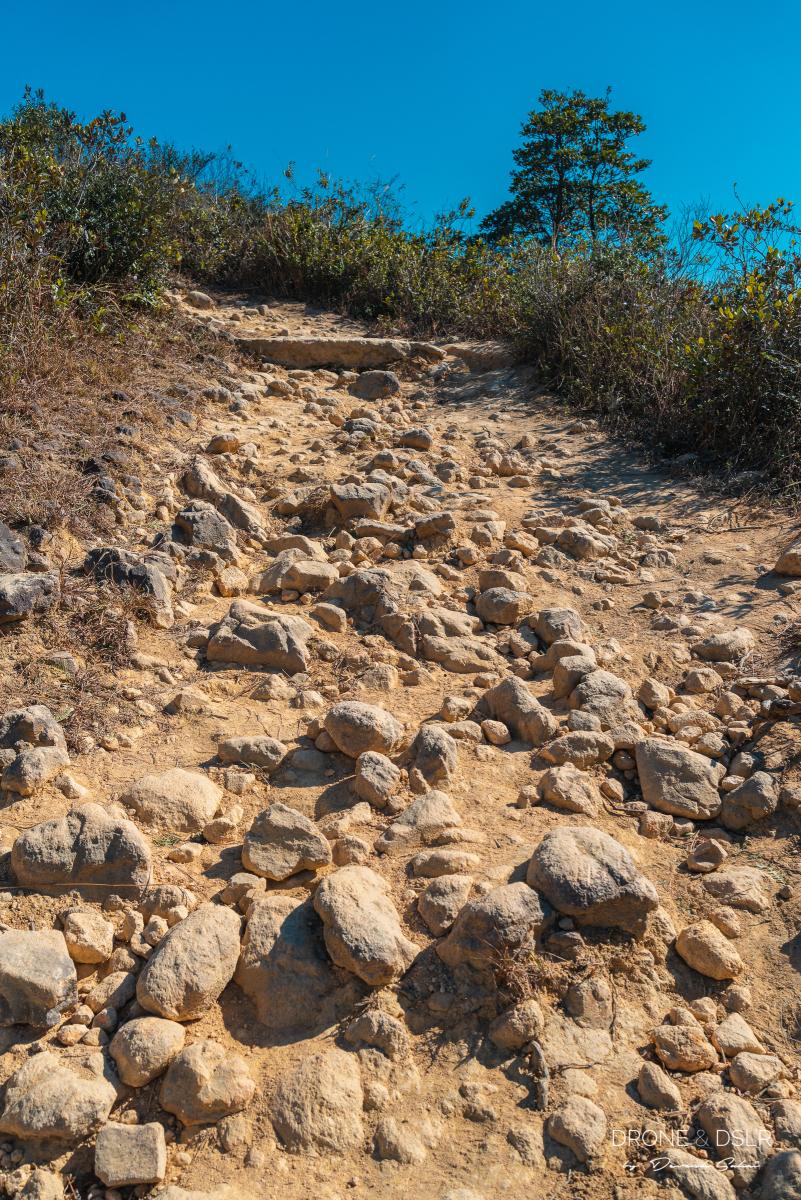
As the trail continues its uphill climb, the airport becomes more clearly visible. Although this section of the trail is very scenic, it’s not shaded at all.
-
- Lo Fu Tau Country Trail

-
- The final steps to the top of the hill
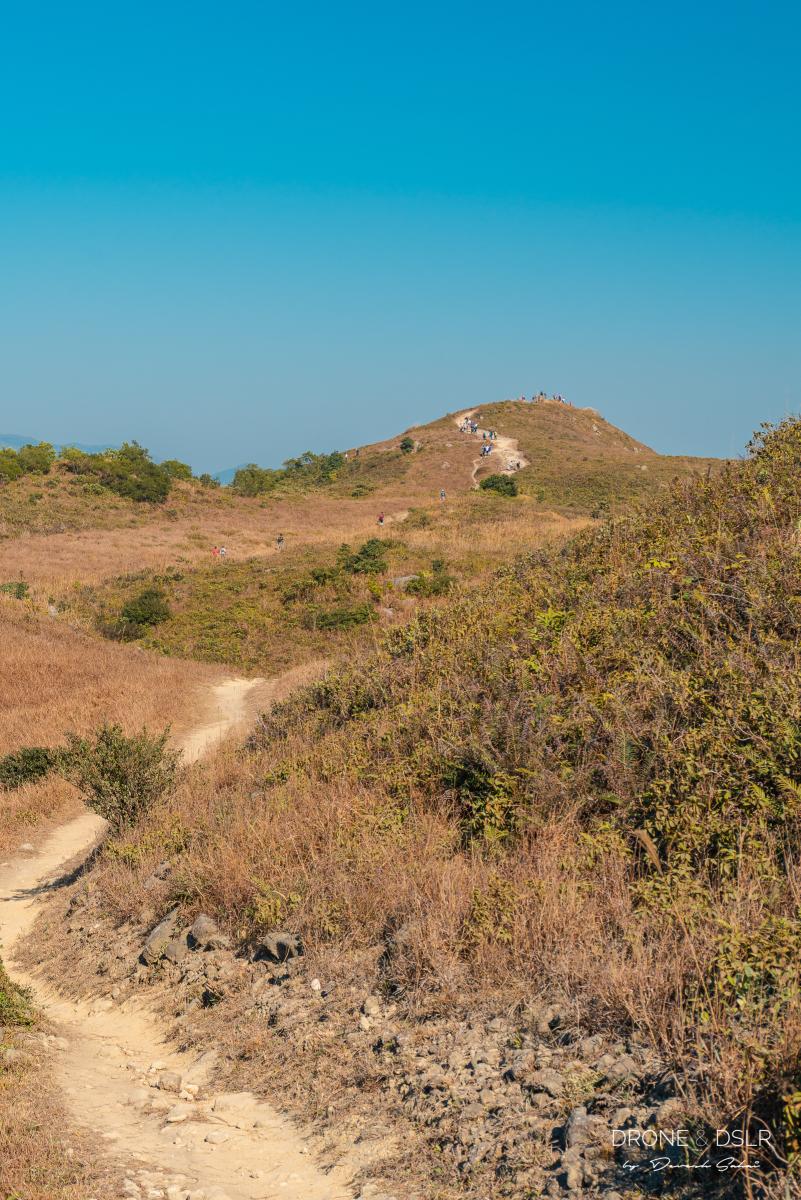
After another few hundred metres, the trail finally arrives at the hilltop plateau. From here you can finally see Lo Fu Tau just up ahead.
-
- The top of the hill is mostly flat
-
- The final stretch of Lo Fu Tau Country Trail to reach Lo Fu Tau Viewing Point

-
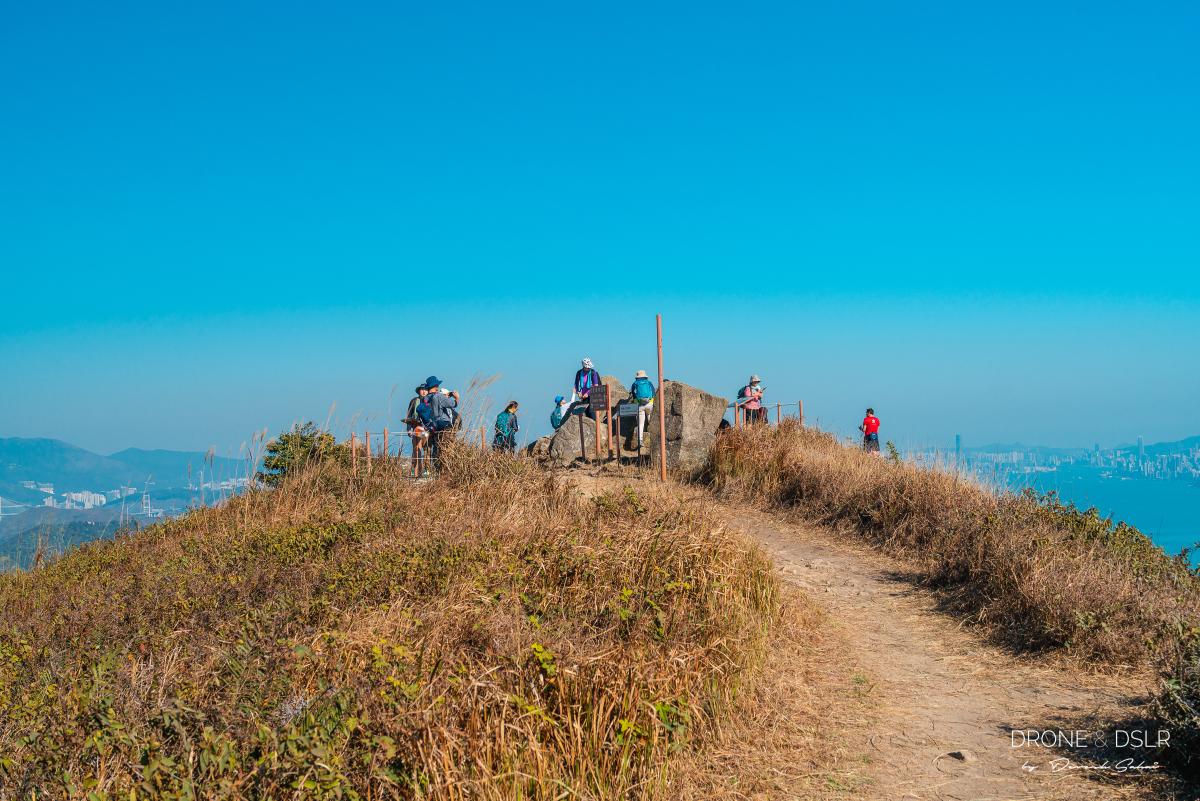
- Made it to Lo Fu Tau
At 465 metres, Lo Fu Tau is the tallest hill in the Discovery Bay area. The top of the hill resembles a tiger’s head, hence its name.
From the Lo Fu Tau viewing point, you get sweeping panoramic views of the surrounding areas! At the back, you can see Castle Peak, Tuen Mun, and aeroplanes landing or taking off from Hong Kong Airport. And ahead Discovery Bay, the golf course, and reservoir. Also, if it’s a clear day, you can see the Hong Kong skyline!
-
- Lo Fu Tau Viewing Point up ahead
-
- The views from Lo Fu Tau Viewing Point

-
- The north-west viewing from Lo Fu Tau viewing point – Castle Peak and Tuen Mun

-
- Watching an aeroplane land from Lo Fu Tau

-
- The south-east views from Lo Fu Tau Viewing Point – more of Lantau to see

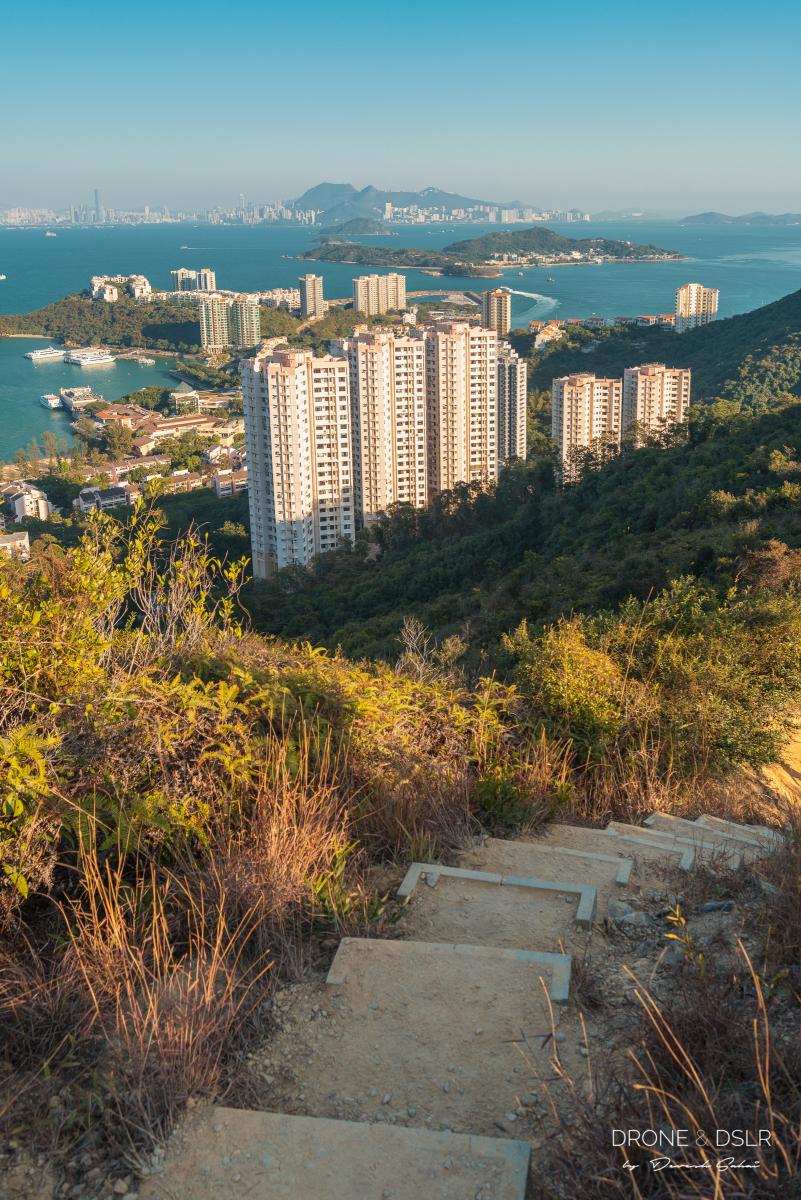
To the Discovery Bay Lookout Point
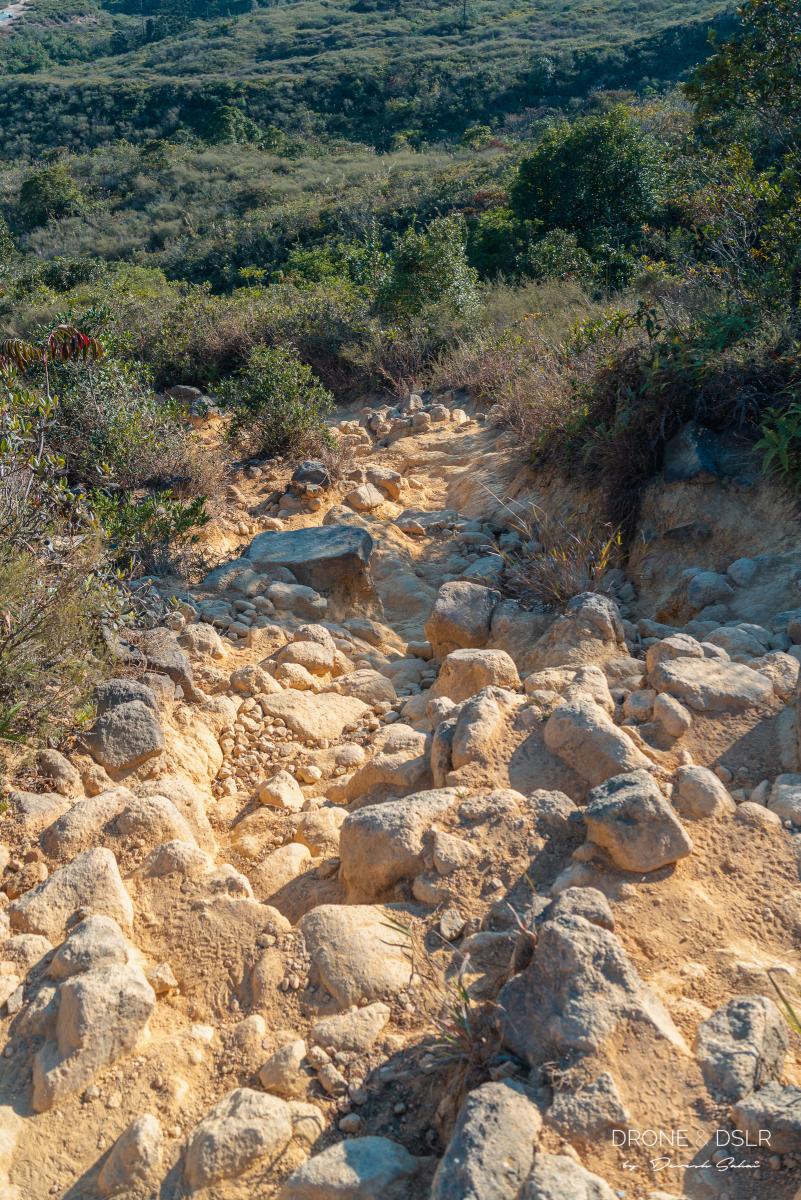
Warning: The next section of the trail is extremely treacherous. Even if it’s downhill, it’s not easy. It’s steep and slippery, full of loose gravel and rocks. Descend slowly and with caution.
The trail from Tiger’s Head to the Discovery Bay Lookout Point is an unmarked, unmaintained trail. There are numerous routes that all eventually lead to some part of Discovery Bay. But I’ll stick to the one that ends closest to the Discovery Bay Plaza.
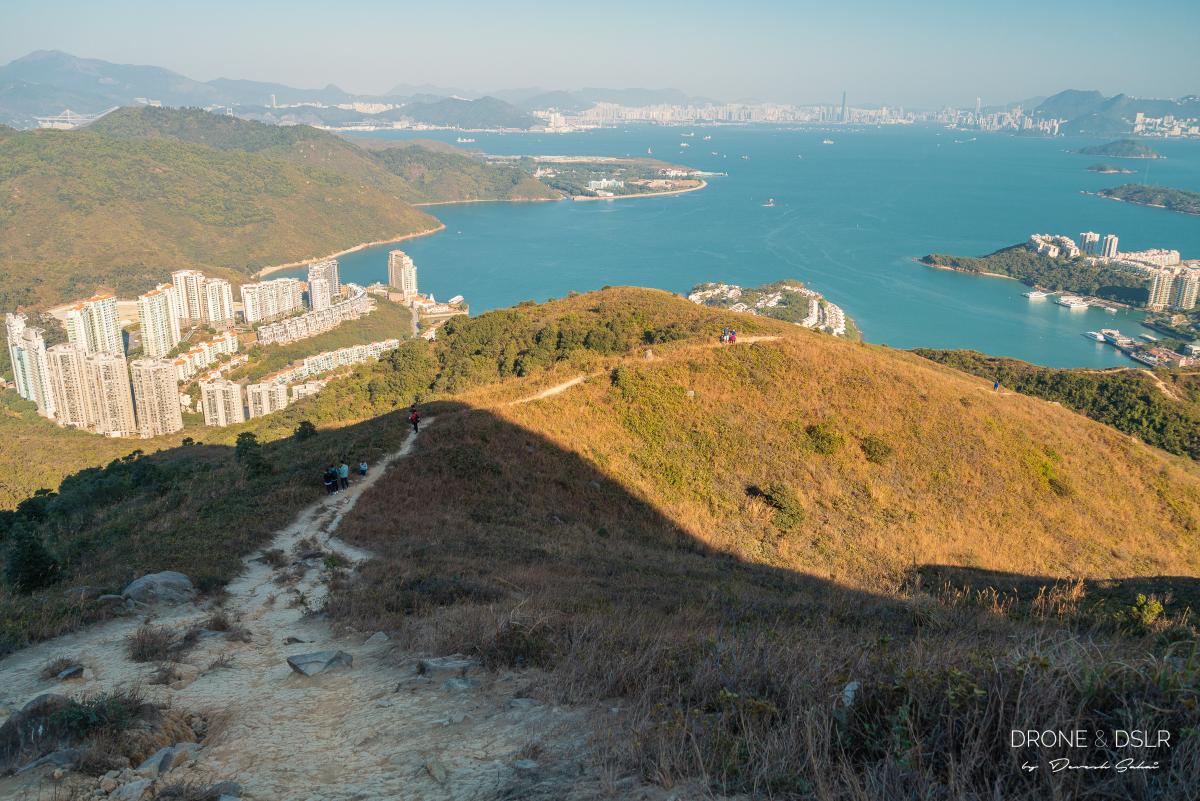
As you begin your descent, there is an extremely photogenic cliff, approximately 300 metres below Lo Fu Tau Viewing Point. The cliff is slightly off-track from where the trail turns left and heads downhill.
-
- The viewing cliff is just ahead

-
- Enjoying the views of Discovery Bay

I wonder if this cliff is what resembles a tiger’s head.
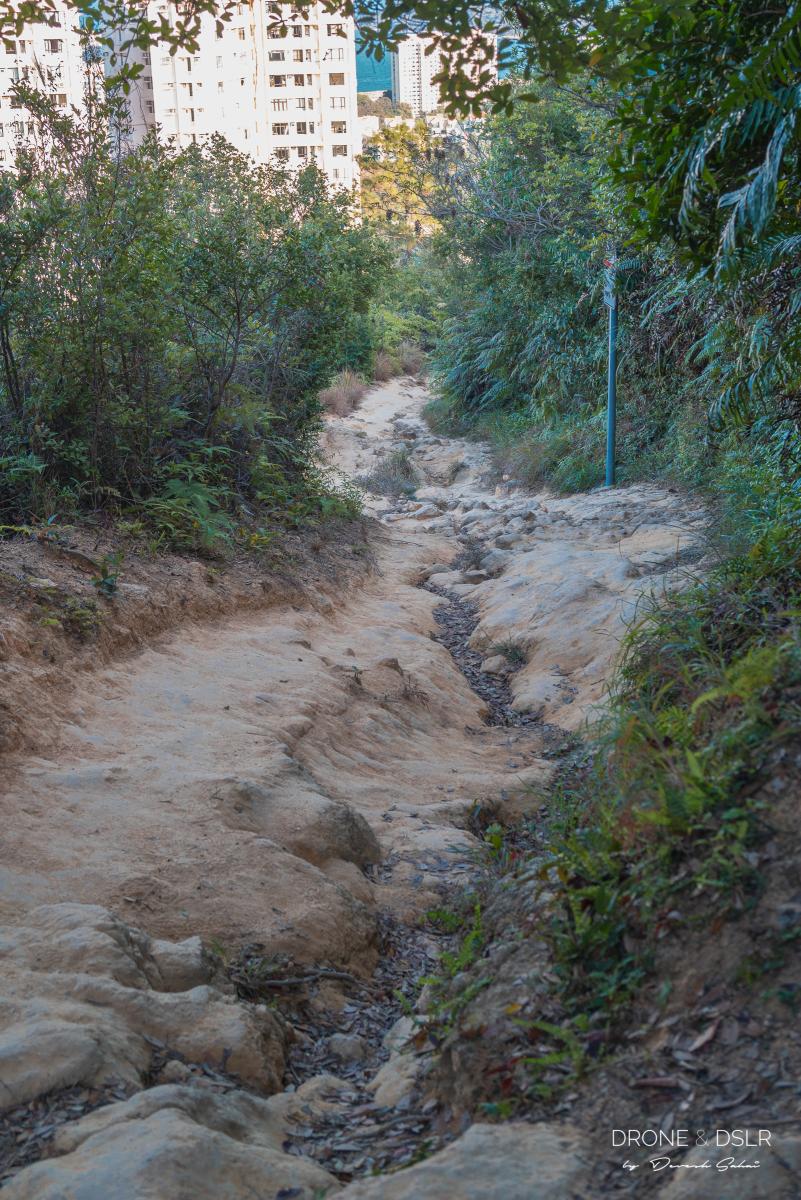
Anyway, after you’re done taking pictures and admiring the view, return to the trail. From here on, the trail becomes extremely rugged and rocky. So, it does help if you sit down and descend.

The trail continues downhill
I found the section just before the trail curves right to be very slippery thanks to all the loose gravel. Fortunately, it becomes less steep after the curve, but it’s still not a flat surface.
I found this section to be very slippery thanks to the loose gravel
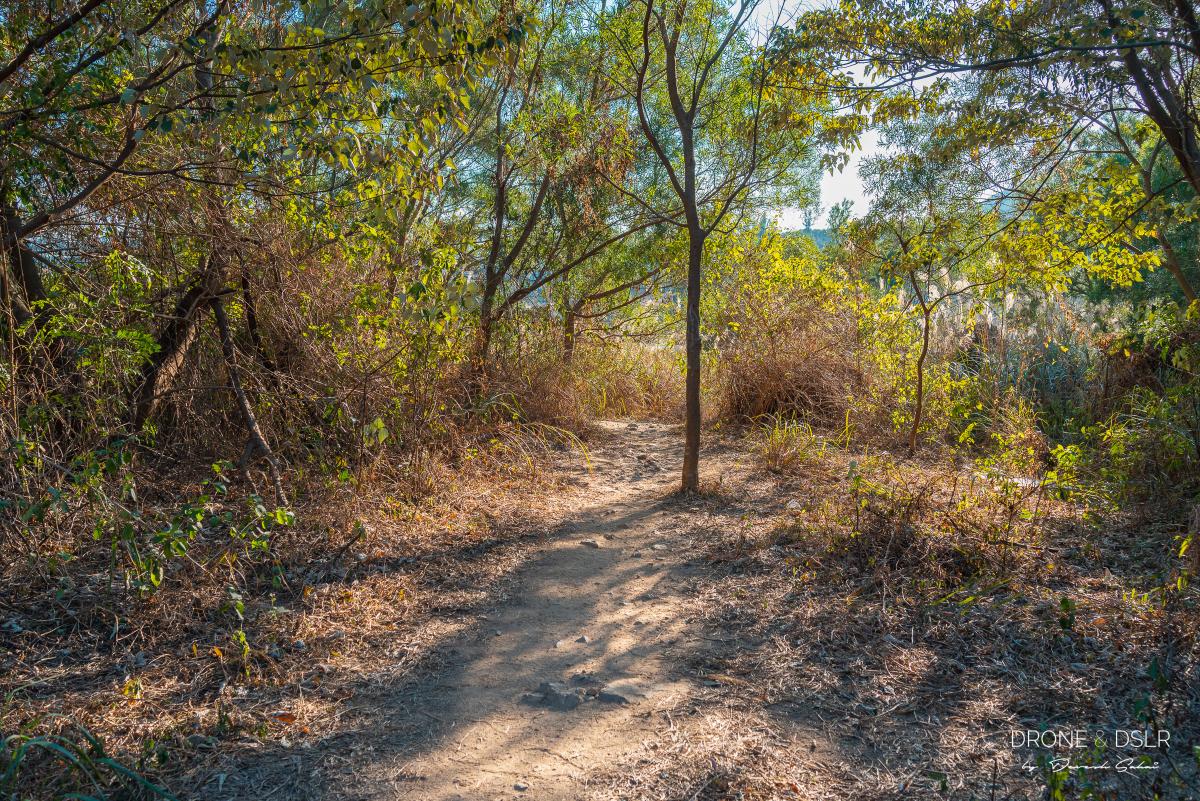
After the trail curves and runs parallel to Discovery Bay, you’ll notice a few paths towards the left. However, I would advise that you continue straight. At the end of the slope, the trail finally descends into a flat, bushy area. And once you cross this area, it exits onto a paved road.
-
- The trails heading down to Discovery Bay

-
- Be careful as you descend this section
-
- The flat, bushy area before the trail ends
Turn left once on the paved road, and walk till the end where you’ll see the Discovery Bay Lookout Point.
-
- Turn left at this paved road
-
- Walk through the trees to the Lookout Pavilion
The final descent to Discovery Bay Plaza
Once you’re done admiring the views from the lookout point, turn right and walk down the steps. At the end of the steps, continue downhill along the bumpy dirt trail.
-
- View of Discovery Bay from the Lookout Pavilion
-
- Take the steps down from Discovery Bay Lookout Pavilion
-
- Turn left at the end of the steps
-
- This section of the trail is very uneven and bumpy
The dirt trail soon transforms into a paved trail, as the residential towers of Parkvale Village get closer. Walk down the paved trail and the final flight of steps towards the grassy patch behind Parkvale Village.
-
- The uneven trail finally ends at these steps

-
- Turn left at the end of the steps

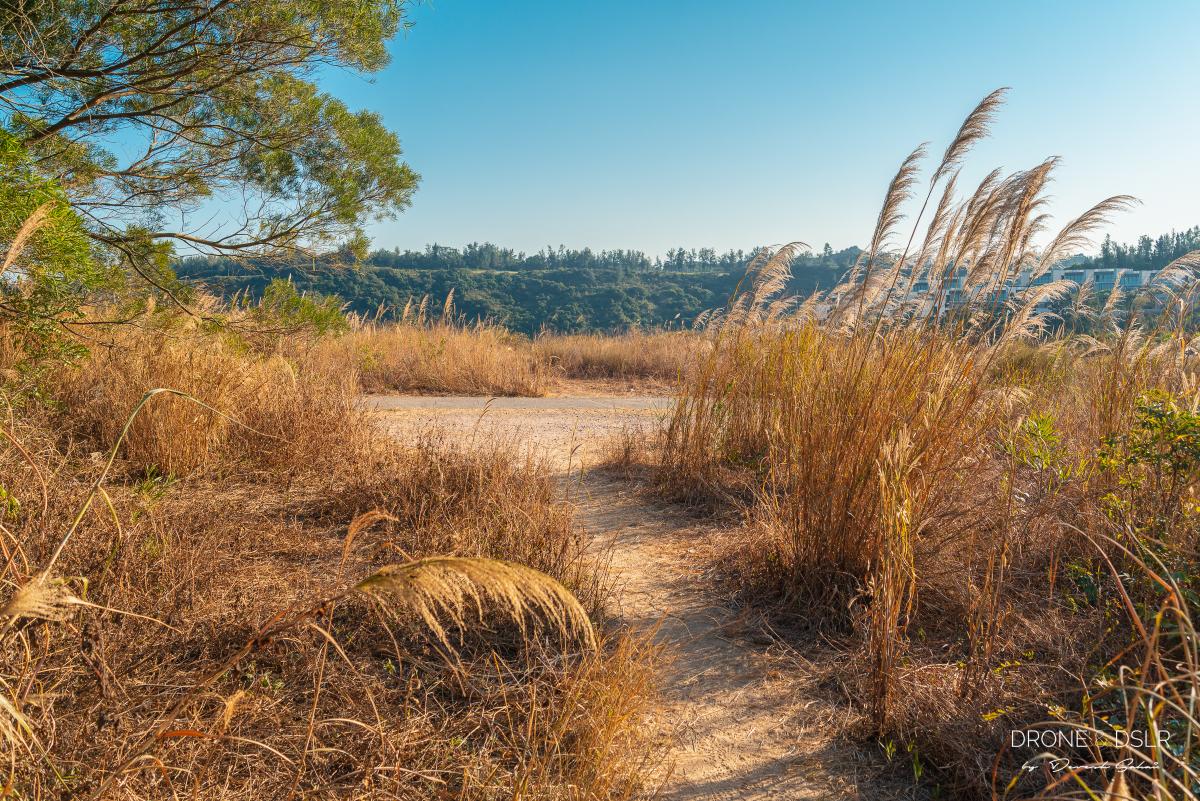
Now at this point, you could turn right, and take the shortcut through the trees to Discovery Valley Road. But I wouldn’t advise that you do this unless you’re confident that you can go down a 7-foot drop, without any support.
Be safe and turn left into Parkvale Village. Once inside the residential area, turn right and exit onto Parkvale Drive. Follow Parkvale Drive downhill till it merges with Discovery Valley Road.

Walk down Discovery Valley Road
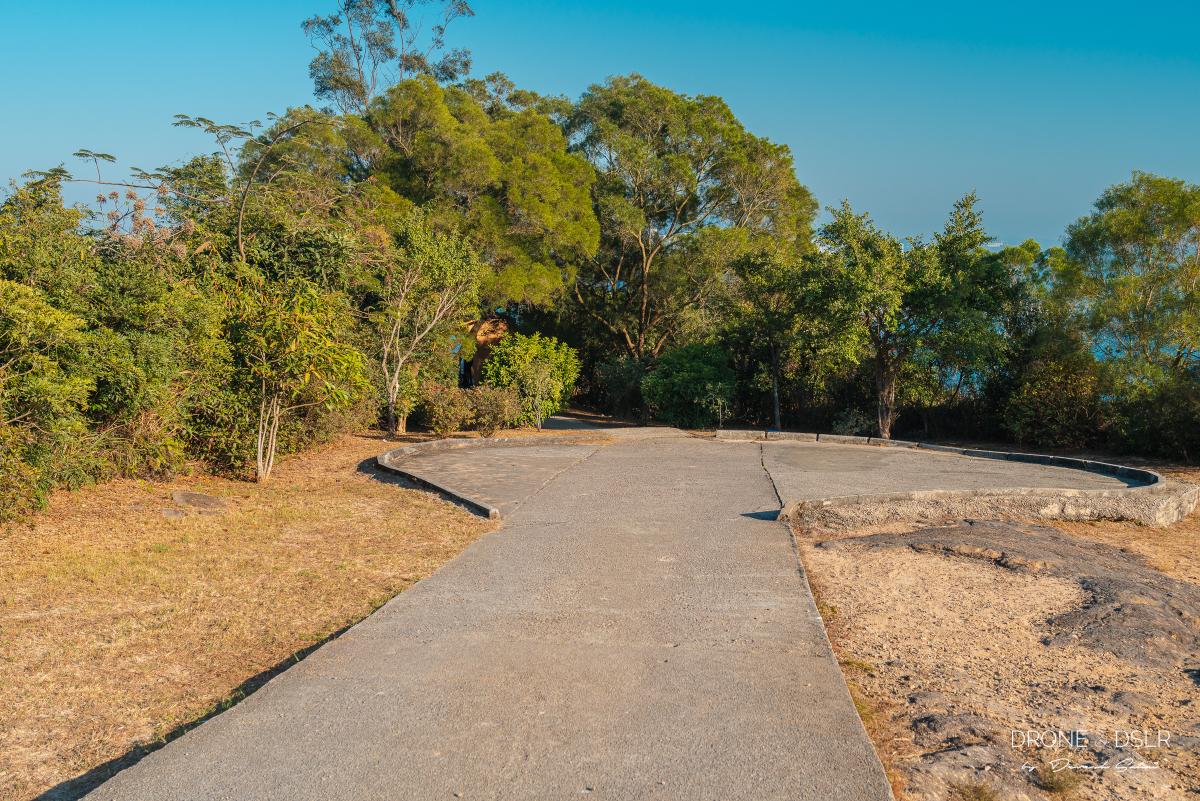
Finally, here’s a shortcut you can take. Walk down Discovery Valley Road till it meets Discovery Bay Road. Cross at the intersection, and walk through the car park onto Plaza Lane. At the end of the lane, you’ll finally arrive at Discovery Bay Beach and Discovery Bay Plaza.
-
- Cut through the car park

-
- Finally at Discovery Bay Plaza

Mui Wo to Discovery Bay via Lo Fu Tau Country Trail
After reading this guide to the Lo Fu Tau Country Trail, I hope you have a better idea on which side you’d like to start the hike from – Mui Wo or Discovery Bay.

Me standing on top of the Tiger’s Head
Also, if you want to hike between the two townships on Lantau Island during the summer months, I would recommend the shorter and shaded route via the Trappist Haven Monastery. Lo Fu Tau is best saved for the cooler months.
We hope you enjoyed this guide to the Lo Fu Tau Country Trail. Feel free to share it on the social media channel of your choice, or drop us a comment below.
If you enjoy our work, come join us on Instagram and YouTube 🙂


You might also like


13 Comments
We are planning to give this one a try soon. But one question – isn’t it easier to hike up the steep slope from DB to LFT than to hike down? I am worried about the slippery nature, weak knees and weak back. Any comments? Thanks!
Hello,
If you’re talking weak knees and a bad back, then I would rather you hike up Lo Fu Tau from Discovery Bay. It will definitely be less jarring on your knees.
Hope this helps!
Thanks for your comment. We just hiked up from DBay. It was was steep but manageable. We are glad we didn’t come down the slope to DB, which would have been impossible for those with weak knees/back.
Overall, great hike with amazing views.
Thanks for writing up the detailed hiking guides with photos for Lo Fu Tau Country Trail. You may wish to learn the nicknames of some places as dubbed by local veteran hikers:
1. Big boulder in the middle of the trail – Peach Rock
2. The rocks in the form of a ledge – Duck Rock
3. Collectively together with Standing Rock, it is referred to as Rock City.
Additionally, you may be interested to have a look next time at a fung shui grave decorates the tiger’s forehead.
Below is a link to an old SCMP article “You’ll need a tiger in your tank for this walk” dated back to 1999 when the trail was in its primitive shape, you will find further information about the above-mentioned points from the last few paragraphs of the article. You may also be interested to see some narratives about the 400m short-cut and the story behind the ancient village trails.
https://www.scmp.com/article/270888/youll-need-tiger-your-tank-walk
Hi Mr Wong,
Thank you so much for sharing the names of the rocks and the article. It’s very interesting indeed!
Also, thank you for taking the time to read and go through the photos. It means a lot coming from you!
Thanks for sharing! Do you think solo camping along this hike’s peak is doable / respectful of the space and other hikers? Just looking for something between DB and Mui Wo.
Appreciate your passion for these hikes, thanks for sharing 🙂
You’re welcome, Phil!
From what I remember, there isn’t much space to camp or a dedicated camping space along this trail. But I could be wrong.
I completed this hike last Saturday. I enjoyed it a lot. I finished happy but exhausted 😉 Thanks for sharing this beautiful hikes.
You’re welcome, Jesus! Hope you’re careful hiking in the heat these days.
Hey Devesh! I just did this hike again the other day, up to Lo Fu Tau from Discovery Bay, then over to Mui Wo.
I’ve done this hike many times… and each time I do it, I think to myself: I would never dare to do the descent towards Discovery Bay because it’s so gravelly and slippery. I’ve seen many people struggle on their way down, and even seen some people do a 180 and head back towards Mui Wo.
On the other hand, the descent towards Mui Wo is the kind you can run / skip down joyfully…
Just my $0.50!
100% valid. I’ve changed the language to let the readers decide. But I’d still love to see people run/skip joyfully down a hill in HK 😀
Good, clear instructions, although the rest Pagoda with the right turn into the woods was not named, but it was fine to do the longer route. Did the Trappist route first and was thinking about getting the ferry, but it was 2pm and with 4 hours of light, decided to do the 3 hours hike back the hard way, and got back in 2 hours 45 with a bit of jogging. The way down was definitely treacherous, and concerning whether the plants themselves might cause damage or be hiding snakes. All in all got back and have never wanted a shower on the beach more than today. Would rate this hike (especially with the “warm up” of Discovery bay to the monastery and on to Silver Bay Resort). The way down makes it impossible as a trail run, but there are a fair few flat bits to speed up along. I got through well over 3 litres of fluids (but I sweat a lot), plus another 1.5 litre while waiting for the boat. I would not attempt this hike without (1) experience of a humid Hong Kong trail run or hike; (2) taking at least 2 litres of fluids. I had a 1.5l bladder with antioxidants, and some electrolytes infused water in 2x 250ml pouch bottles. Helpfully circle K at pier 3 had pocari sweat sachets, the auntie with the drink shop at the bottom of the steps down from the monastery gave me 330ml of Wang Lo (red herbal drink) and 330ml of coke plus. I also bought a 500ml bottle of vitasoy, and a 500ml of water. I got a small cut on my leg from a stupid move with some rocks on the way down. I also slid down on my backside with my hands for around 30 or 40m in total as it was so steep, and by that point I was not safe to keep walking it. Again, an amazing experience and good instructions.
Thanks, Sam! And it sounds like you had quite an adventure completing the loop 🙂