
The Ma On Shan Hike is one of Hong Kong’s most challenging and epic hikes. Covering a distance of 7.5 km, between Shatin and Sai Kung, the trail traverses through some of the most daunting ascents on it way to the 702-metre tall summit. The hike scales Tiu Shau Ngam and navigates the Hunch Backs (or Hunchbacks) before crossing one of the most beautiful ridgelines in Hong Kong to reach the Ma On Shan Peak.
Ma On Shan, Hong Kong
The aptly named Ma On Shan or 馬鞍山 in Cantonese (literally “Horse Saddle Peak” or “Horse Saddle Mountain”) gets its name from its unique saddle-shaped profile.
The Hunch Backs and Ma On Shan (can you see the resemblance to a saddle?)
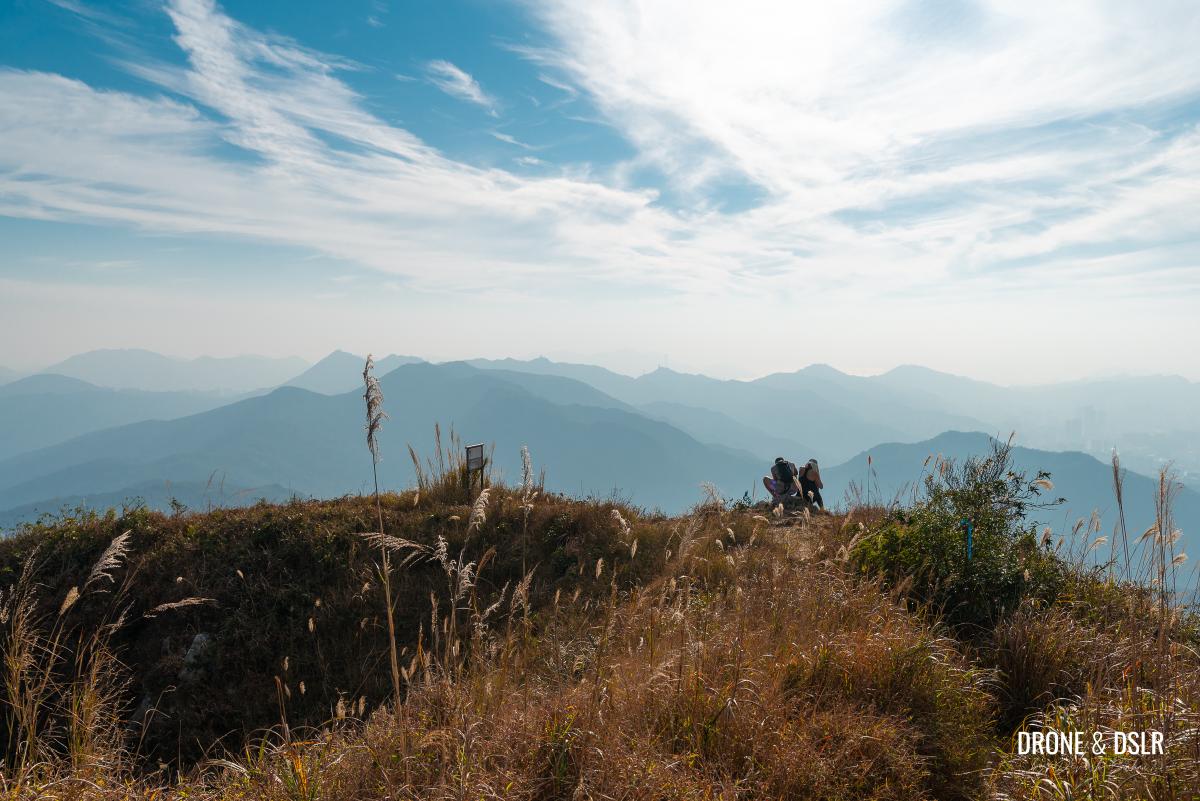
At 702 metres above sea level, Ma On Shan stands as one of Hong Kong’s tallest peaks. However, unlike many of its taller counterparts, the hike offers an immersive experience, with panoramic views not only from the summit but also along the entire trail, especially along MacLehose Trail Section 4 and the Ngong Ping Plateau. This section, towards the end of the hike, offers some of the most photogenic trails and terrains in all of Hong Kong.
One of the most picturesque sections of any hike in Hong Kong
For me, Ma On Shan Hike is one that keeps on giving, as long as you’re willing to put the effort.

To Ma On Shan next!
So, with all said that, let’s dive deeper into our guide for the Ma On Shan Hike.
About the Ma On Shan Hike
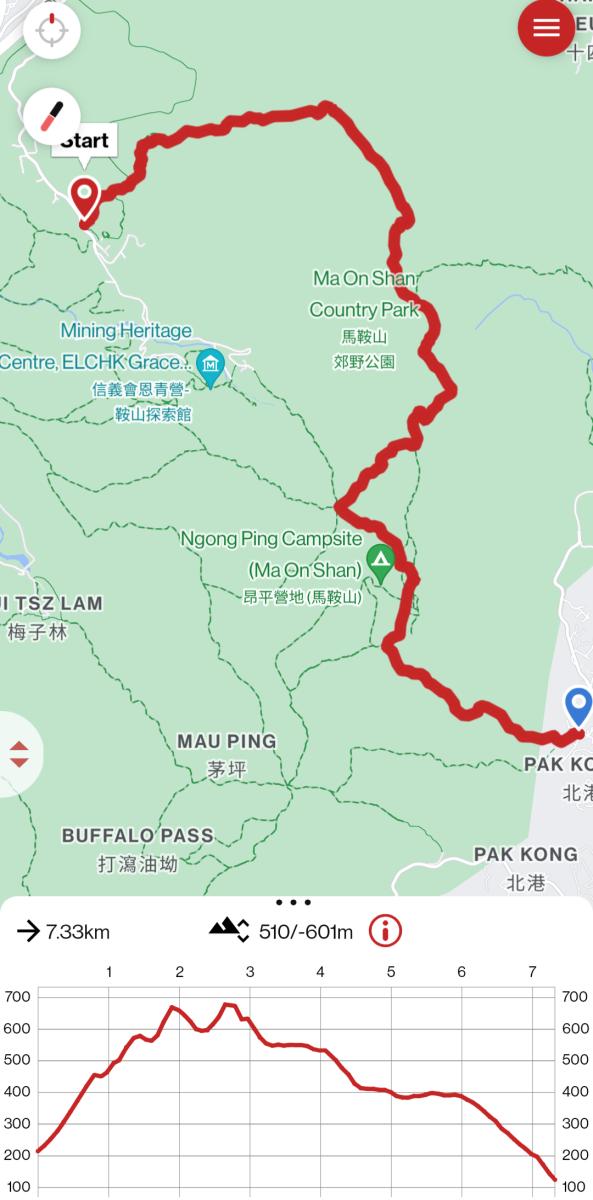
Ma On Shan Hike Trail Map and Elevation Profile
At the very onset, I should warn you that the Ma On Shan Hike isn’t easy.
3.1 km of the 7.5 km is consists of unmaintained rocky terrains with steep ascents and descents. The hike scales multiple hills, starting with Tiu Shau Ngam, The Hunch Backs, Ma On Shan, and Pyramid Hill (optional).
At many points, you will have to use your hands to climb or assist you in descending. But if you’re willing to endure all that, the views that you will be rewarded with will more than compensate for challenging hike.
The good news is that the toughest section of the hike is the first 1.8 km, till the Hunch Backs. Relatively speaking, 1.8 km is a very short distance but when climbing the Hunch Backs, it feels like an eternity.
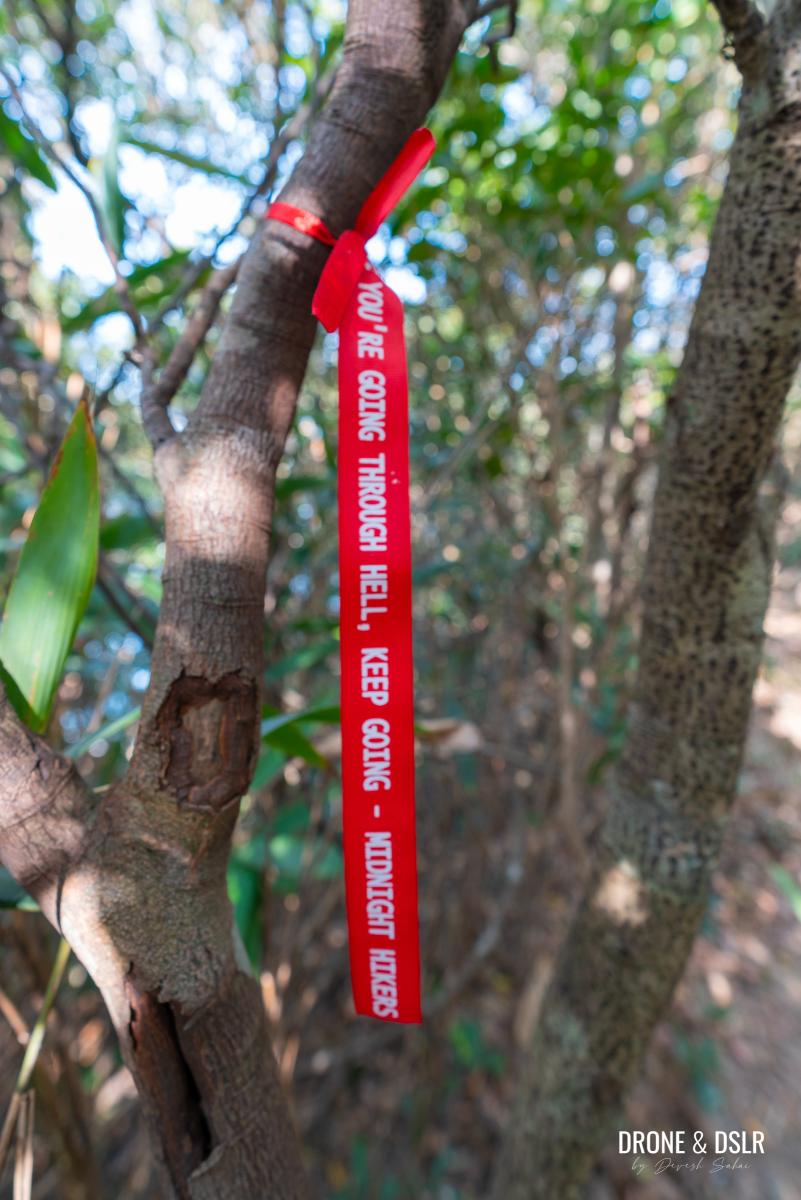
Marker ribbons along the Ma On Shan Hike are different!
After conquering the Hunch Backs, the rest of the hike may seem relatively easier. The ridge between the Hunch Backs and Ma On Shan is a memorable crossing, and so are the views from Ma On Shan Peak. However, the descent from Ma On Shan can be quite challenging too.
At the bottom of Ma On Shan, you’ll connect with the most scenic part of the MacLehose Trail Section 4. So, get your cameras ready!
And after that, the trail reaches the beautiful Ngong Ping Plateau, from where you can admire the most incredible views of Sai Kung, before finishing the hike in Sai Kung itself.
Here’s a quick highlights video of what to expect.
Subscribe to my YouTube channelBefore we dive into the details of the hike, here are some items I recommend that you carry on the Ma On Shan Hike.
What to carry:
- At least 2 litres of water.
- Sun protection, especially for the neck.
- Hiking gloves. They will save your hands from cuts when clambering.
- Proper hiking shoes.
- Some snacks.
A quick personal note
One of my objectives for this hike was to provide as much detail of the trail as possible. During my own research, I observed that many existing guides lacked photographs of the route. This makes sense, given that a significant amount of effort is devoted to navigating the trail, leaving little time or inclination to focus on taking photos.
If you find this guide informative and helpful, with its comprehensive descriptions, detailed instructions, and accompanying images, I’d love to hear your thoughts.
With that in mind, let’s proceed with the Ma On Shan Peak Hike guide.
Starting Point
The Ma On Shan Hike commences from the Ma On Shan Country Park BBQ Site. This hike and the Ma On Shan Country Trail share the same starting and ending points, but they differ significantly in terms of difficulty.
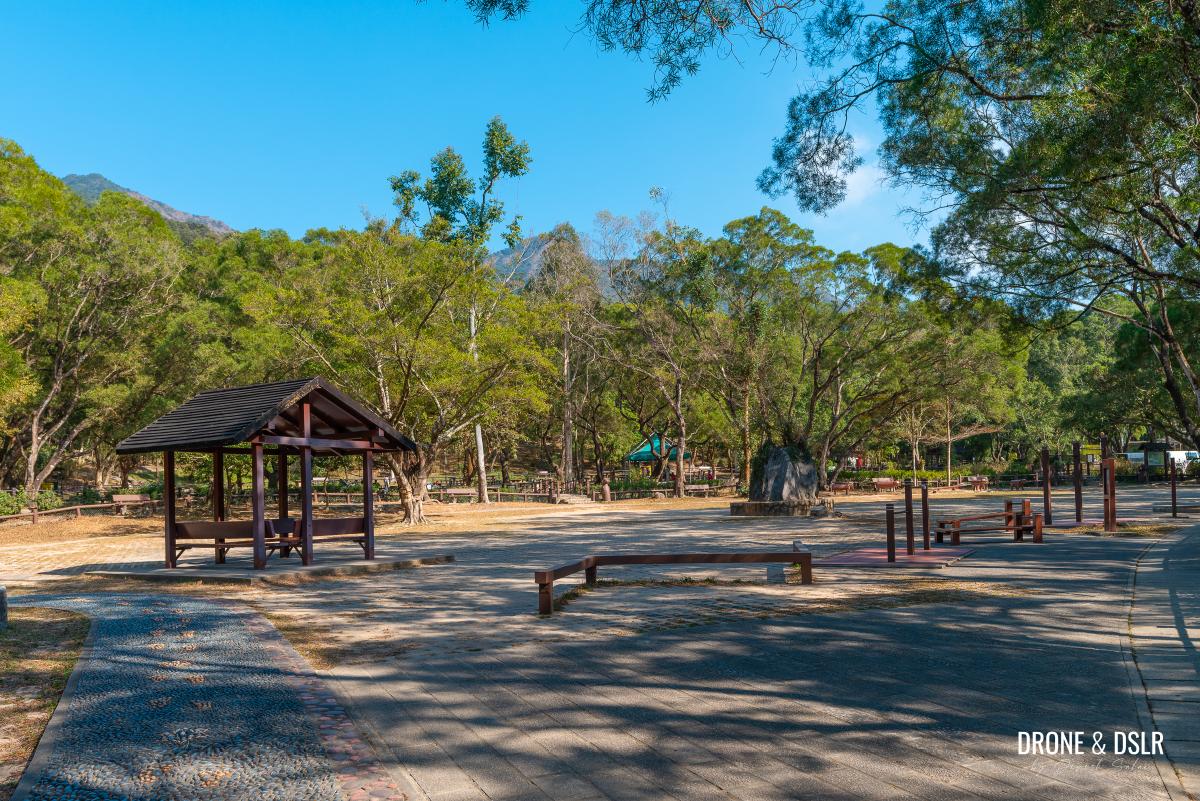
The Ma On Shan Barbecue Site
To reach the barbecue site, you have three options:
- Taxi : The most convenient and fastest way to arrive at the start point is by taking a taxi.
- Bus : The Ma On Shan Residents Bus (NR84) operates between Ma On Shan Tsuen and Ma On Shan Station. For details on the bus’s timetable, route, and fare, visit the Transport Department’s website.
- Walking : You can also walk to the barbecue site from Ma On Shan, but be aware that this uphill journey takes approximately 45 minutes. It’s recommended to start your walk from Hang Hong Street, where public transportation is readily available.
Once you arrive at the BBQ Site, take note of the entrance to the Ma On Shan Family Walk. Notably, the family walk is a loop around the barbecue site, with two entry points. However, the entrance at the BBQ Site is the easiest to spot and access.
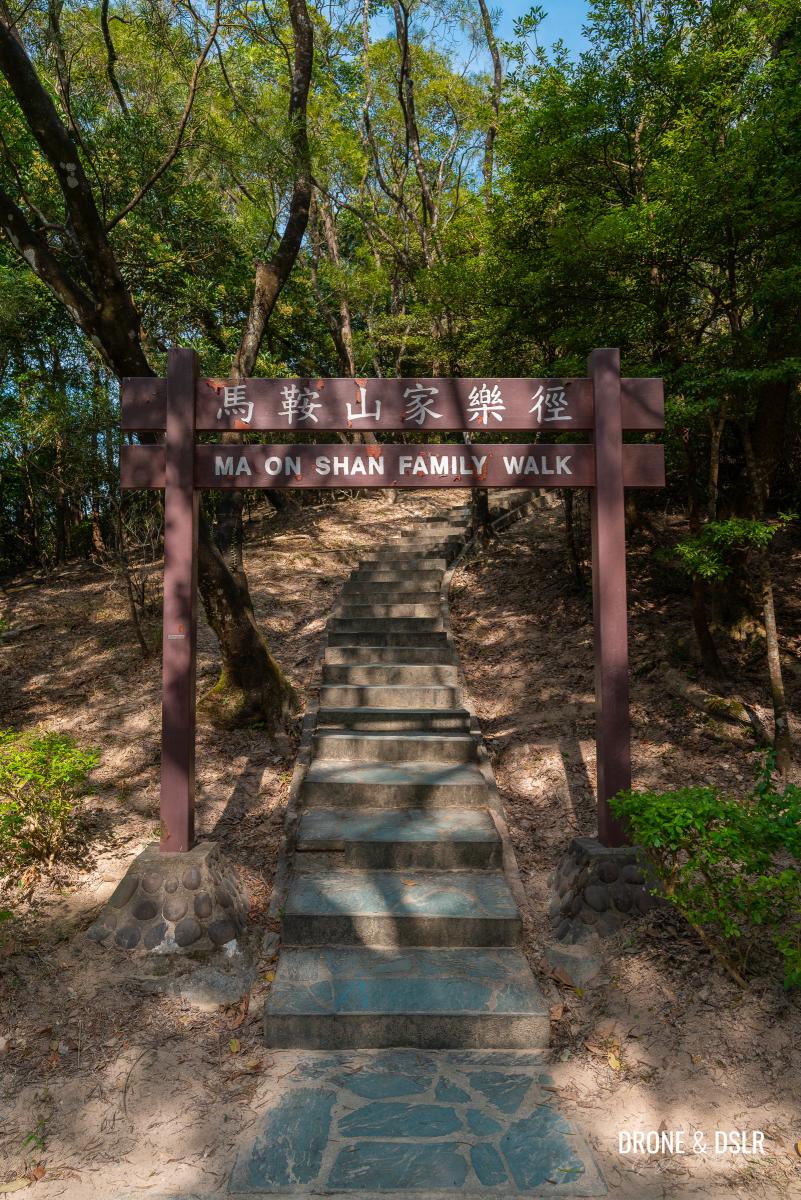
The start of the Ma On Shan Family Walk and the Ma On Shan Hike
Once at the entrance of the Ma On Shan Family Walk, get ready to start your hike.
To the Ma On Shan Family Walk Viewing Point
The initial section of the hike is relatively easy and straightforward.
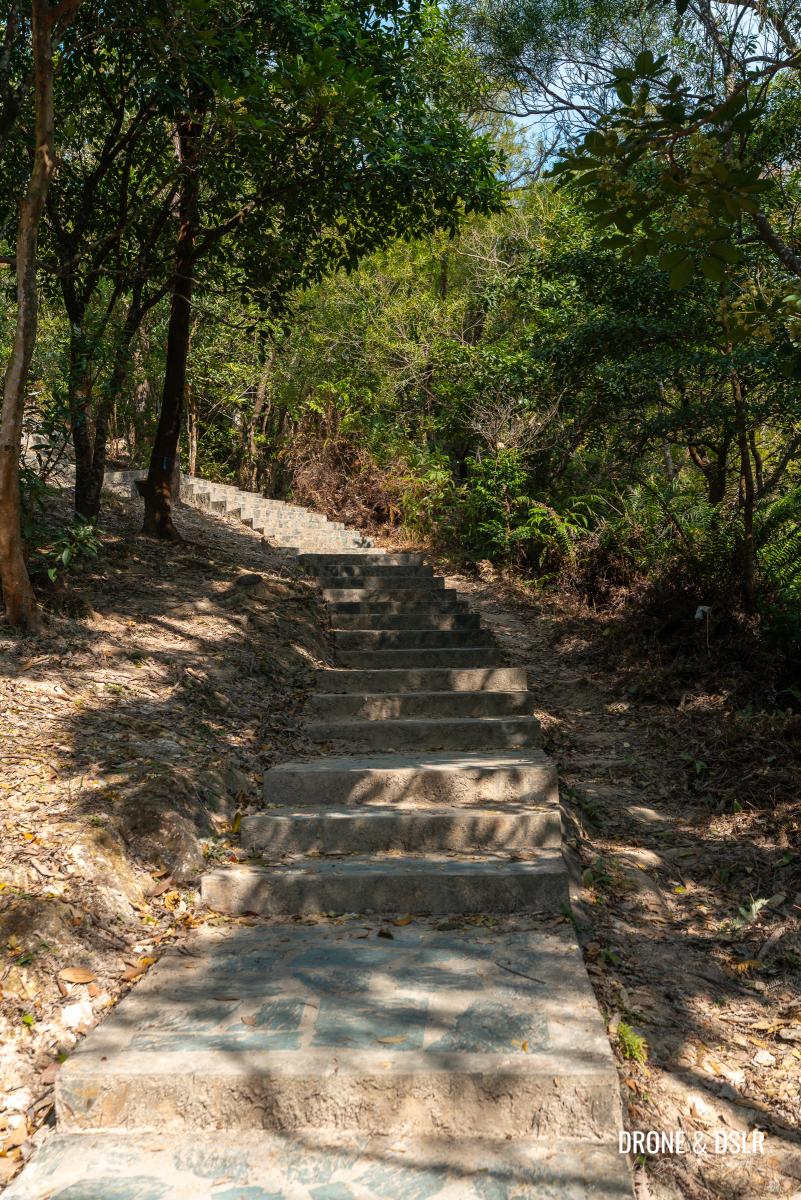
And the hike begins on these easy steps
The Ma On Shan Family Walk mostly consists of steps, as it climbs up the hill. The trail is shaded and follows a gentle incline.

Making my way through the Ma On Shan Family Walk
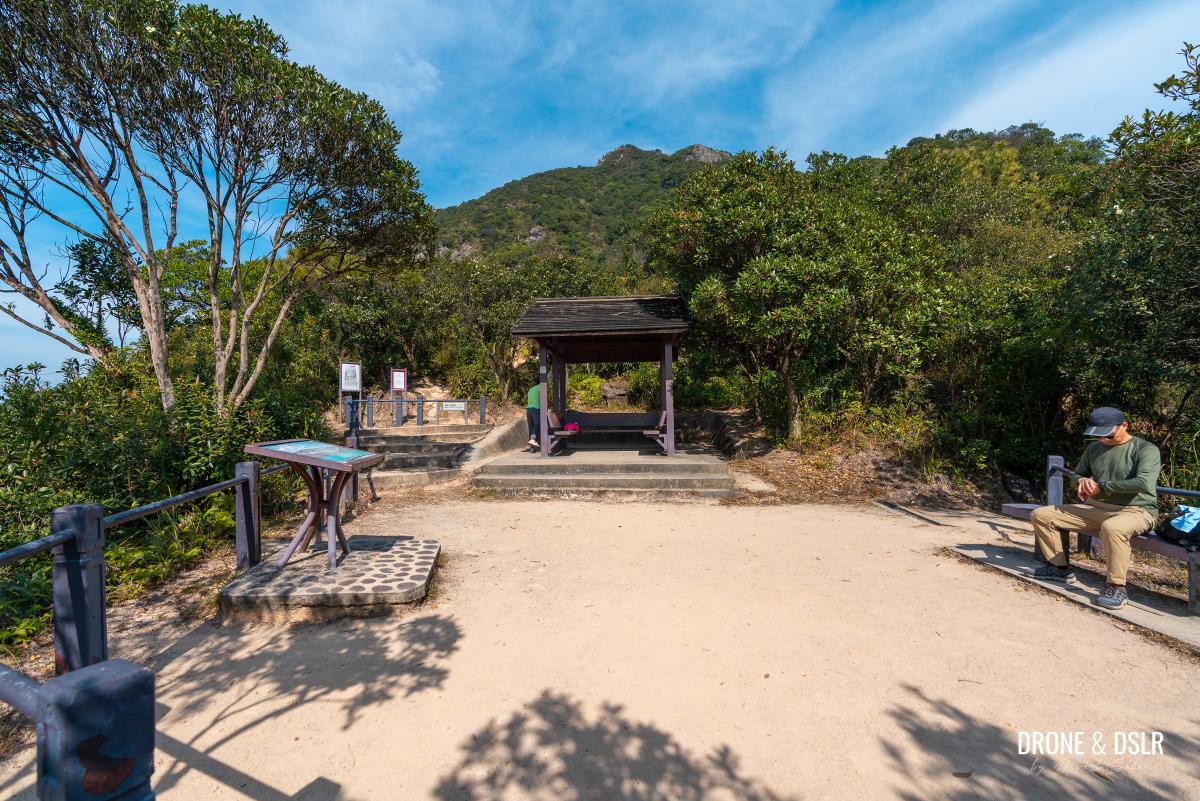
However, as it approaches the top of the loop, the incline becomes steeper. After the final section of steps, the trail lands next to a seating area, with a bench and pavilion.
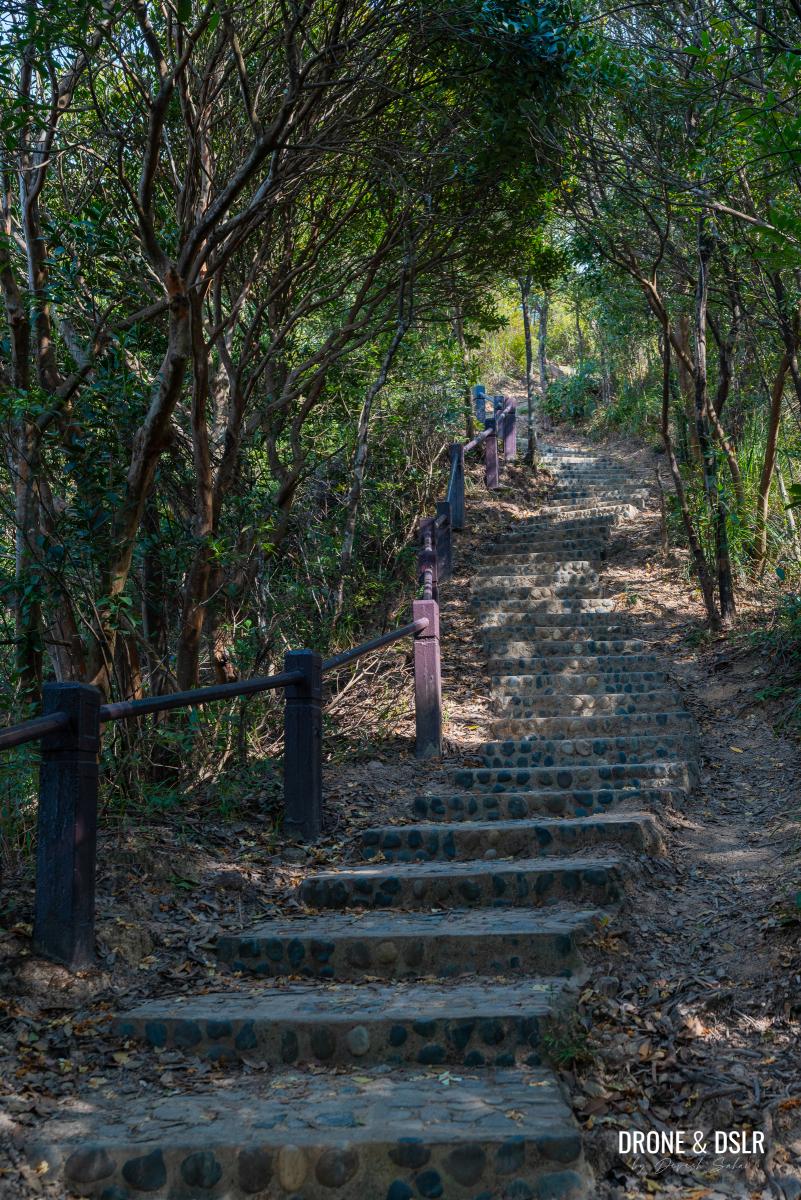
The steps become steep closer to the exit
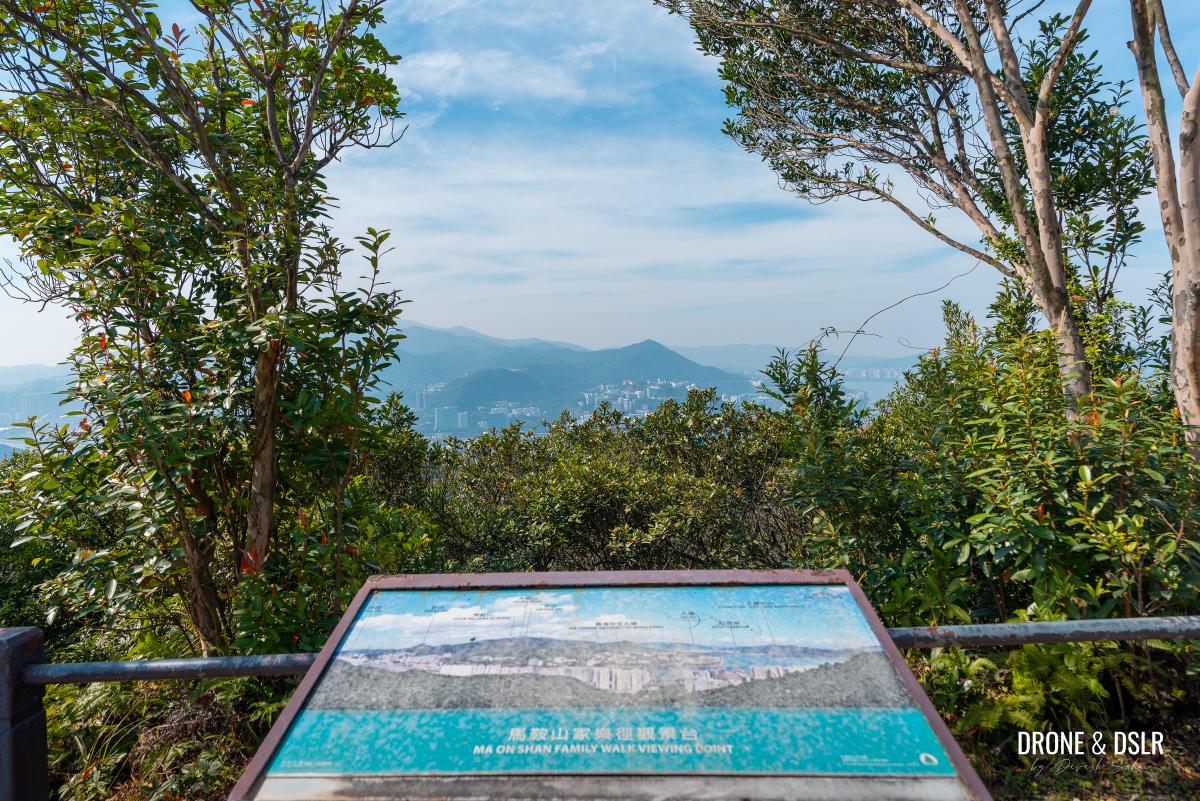
This is the Ma On Shan Family Walk Viewing Point.
-

- The area on top of the steps – The Ma On Shan Family Walk Viewing Point
-
- Don’t worry, you’ll get much better views ahead
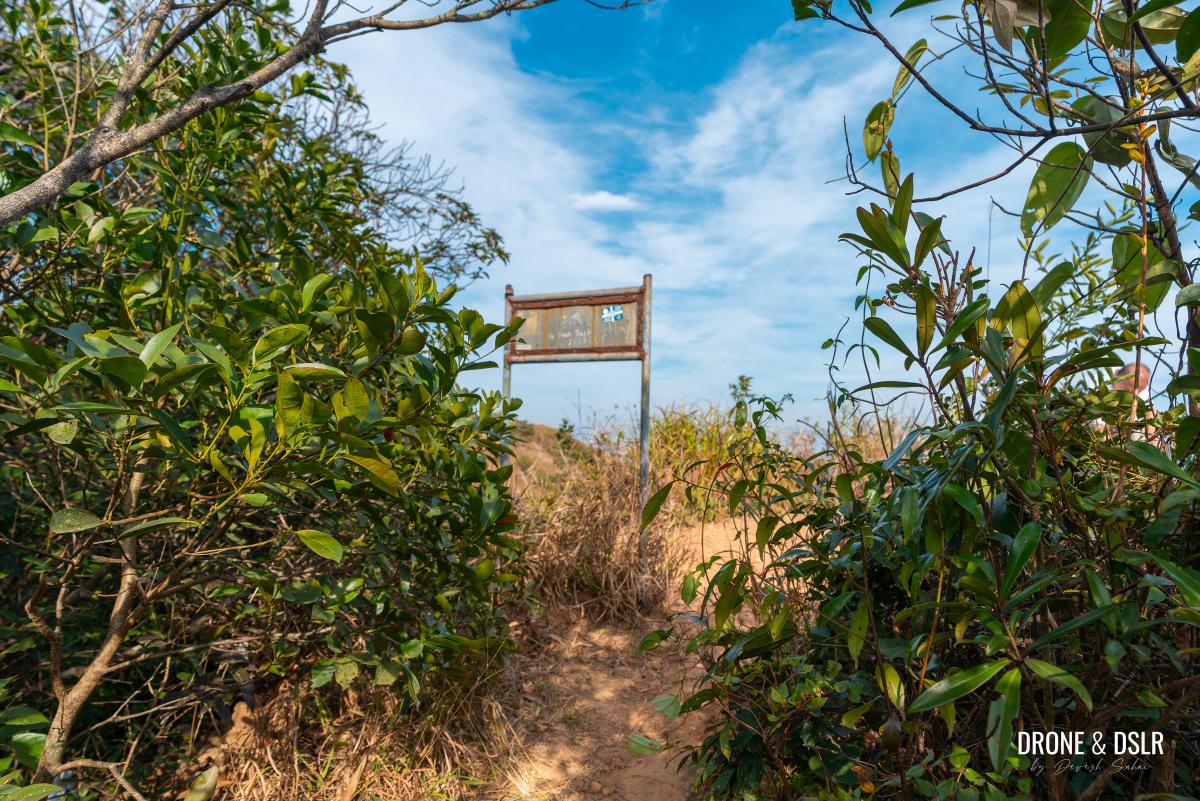
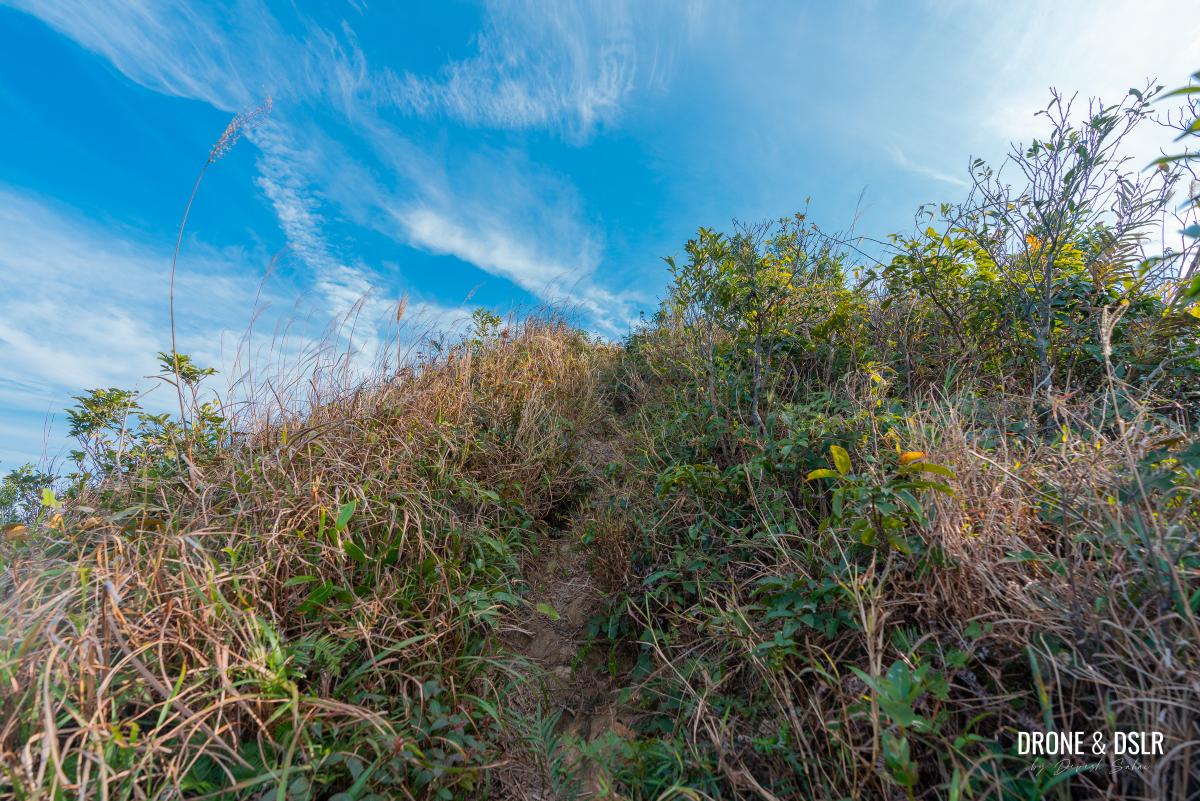
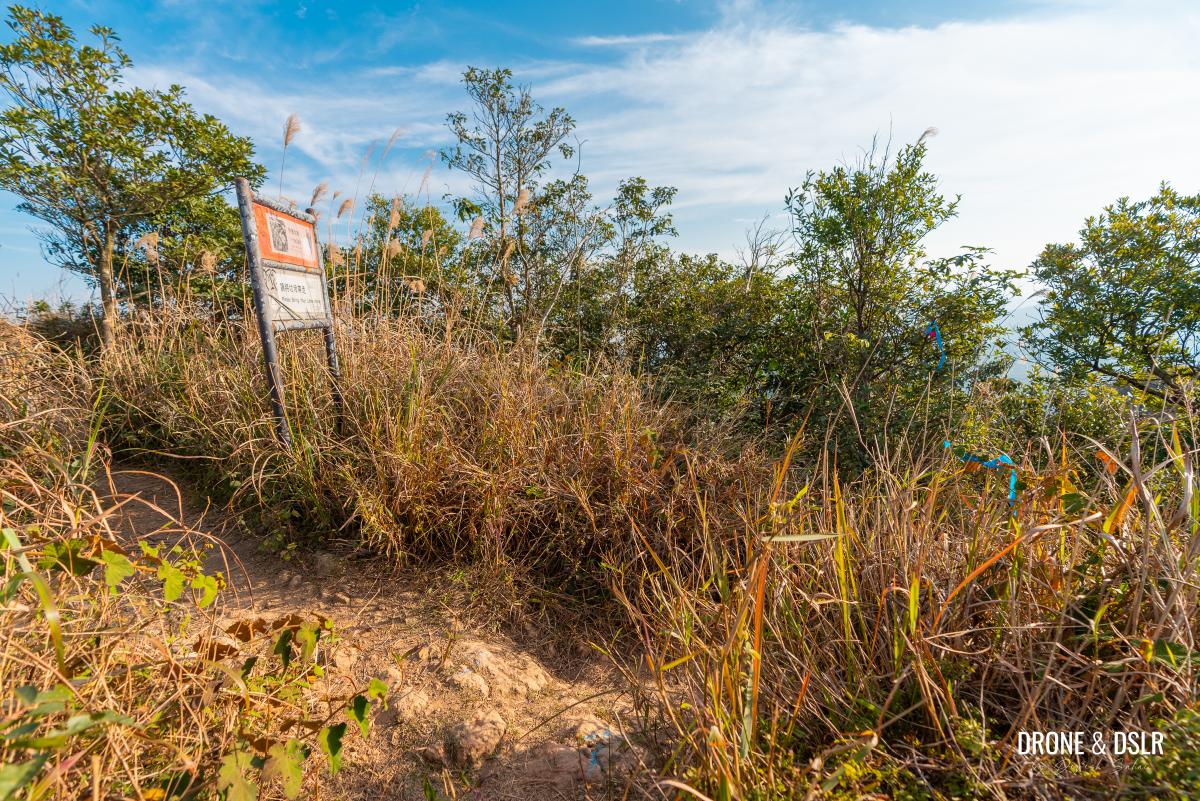
Have a quick look at the view, if you must, and then move to the back of the pavilion, where you’ll notice a few sign boards. And across the railing is the trampled and unmarked entrance to Ma On Shan.
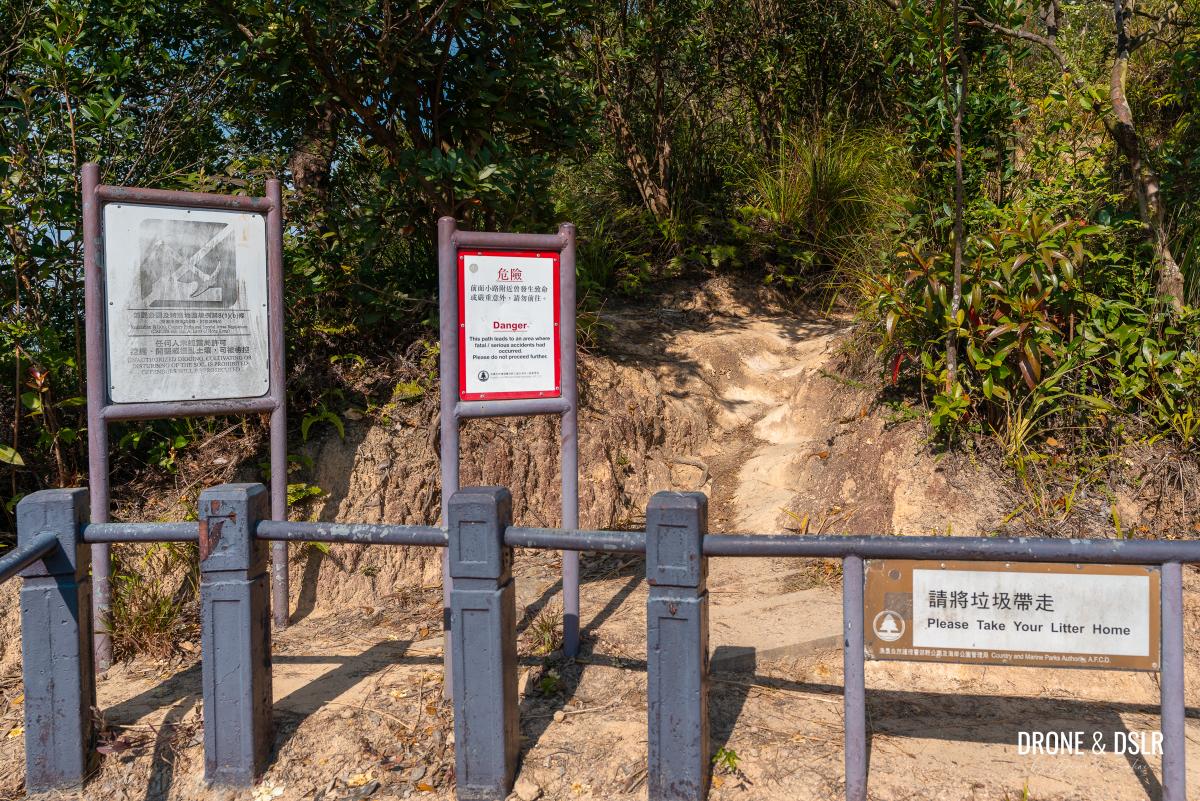
Step over the railing and onto the trail on the opposite side to start the real Ma On Shan Hike
To the Outcrop with Three Viewing Levels
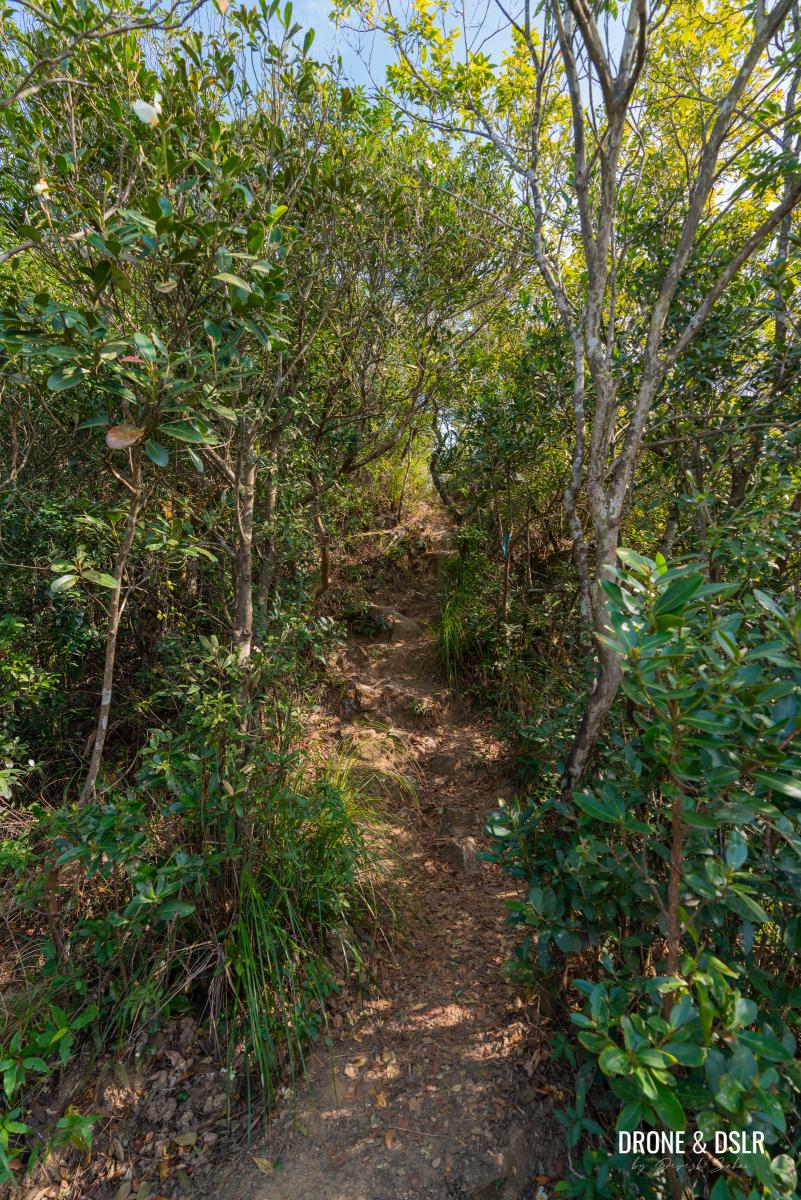
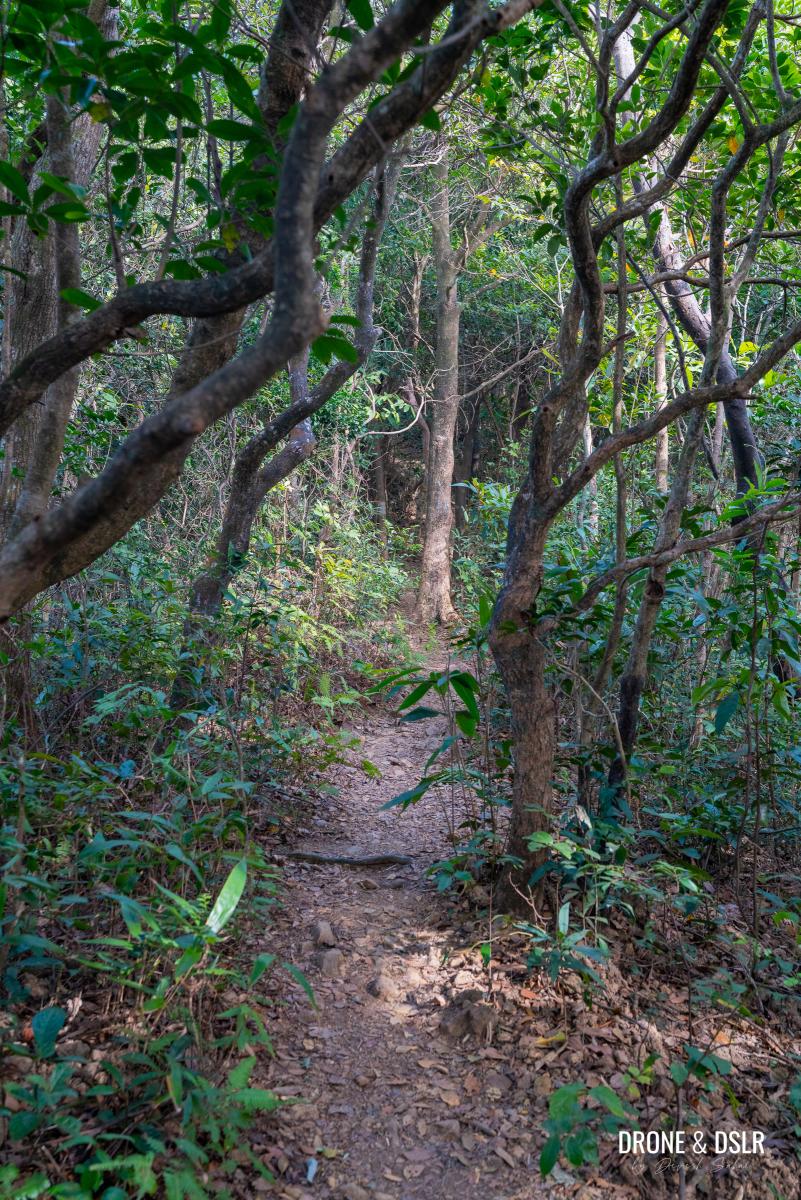
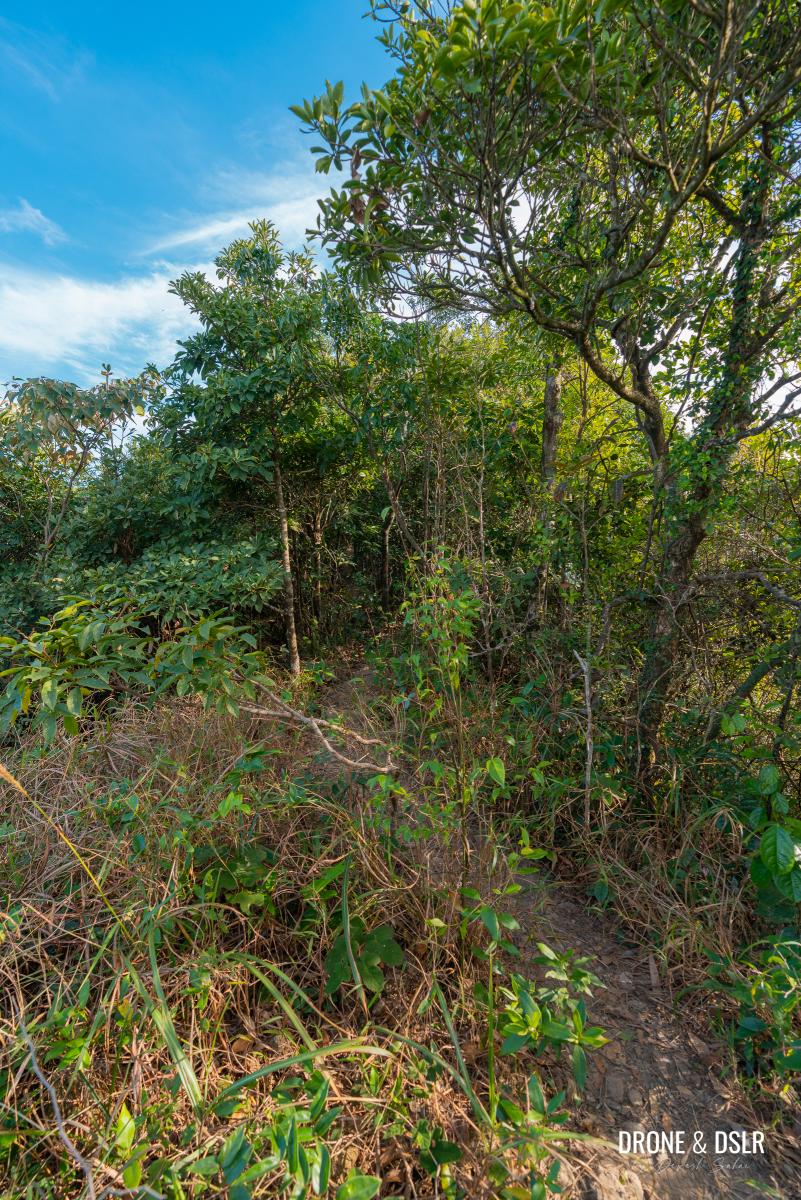
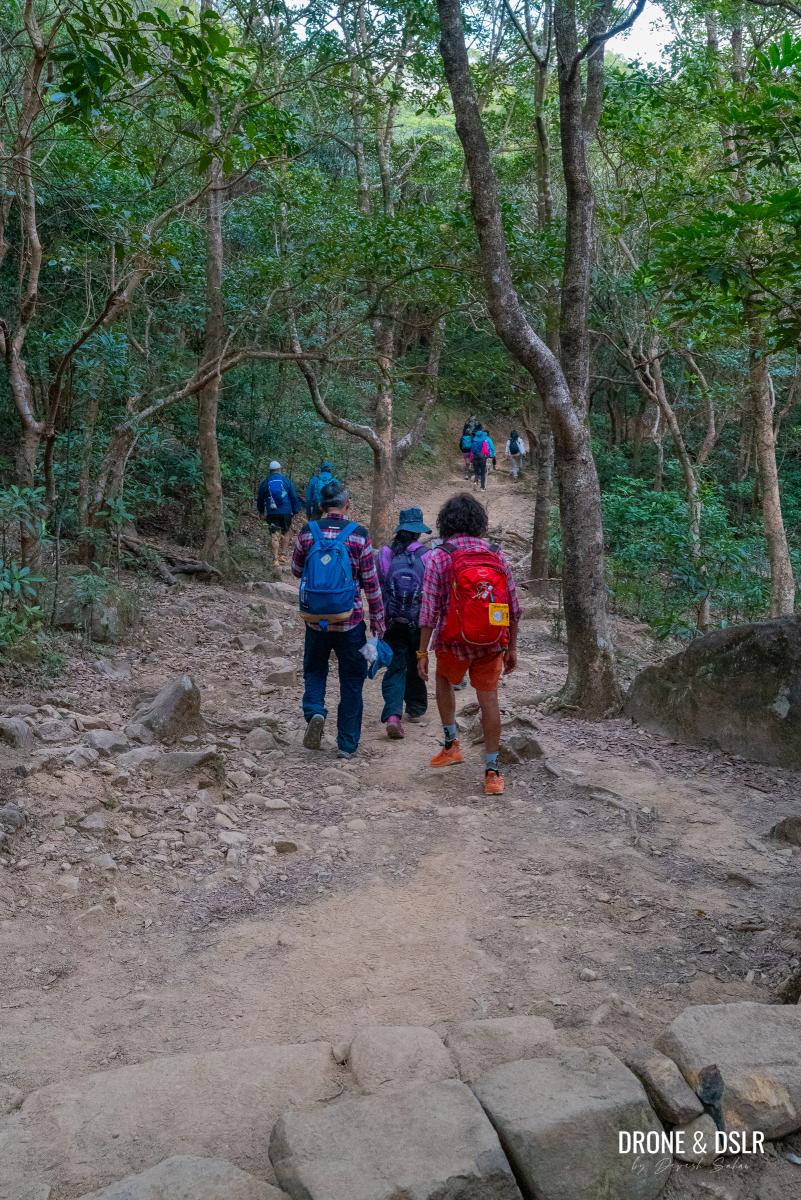
The next section of the trail begins on a relatively easy incline. As you walk, the trail passes through vegetation along a mud track, which provides decent traction.
The trail is fairly easy at the start
There is still some shade along this section of the hike, but once in a while, you might feel the sun beating down on your back.
There is some shade along the initial section
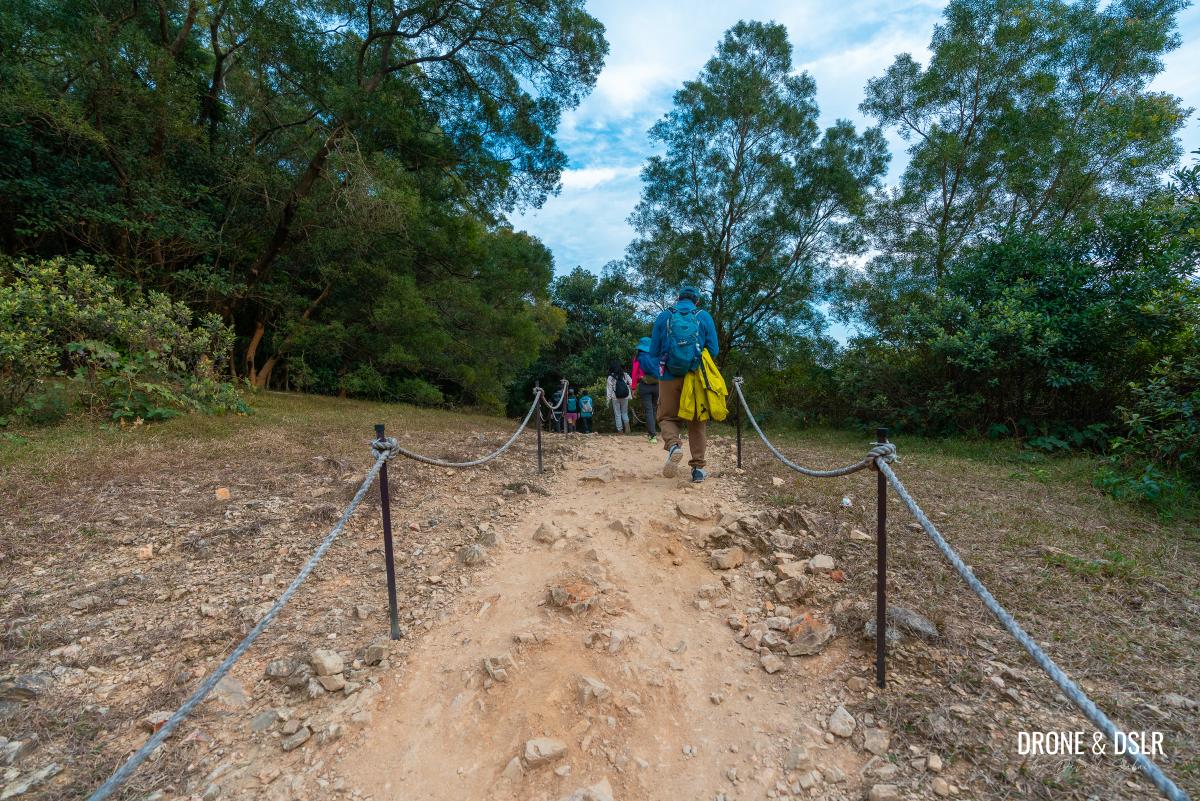
After a short climb, the trail reaches a flat terrain. It may be tempting to continue on this surface, but you’ll need to turn right onto the loosely formed steps. Along this section of the trail, there is a rope available to help pull yourself up as the incline becomes increasingly steep.
-
- At this point, climb up the trail on the right

-
- If you find this section steep, use the rope
At this point, the ascent does become more challenging, and the trail loses some of its shade. Pace yourself and take breaks if needed.
-
- The trail continues on a steeper incline

-
- Still relatively steep and with less shade

At the end of the climb, the trail reaches a clearing where you can finally catch your breath before the continuing.
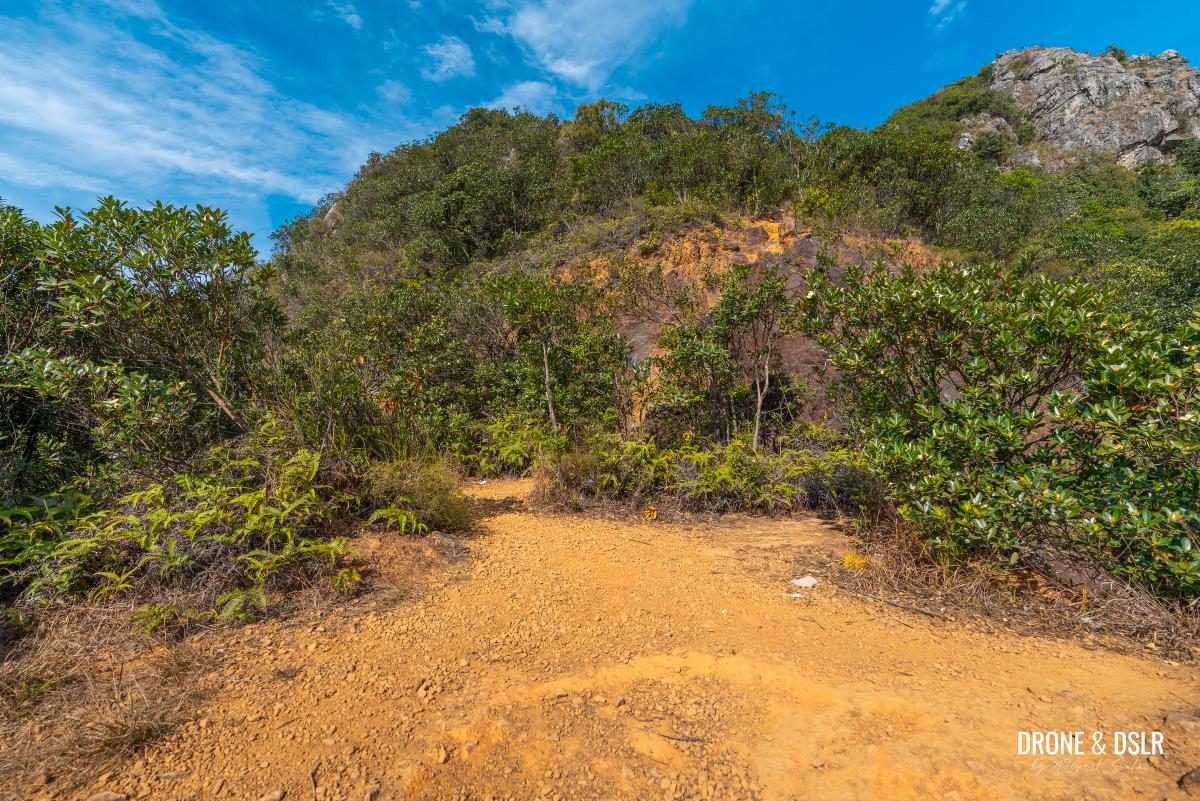
The incline ends at this clearing. Walk across to continue climbing.
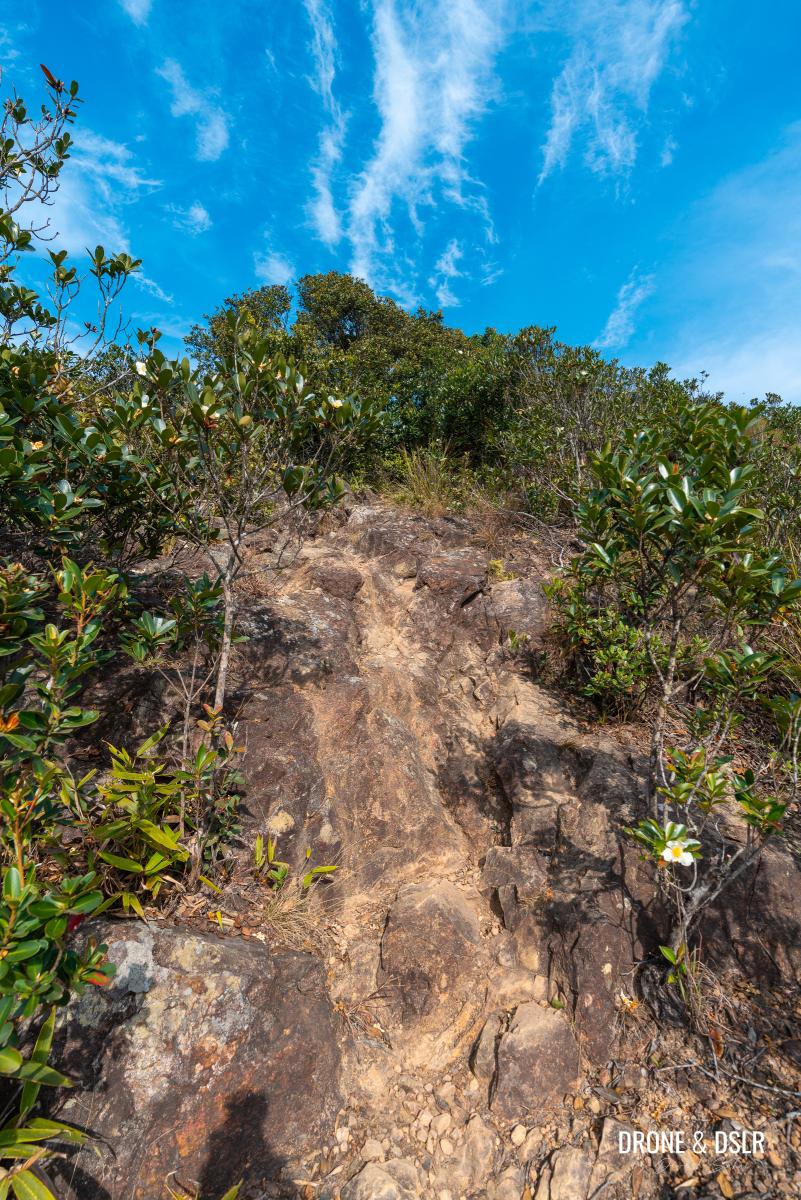
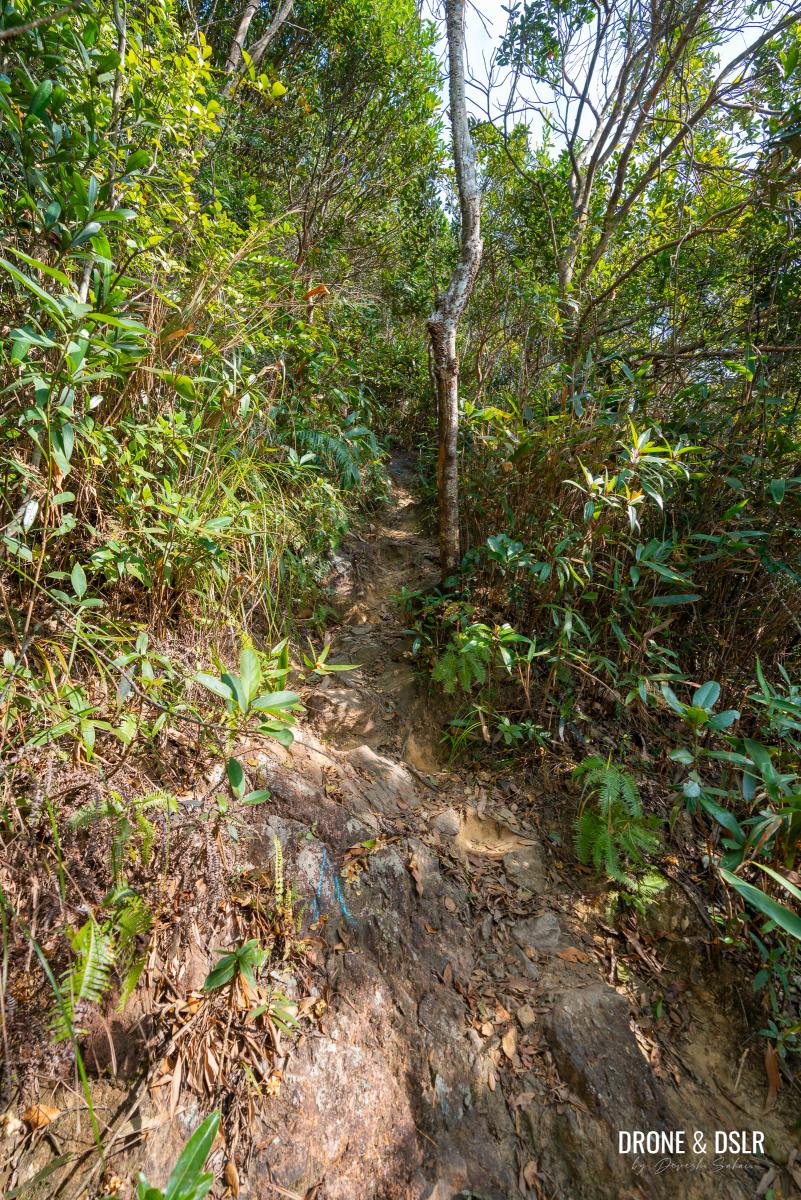
Once ready, walk to the other side of the clearing where you’ll feel like you’ve lost the trail. Don’t worry – using the edges of the rocks, hoist yourself onto the trail.
Use your hands to hoist yourself up on this incline
The trail then makes another short and steep ascent before reaching a landing above. Fortunately, the terrain flattens out again, and the shade returns.
-
- Continue climbing
-
- After the incline, this flat trail and shade is much welcome

Continue walking along the trail as it passes a rocky wall on the left. Just after this outcrop, the trail curves left, revealing the first viewing point.
-
- Walk past this rock (follow the ribbons)
-
- This is a first viewing point on the outcrop. Feel free to skip it.
Skip this viewing point and continue climbing as the trail cuts through more trees to reach the second viewing point on another outcrop, looking south.
-
- Continue walking uphill from the first viewpoint
-
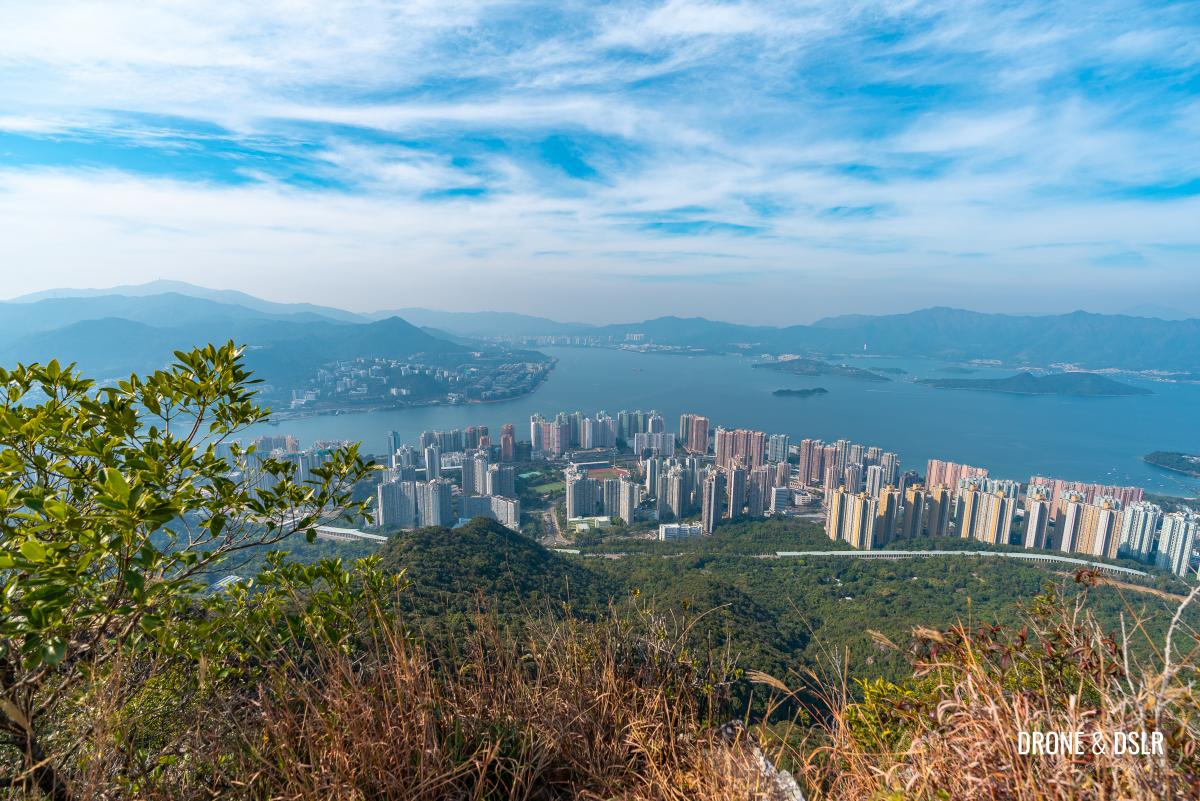
- The views from the second viewpoint on the outcrop

Turn around and climb a short distance to reach the third and final viewing point on this outcrop, with views of Ma On Shan, and the Tolo Harbour.
-
- A short climb after the second viewpoint will bring you to the final viewing point

-
- Views of Tolo Harbour and Plover Cover Reservoir from the third and final viewpoint on the outcrop
At roughly 420 metres above sea level, this outcrop offers a comfortable spot to take your first break. But beware, the toughest section of the Ma On Shan Peak Hike follows next.
To Tiu Shau Ngam
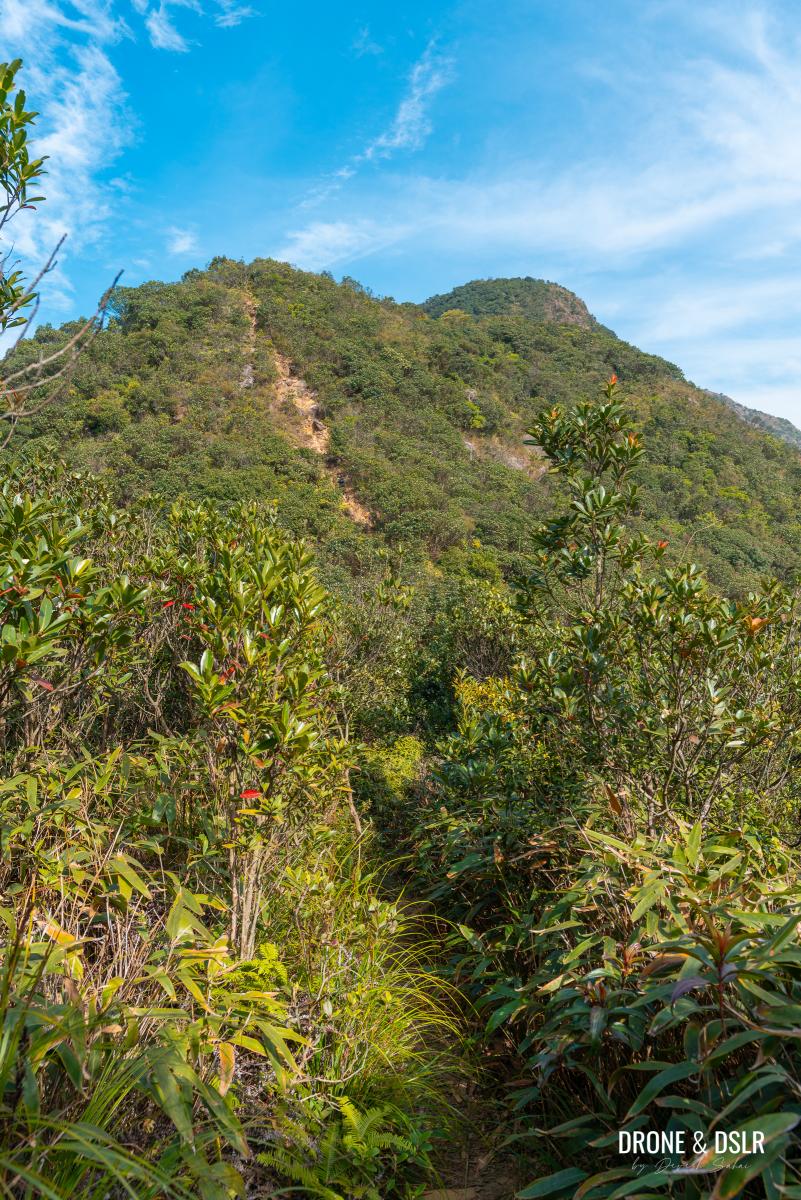
From the viewing point on the outcrop, the trail proceeds through a patch of vegetation on a flat surface, with Tiu Shau Ngam directly in front of you.

Moving on to our next checkpoint – Tiu Shau Ngam (589 m)
The trail then descends on a rocky slope, which might prove to be challenging because of the loose rocks. And you’ve come down, you climb right back up on another rocky incline.
-
- Gently walk downhill and watch out for any loose rocks

-
- After walking down, it’s time to climb back up
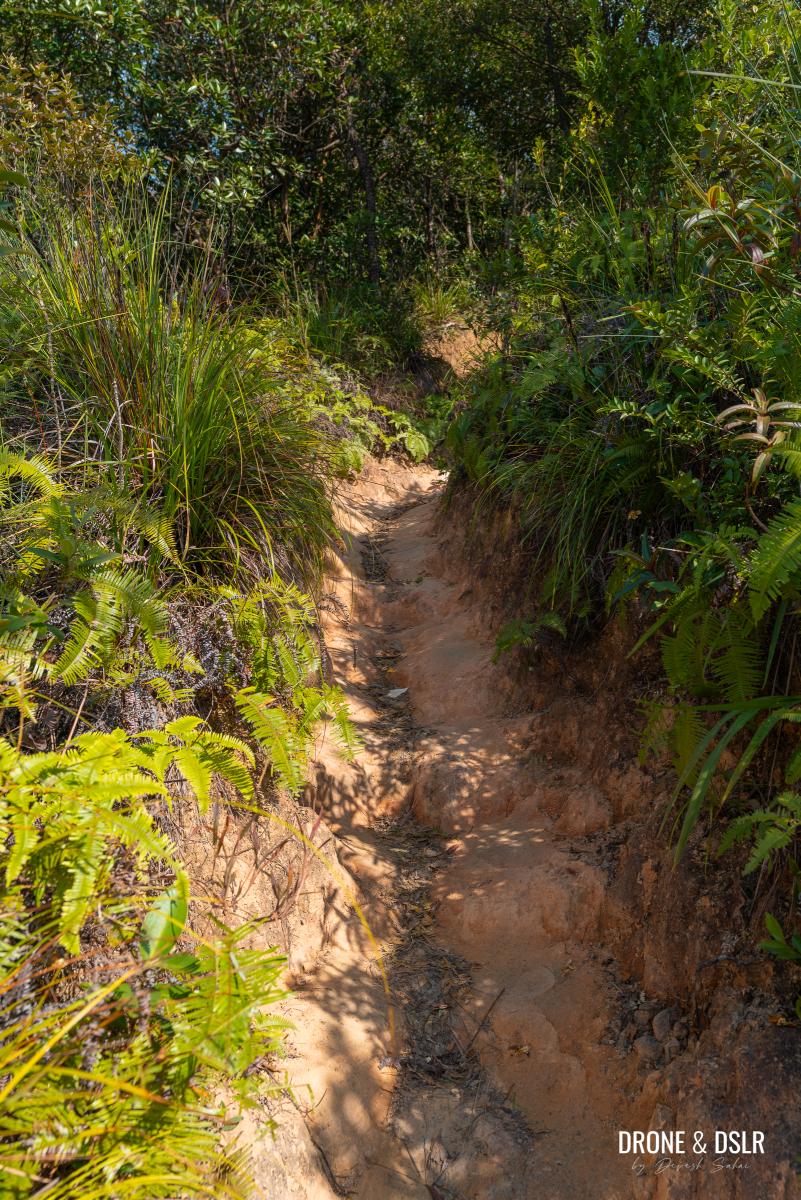
Next, the trail cuts through more vegetation before arriving at the bottom of another long, steep climb. Take your time as you navigate your way up this steep ascent, and watch out for more loose rocks.
-
- Cut through the shrubs and thickets
-
- Here comes a long, steep climb
-
- Keep climbing at a comfortable pace
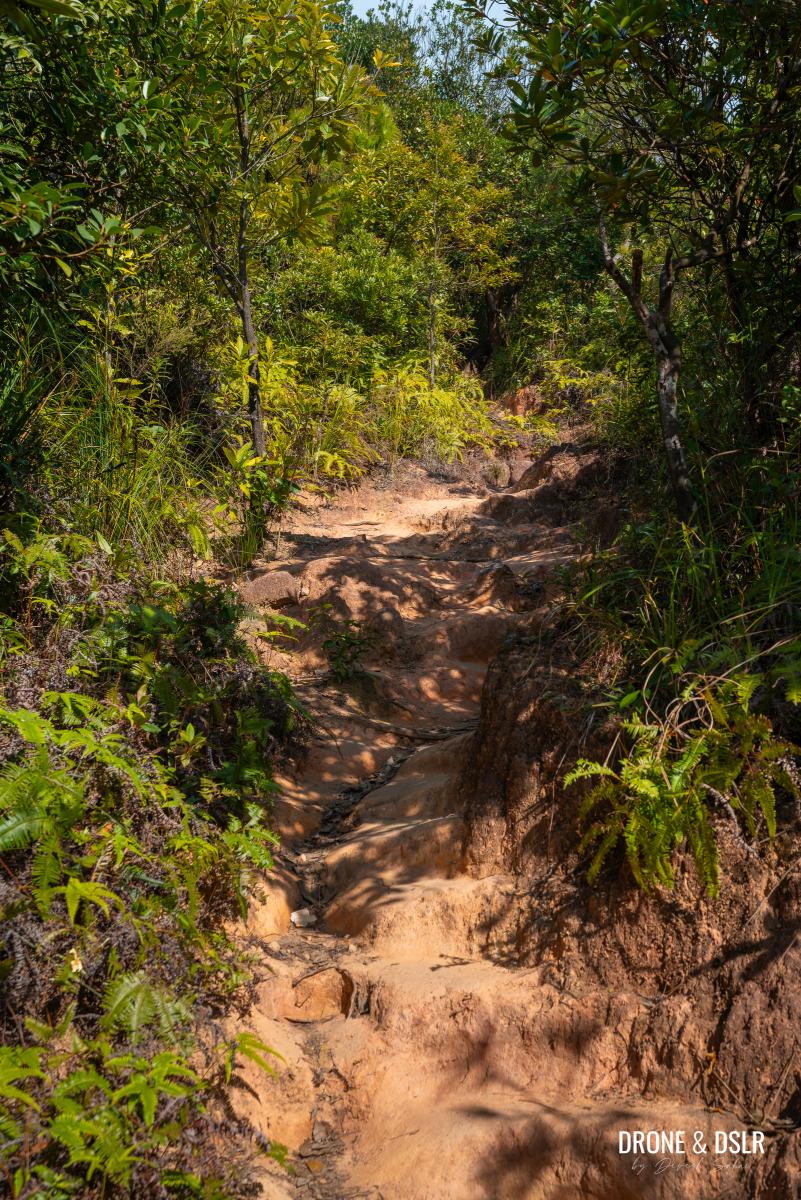
Although the initial incline is muddy and rocky, it eventually becomes more rocky towards the end.
At the end of this climb, the trail levels out and cuts through more shrubs and thickets before arriving at a danger sign.
-
- A flat trail after the long climb
-
- Tiu Shau Ngam ahead, keep going!
-
- Cutting through another section with dense vegetation

-
- The danger sign right before the steepest climb on the Ma On Shan Hike

This is the sign that tells you that the toughest section of the Ma On Shan Hike, lies just ahead. Take a deep breath and mentally prepare yourself for what’s to come.
After the sign, the trail begins its ascent through a short shaded section before approaching, what essentially is a rocky wall.
-
- Make your way to the base of Tiu Shau Ngam
-
- The trail slowly pick up incline

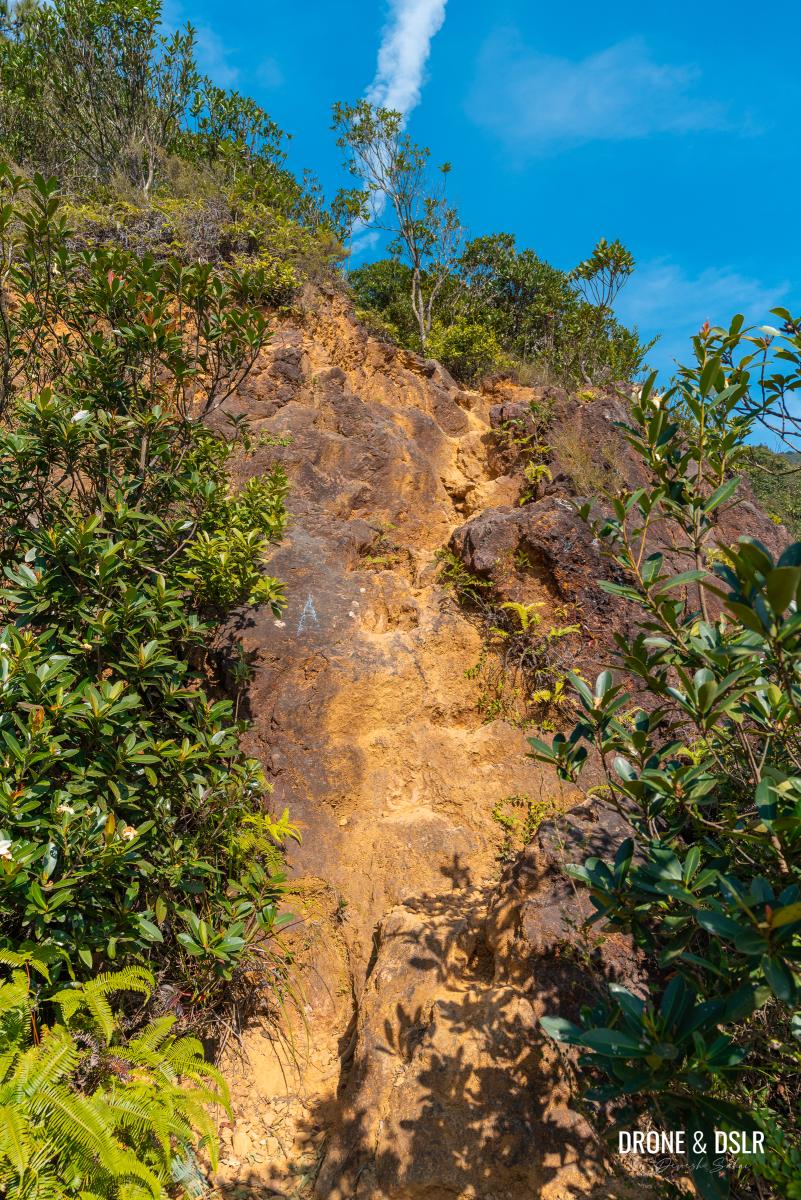
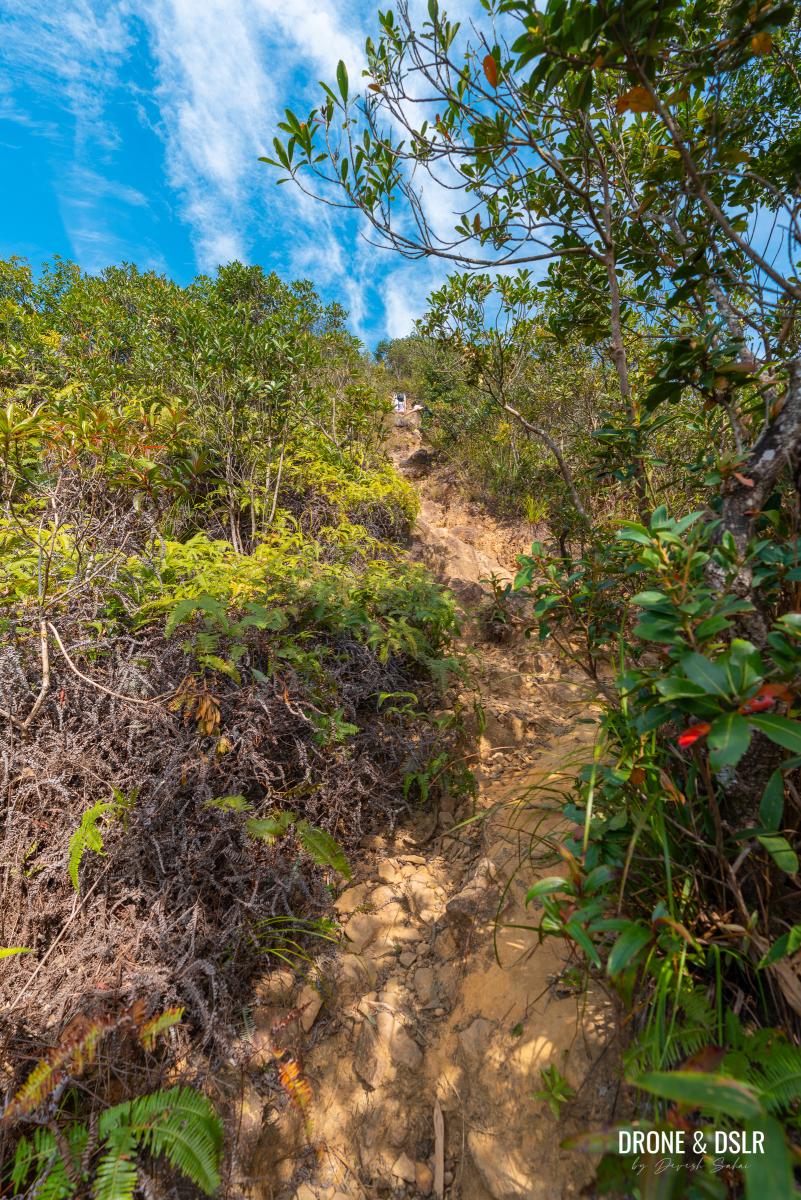
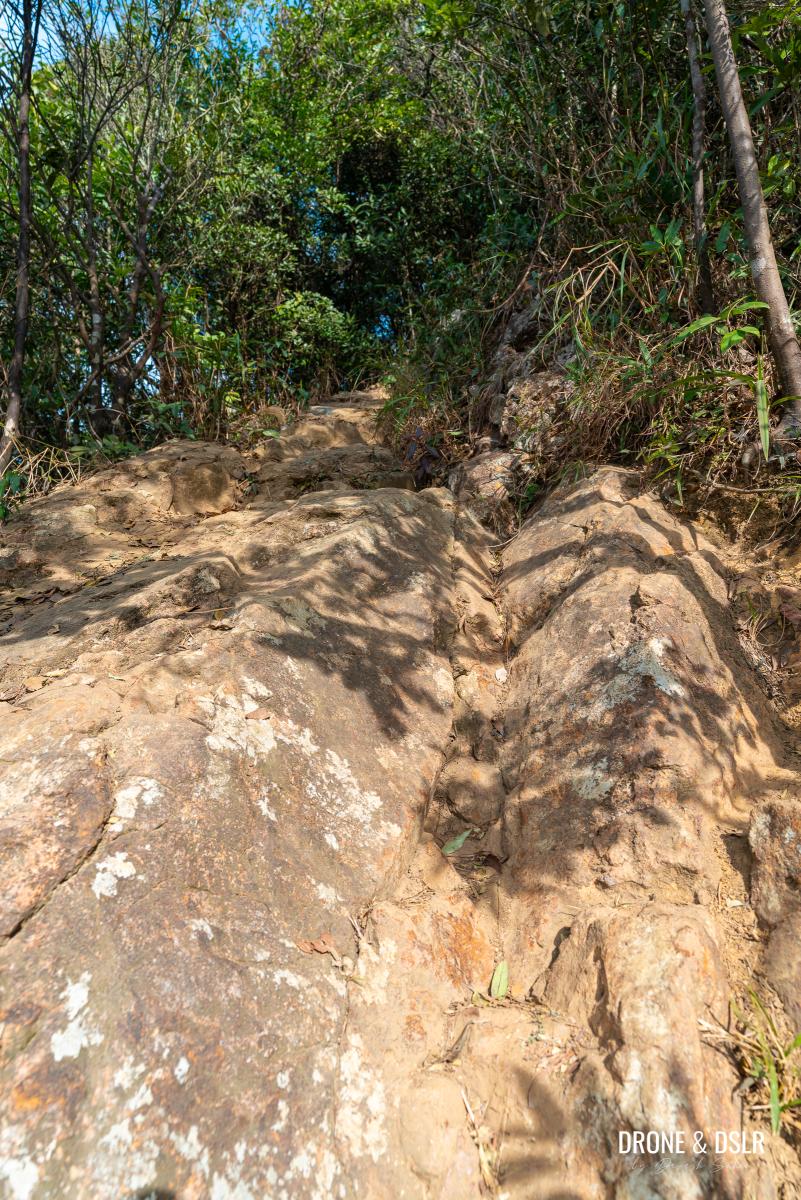
Although it may feel like a dead end, keep going – you’ll need to use your hands (get those gloves ready) to hoist yourself up onto the steep rocky ascent.
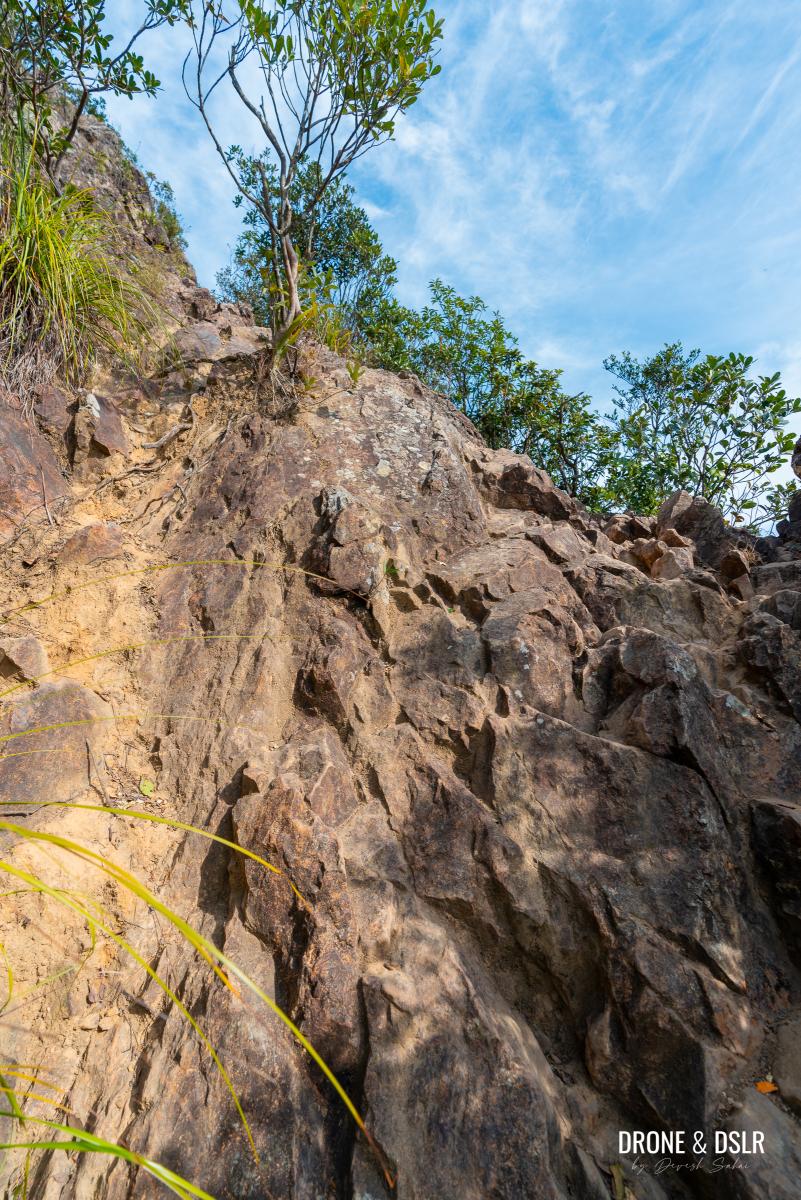
And then suddenly, you’re faced with this rock wall! Get ready to pull yourself and climb up the rock
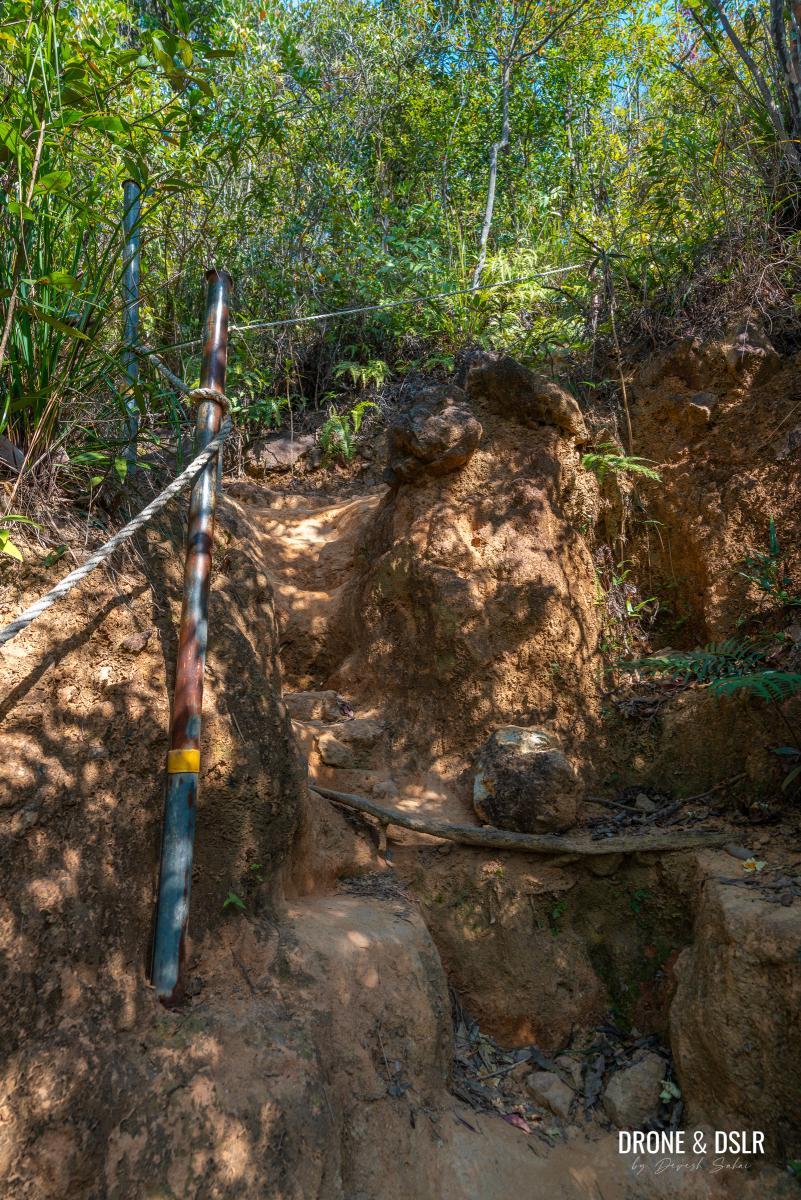
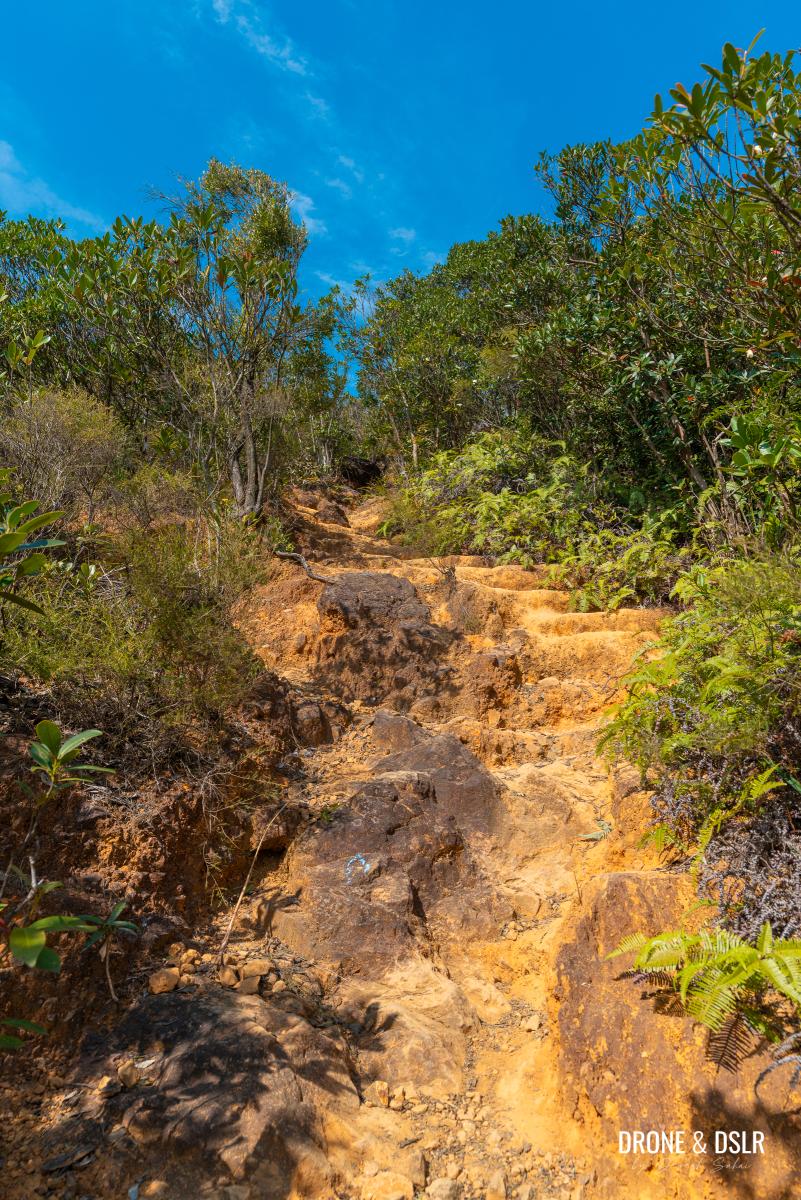
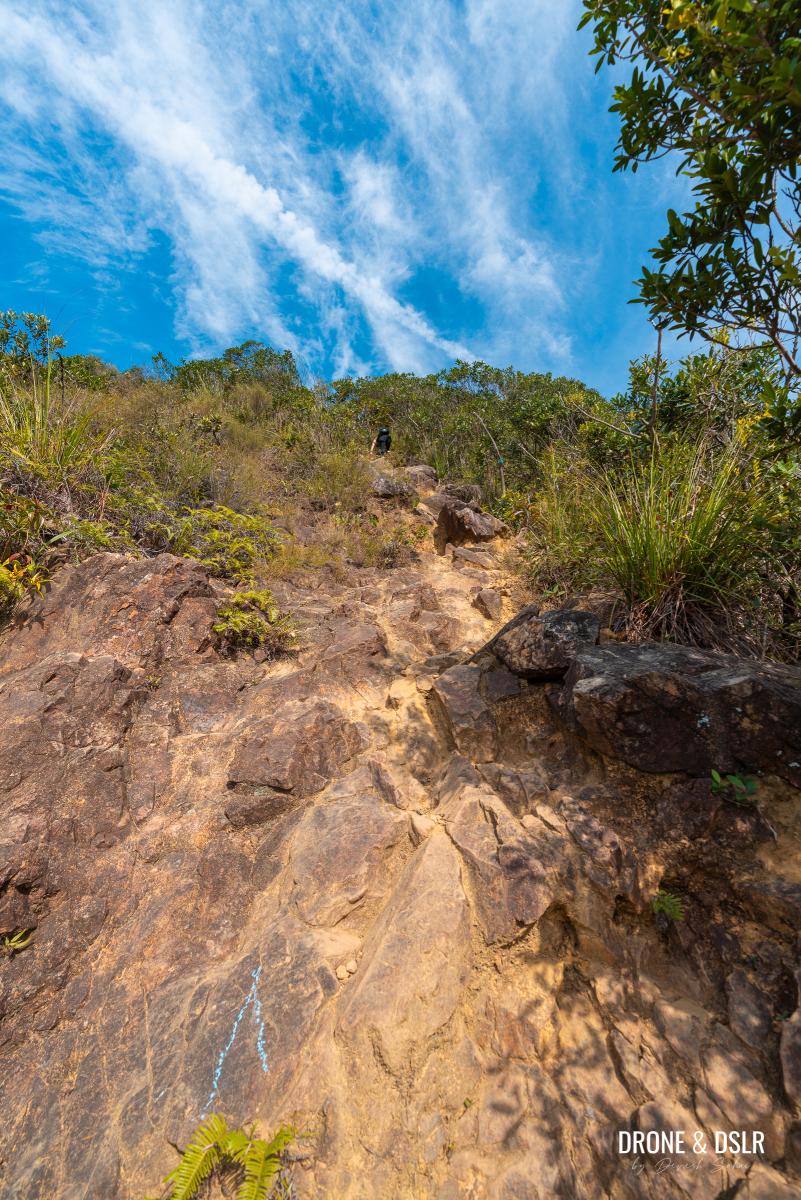
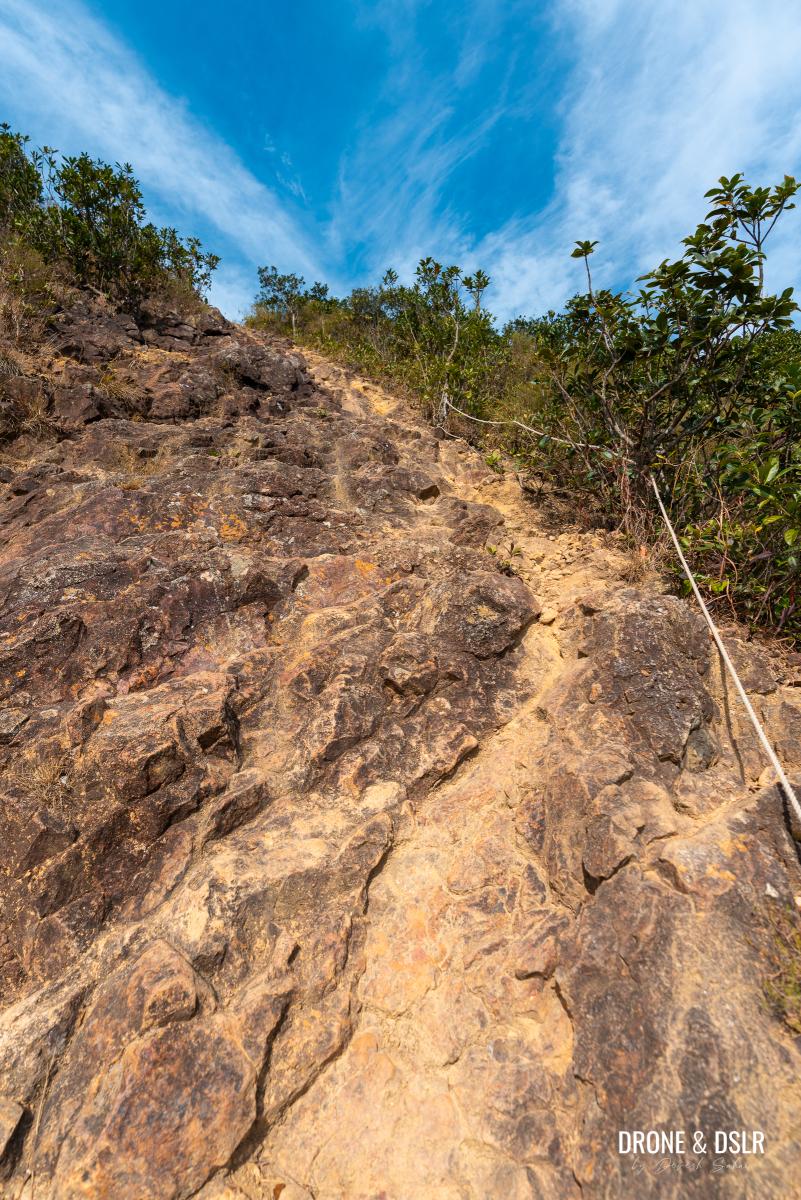
Keep climbing until you reach a section with a rope on the side and what appears to be a worn-out trail on the right. The rope serves primarily as support for those descending rather than ascending.
-
- Be careful as you scale this rocky incline
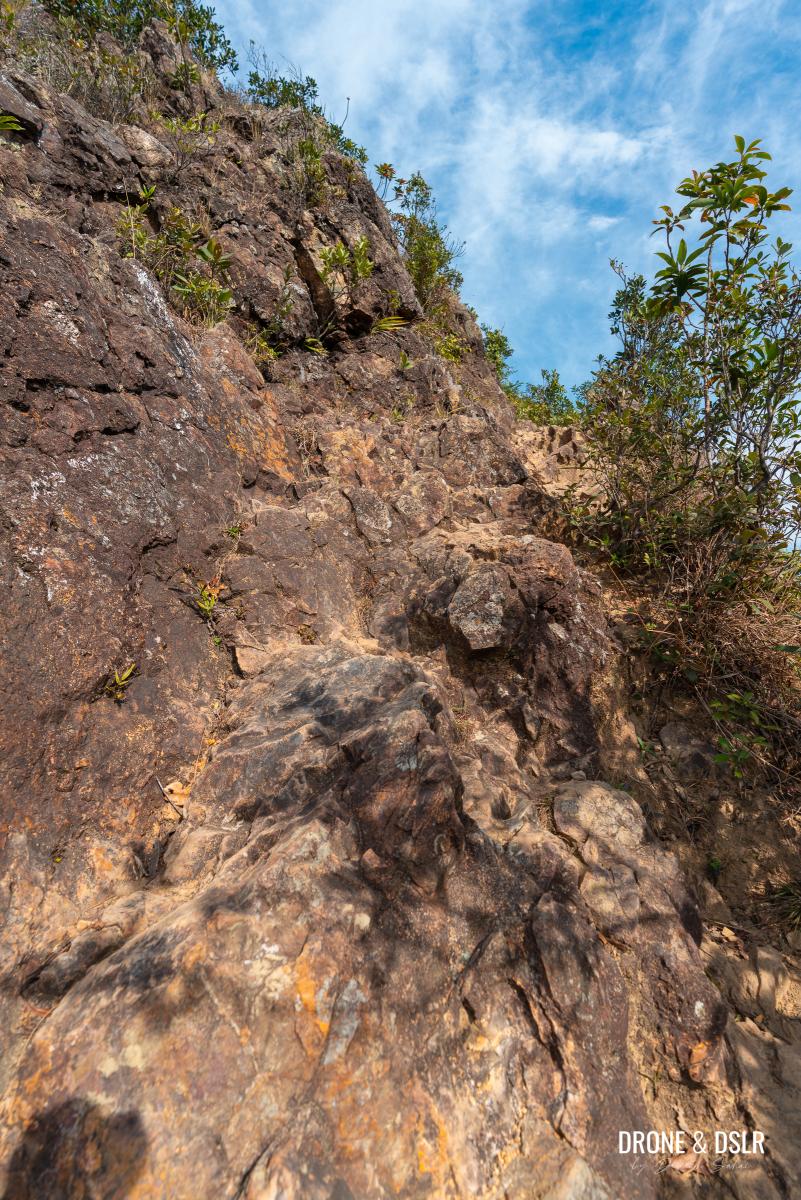
-
- Stay to the right and grab onto the rope if you need assistance
Unless you’re prone to vertigo, I highly recommended that you avoid turning around to look down at this point.
Don’t look down while climbing up this terrain
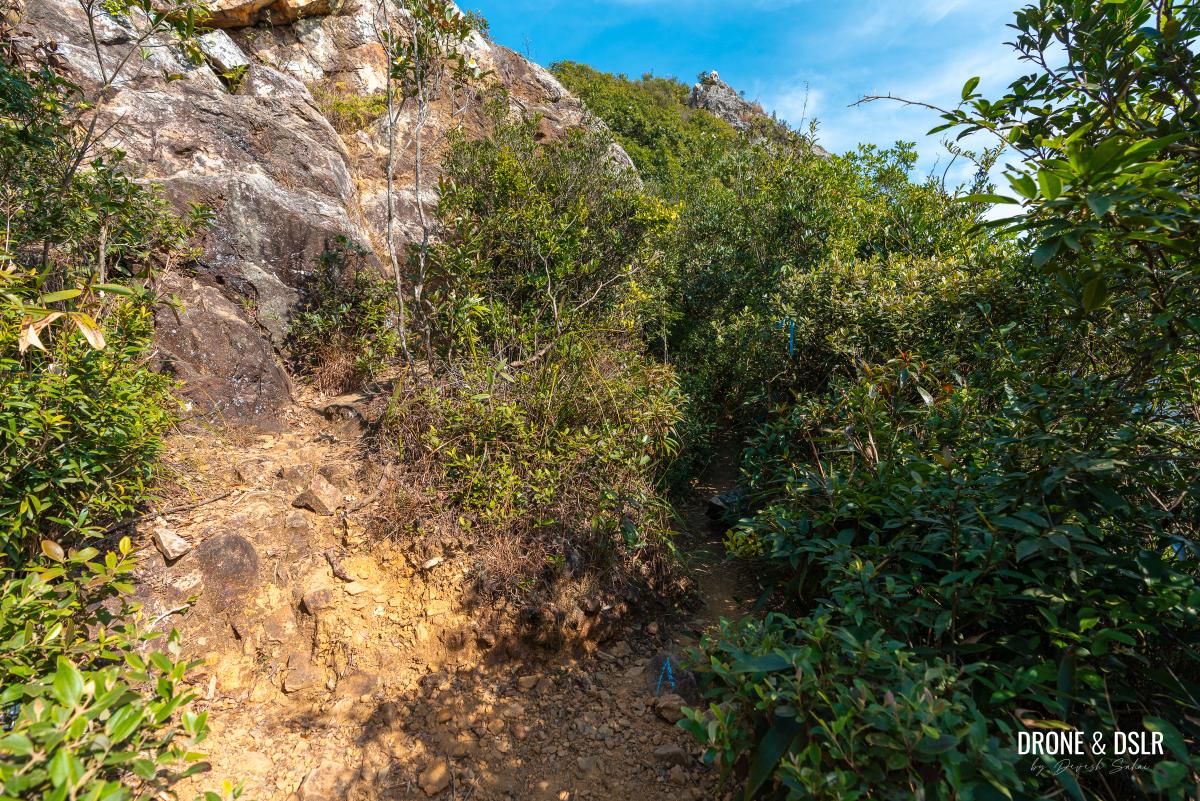
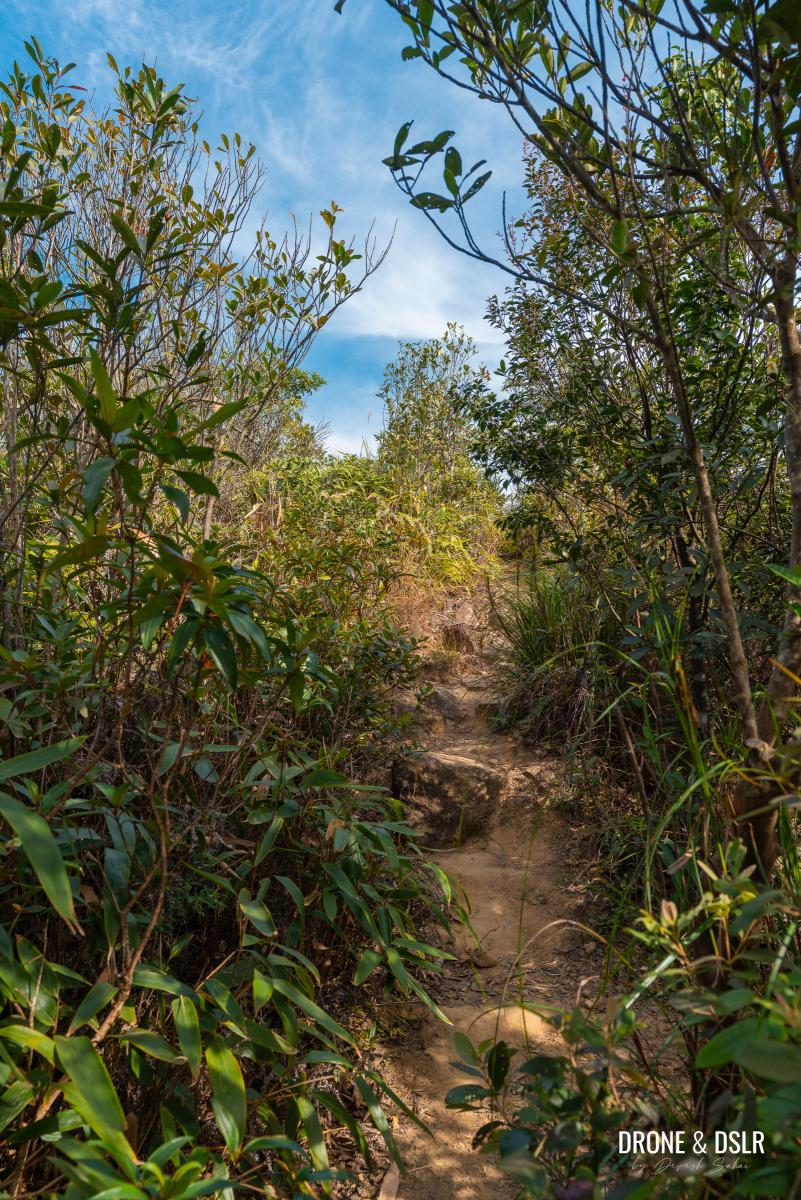
After completing this gruelling climb, you’ll encounter a short incline that will finally bring you to the summit of Tiu Shau Ngam.

One final push to reach Tiu Shau Ngam
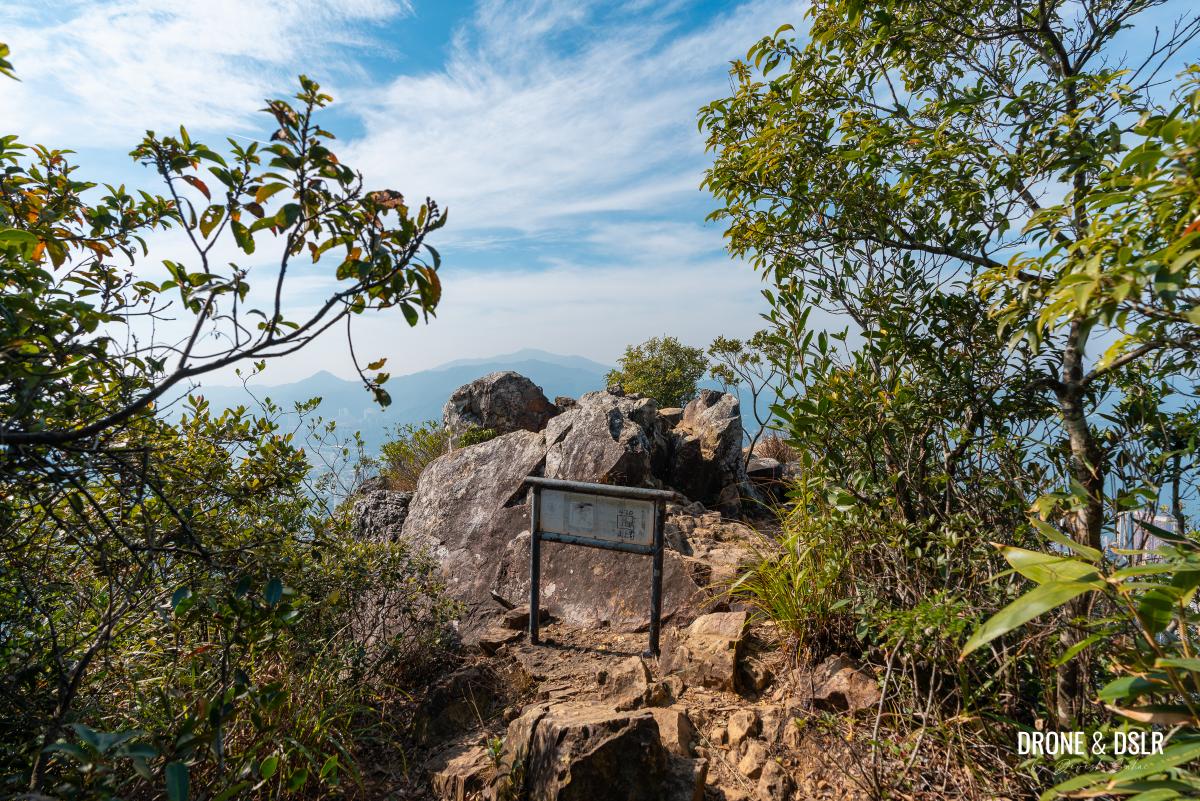
Although there is no triangulation station on the summit, at 589 metres above sea level, Tiu Shau Ngam marks the first peak on the Ma On Shan Hike.
Welcome to Tiu Shau Ngam! The first peak on the Ma On Shan Hike
To The Hunch Backs (Ngau Ngak Shan)
Congratulations on tackling the toughest section of the Ma On Shan Hike!
However, don’t assume that the hike gets easier from here. If I could sum up the next section of the hike in one word, it would be “relentless”.
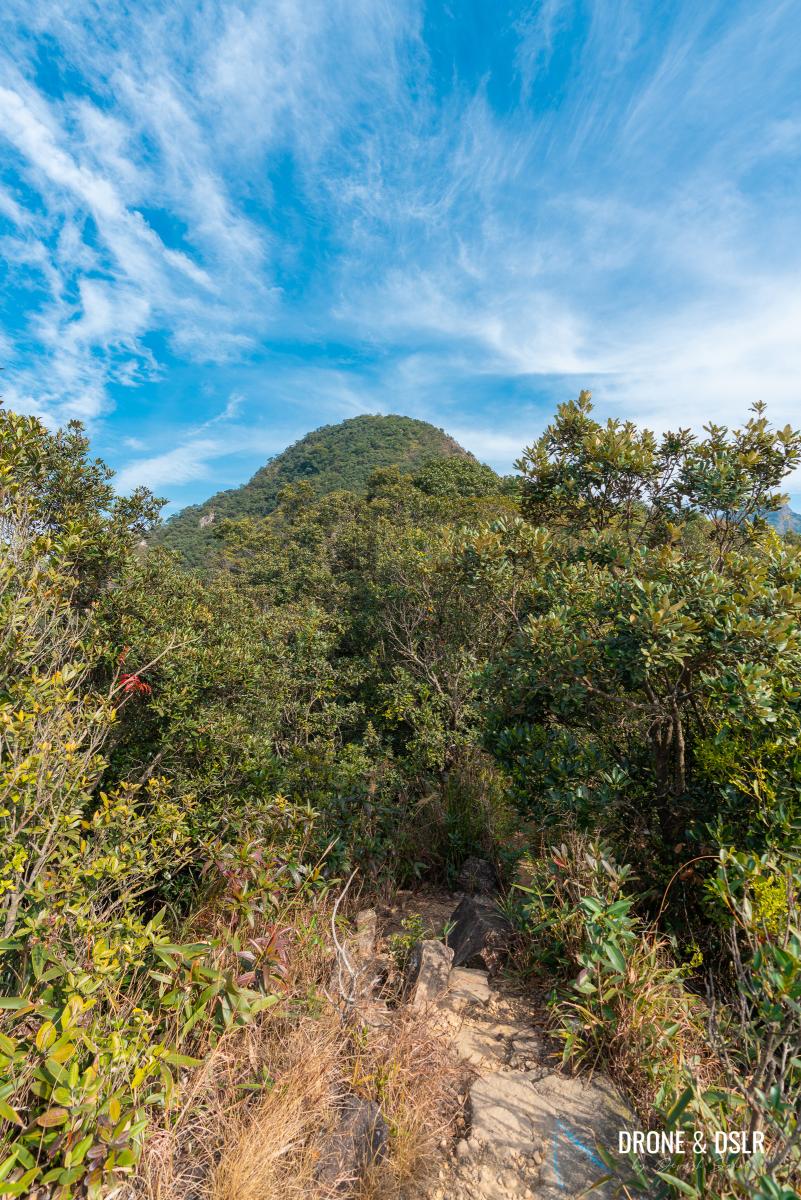
Once you step off the bare summit of Tiu Shau Ngam, you get the clearest view of The Hunch Backs.
-
- Stepping back onto the trail after conquering Tiu Shau Ngam
-
- Your next summit – The Hunch Backs – straight ahead

Follow the trail as it gently descends into a shaded area. A short walk under the shade will bring you to an incline that starts off relatively easy, providing a welcome relief if the sun is out.
-
- The trail descends momentarily

-
- Cutting through the gap between Tiu Shau Ngam and The Hunch Backs
-
- The trail slowly starts its uphill journey

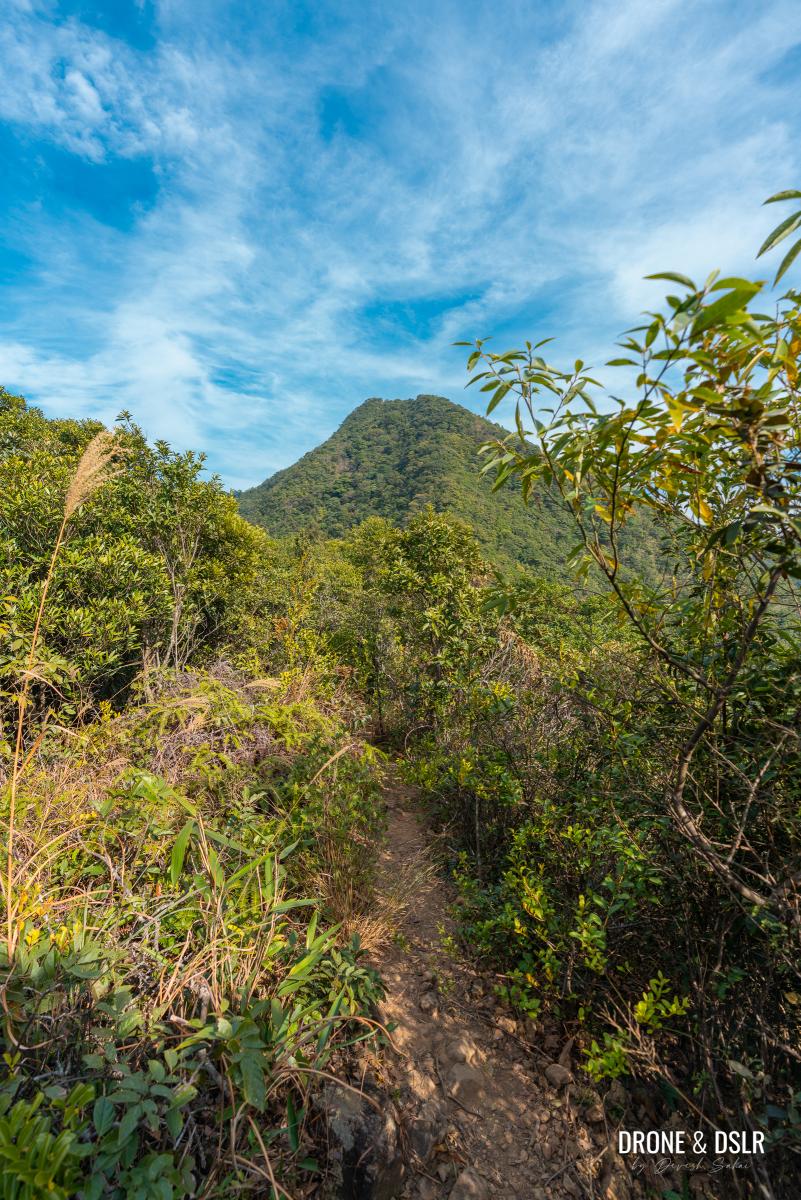
However, as the climb begins, it quickly begins to feel relentless. With no visible peak through the trees, it’s challenging to gauge how much further you have to go.
-
- Making your way to The Hunch Backs
-
- And the incline gets steeper on the way to The Hunch Backs

-
- Keep climbing (with no end in sight at this stage)

As you press on, the trail becomes rockier and steeper before emerging into a clearing.
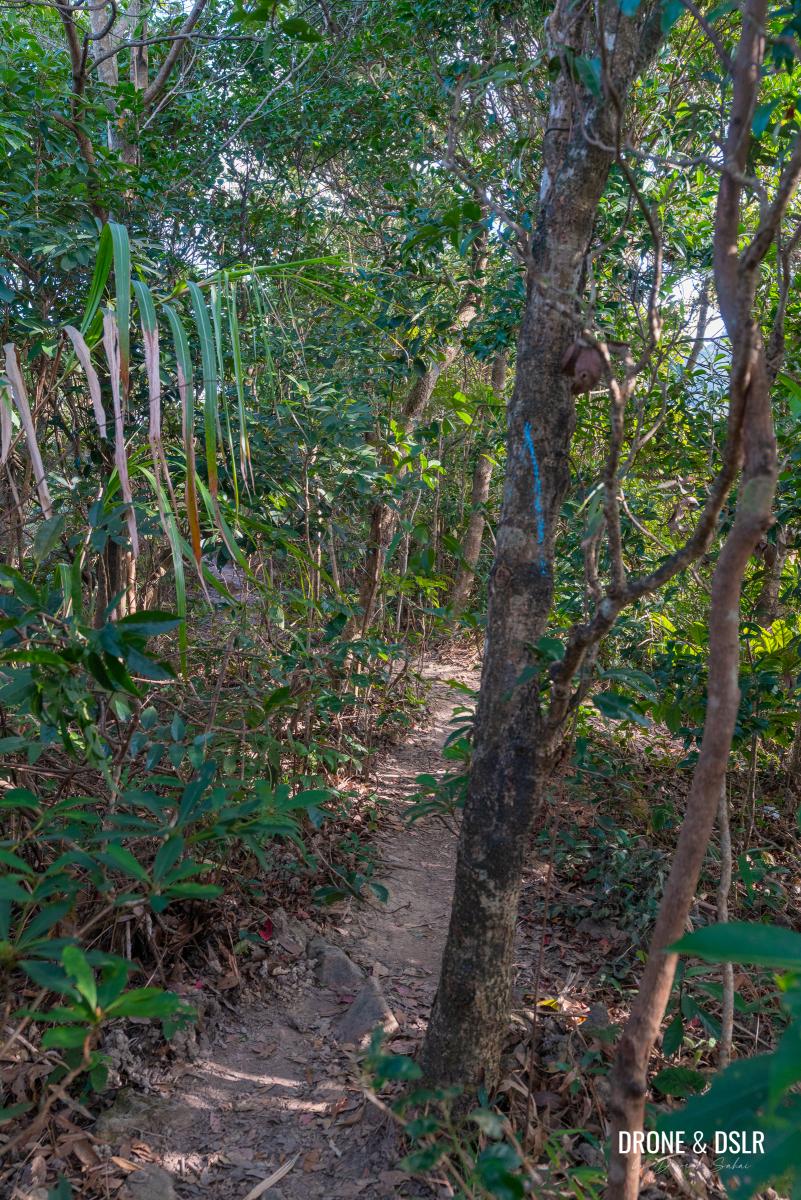
-
- Follow the blue arrows
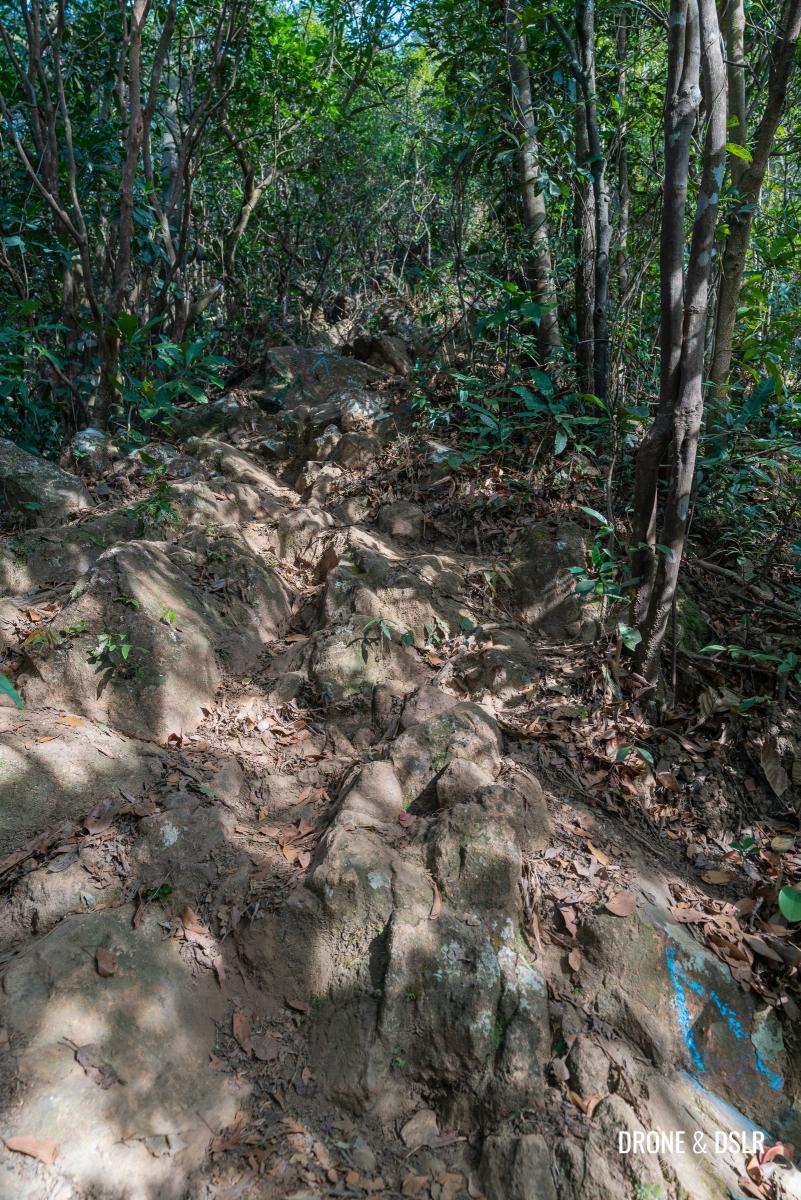
-
- More rocks to climb
For a brief moment, I thought the clearing was the summit. Unfortunately, the trail continues to the left of the clearing.

Follow the trail on the left at this clearing to continue towards The Hunch Backs
After some more climbing, the shade begins to recede, offering a glimmer of hope.
Keep going until the shade disappears
At this point, I felt like the uphill trail would stretch on forever, but then another opening appeared – and this time it was The Hunch Backs!
-
- And you’ve finally made it to the The Hunch Backs!
-
- Welcome to The Hunch Backs

Although the highest point of The Hunch Backs (677 metres above sea level) lies to the left of this clearing, it’s honestly not worth visiting.

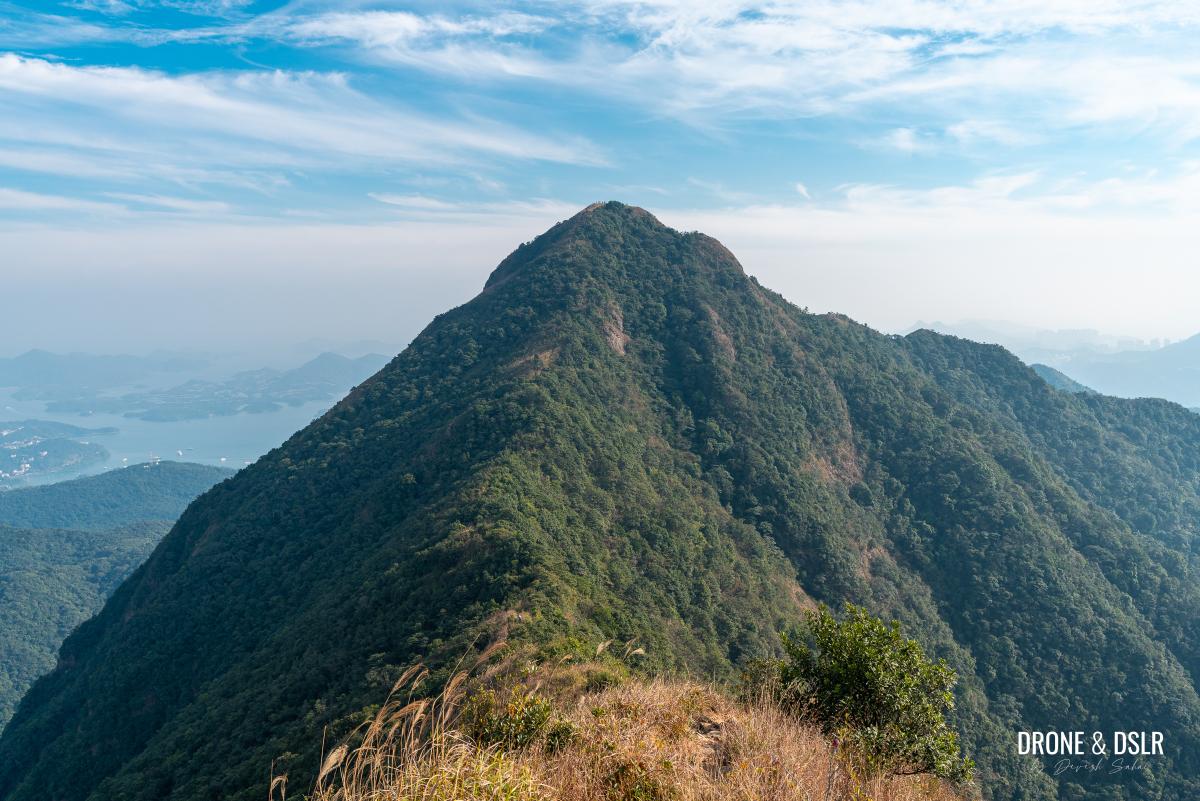
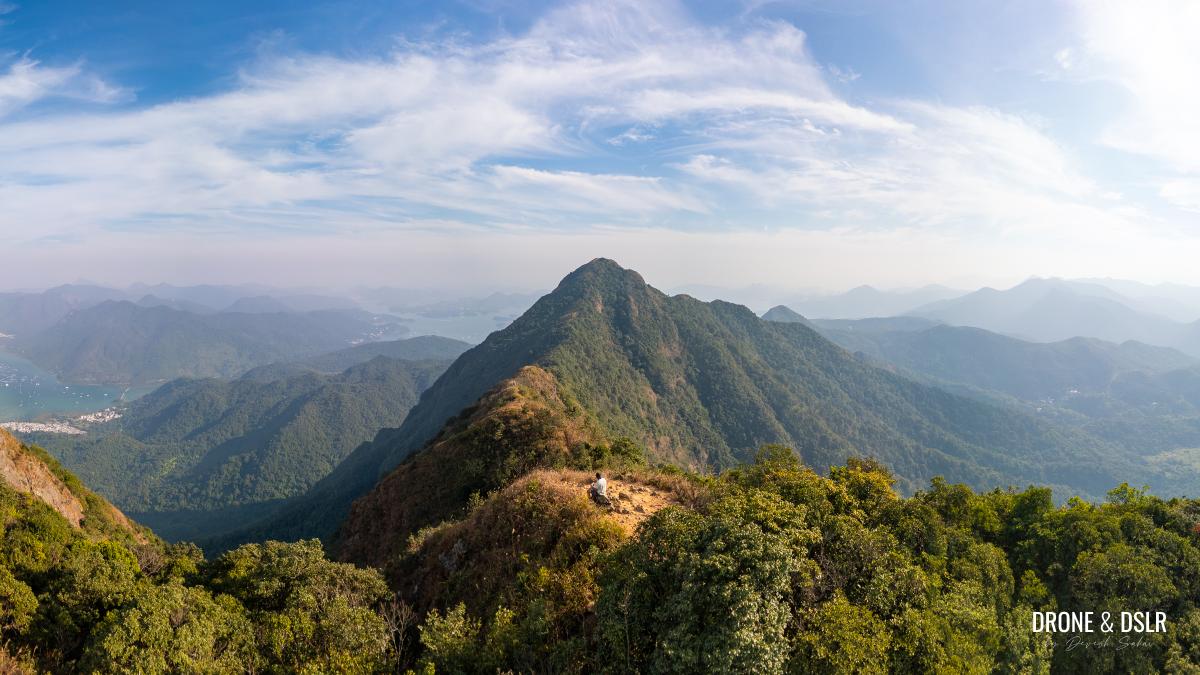
The spectacular view of Ma On Shan from The Hunch Backs
The clearing lies at almost at the same level and offers far better views. In fact, the best views of the ridgeline leading to Ma On Shan Peak are from here.
Taking a break on The Hunch Backs with this incredible view
I decided to sit on a rock and admire the scenery for a good 15 minutes before proceeding further.
Crossing The Ridge
Standing at The Hunch Backs is a bittersweet moment. On one hand, you’ve overcome the toughest section of the Ma On Shan Hike. However, on the other hand, you still have another 5.7 km to go, and you’re likely feeling quite exhausted.
I chose to focus on the former, which helped me renew my energy and enthusiasm. And with that renewed sense, I pushed forward to one of the most scenic ridge crossings in Hong Kong!

It’s time to step back onto the trail after taking a break at The Hunch Backs
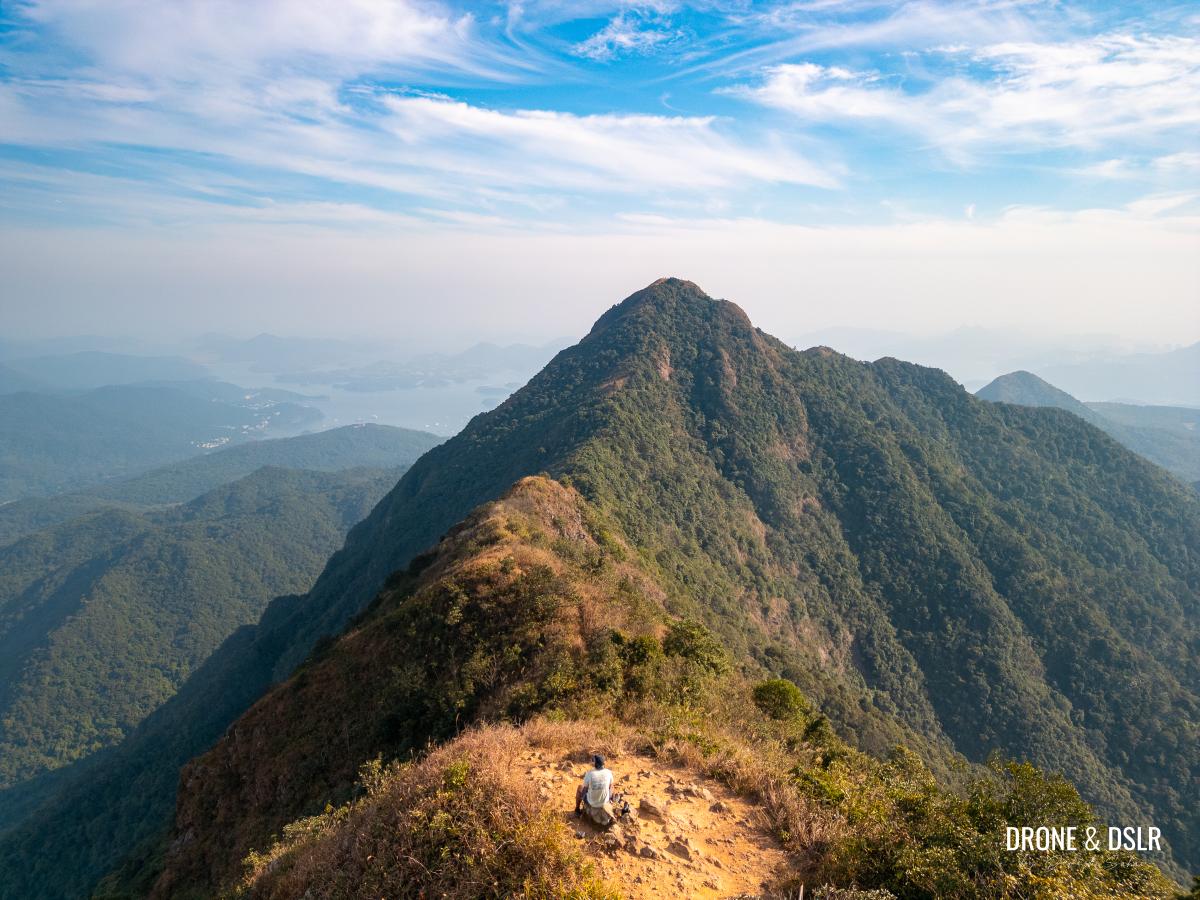
From The Hunch Backs, Ma On Shan stands directly across a narrow ridge. Crossing this ridge offers breathtaking views of Ma On Shan Country Park on the right and Three Fathoms Cove on the left.
-
- Getting onto one of the most scenic ridgelines on any hike

-
- Walking along the ridge to Ma On Shan

The ridge initially descends from The Hunchbacks and follows a relatively flat trail. The trail isn’t too wide, so be mindful as you walk across it.
-
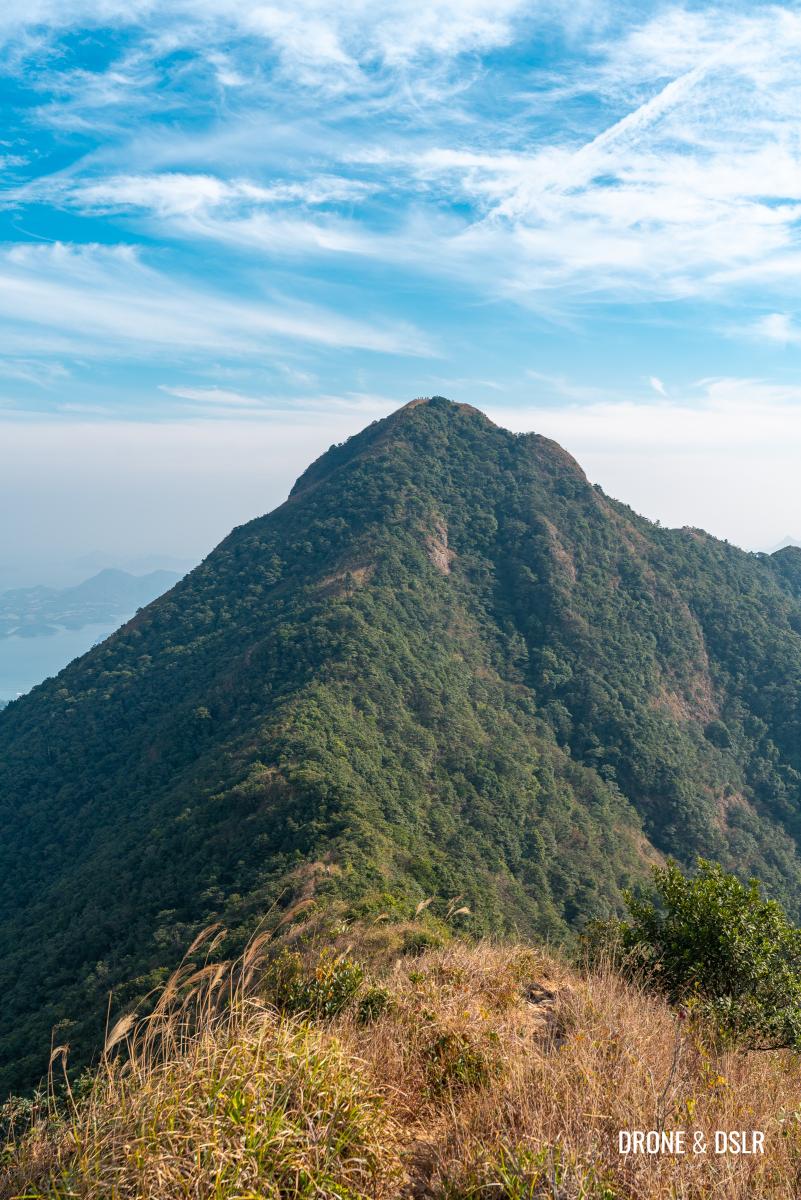
- Splendid views of Ma On Shan from the ridge
-
- When the vegetation subsides, there’s nothing between you and all that surrounds you

-
- Be careful of the uneven terrain while on the ridge
-
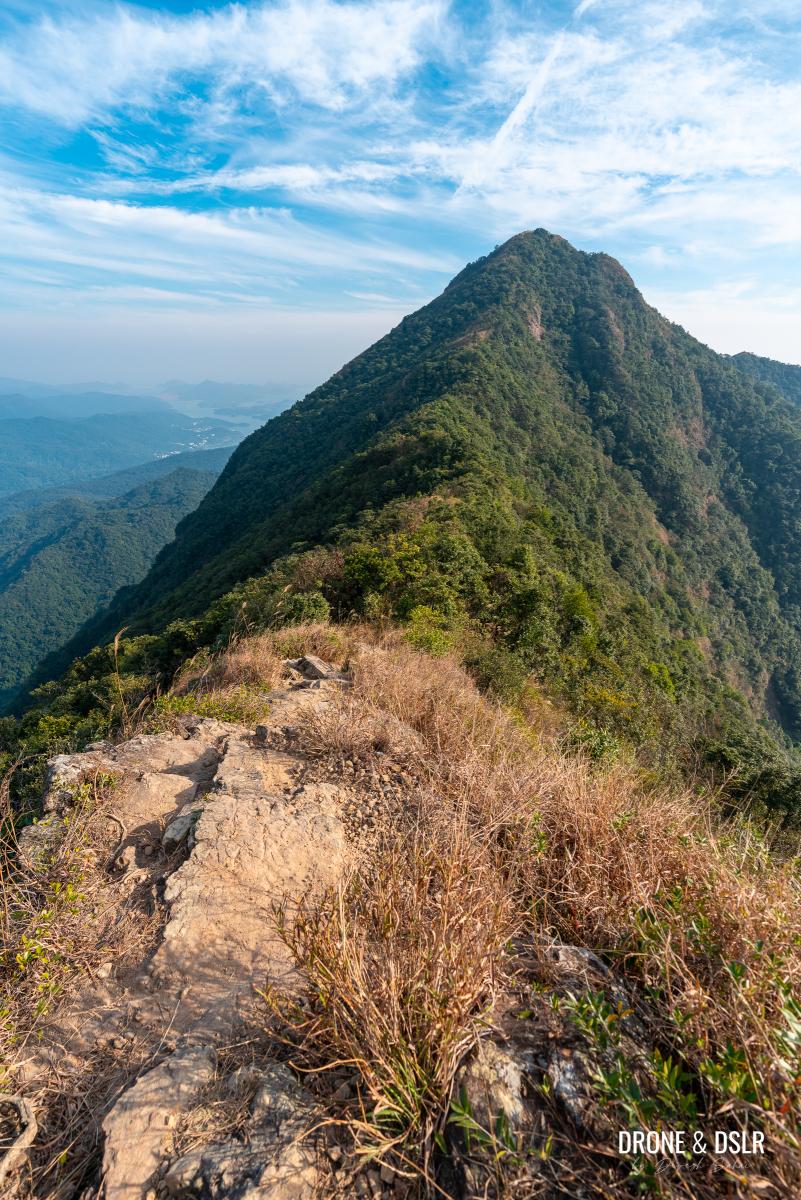
- Once you see the trees and thickets, it’s time to start climbing again
Stop to get some amazing pictures in the initial part of the ridge, because the views soon disappear. Even if that’s temporarily till you reach Ma On Shan summit.
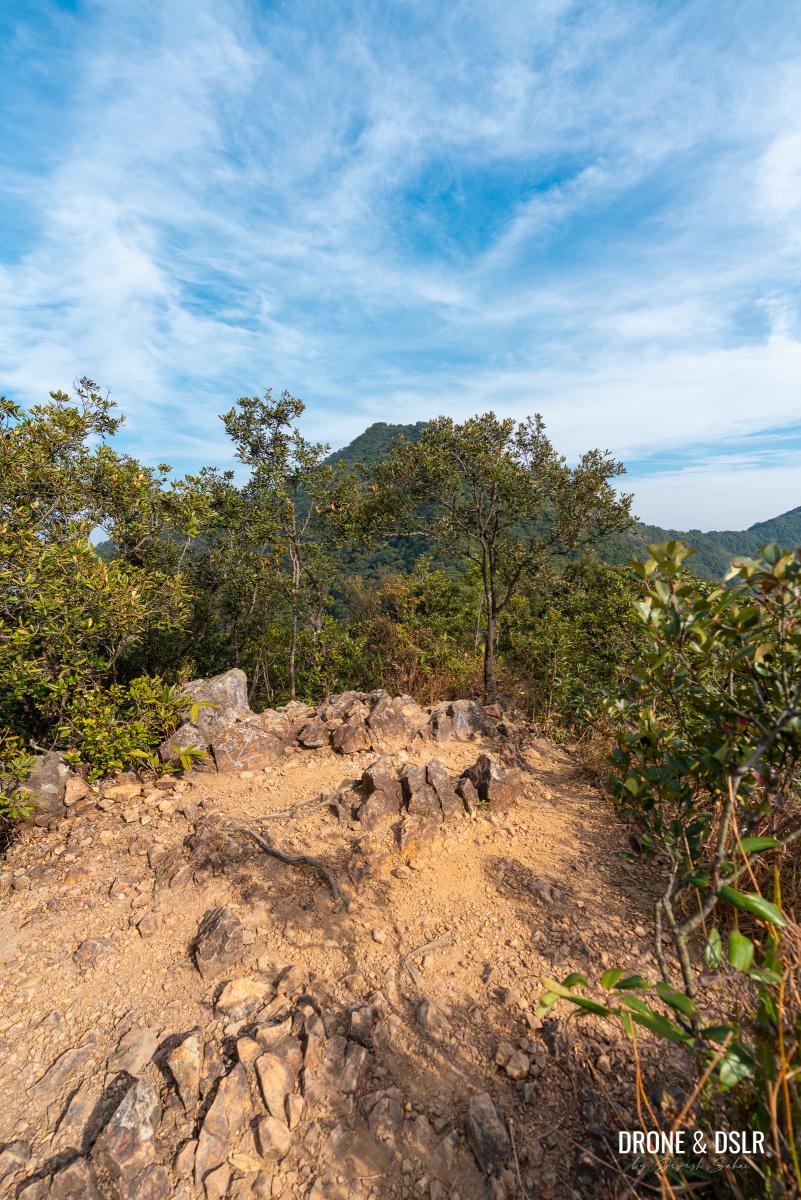
When the trail reaches the area with surrounding vegetation, that’s when you know the ascent to Ma On Shan is about to start.
-
- Passing the trees before the incline begins
-
- One final look at Ma On Shan from here

The ascent starts off gently, but then picks up. To be honest, after conquering Tiu Shau Ngam and The Hunch Backs, this feels relatively easy.
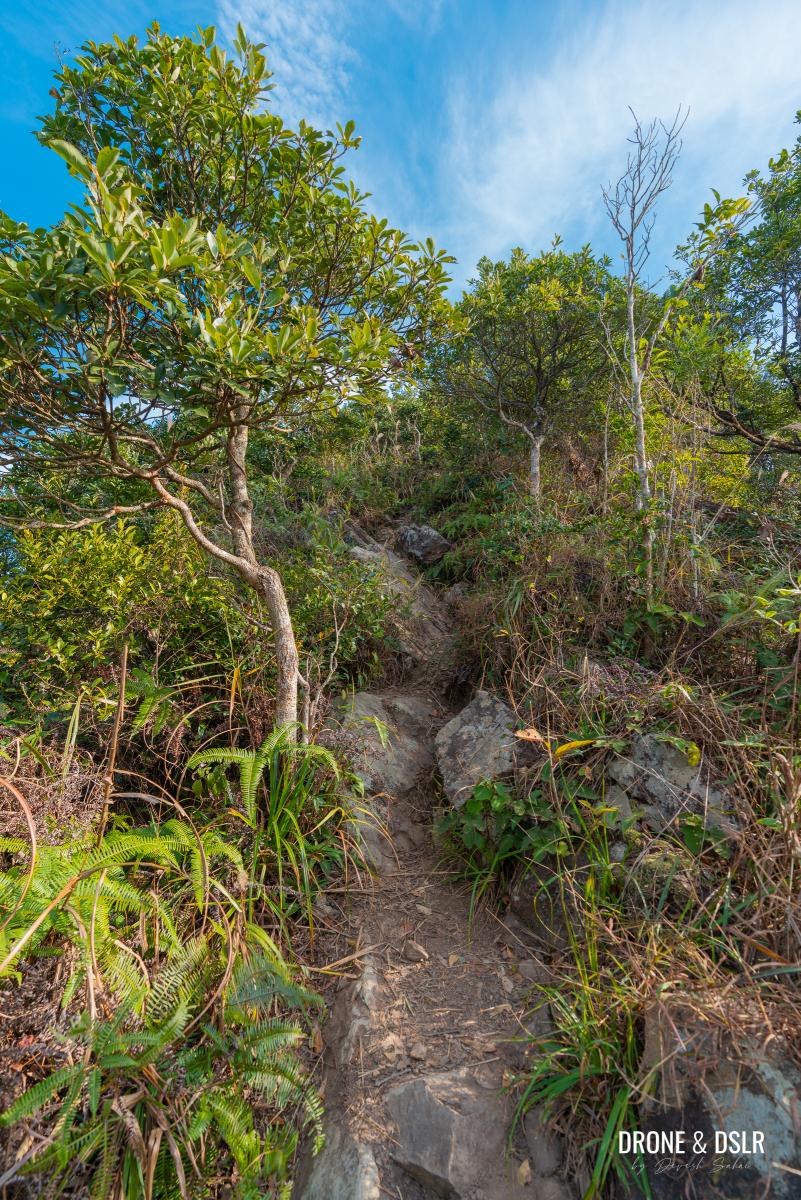
The final ascent to Ma On Shan
Climb at a comfortable pace, keeping your footing secure on the rocky terrain.
-
- After conquering the previous peaks, this climb doesn’t seem too bad
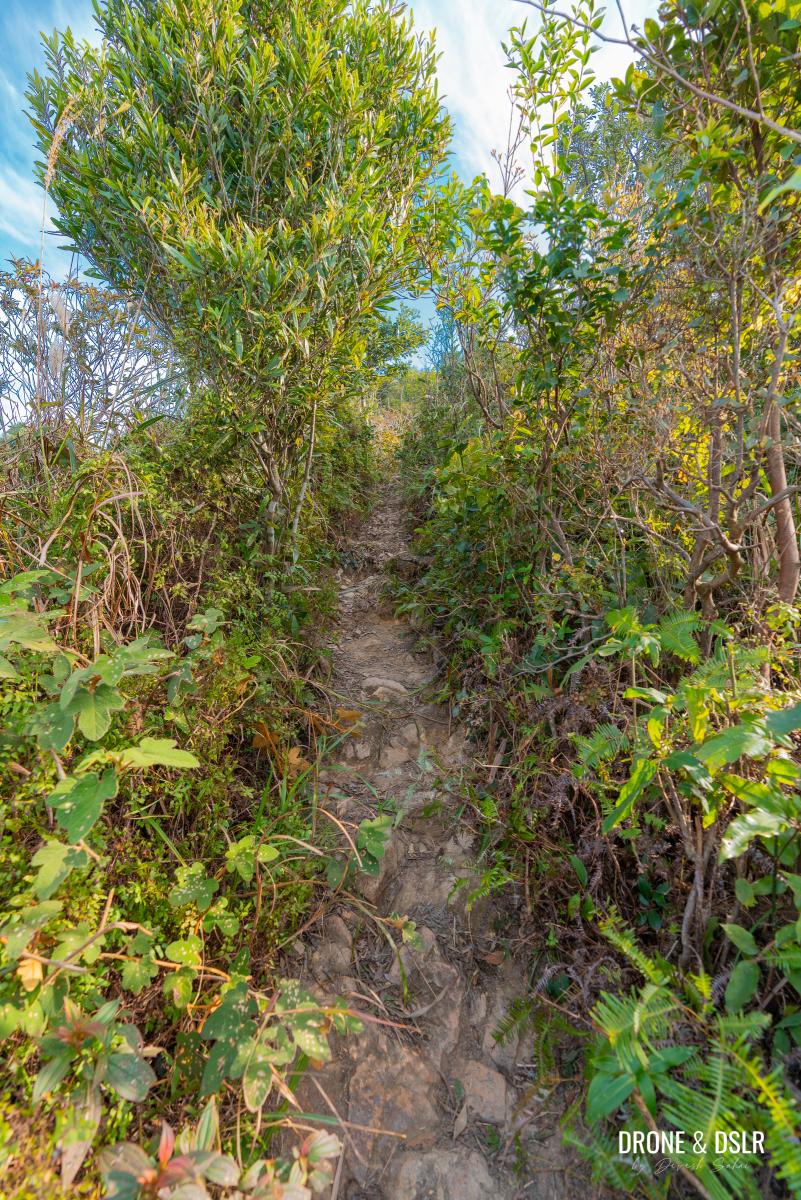
-
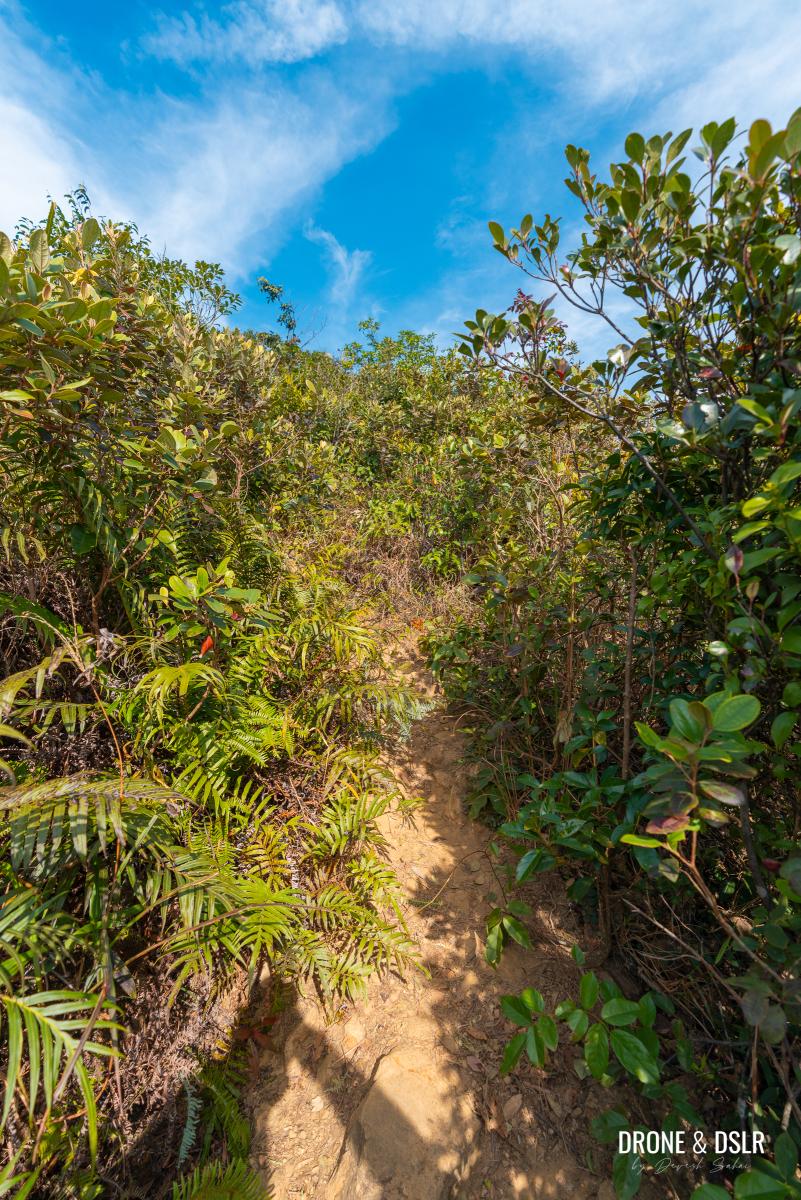
- Completing the final climb to Ma On Shan
As the vegetation thins out, and you get a clearer view of the sky above, that’s when you know that you’re almost at the top of Ma On Shan.
The final ascent to Ma On Shan
The Views from Ma On Shan Peak
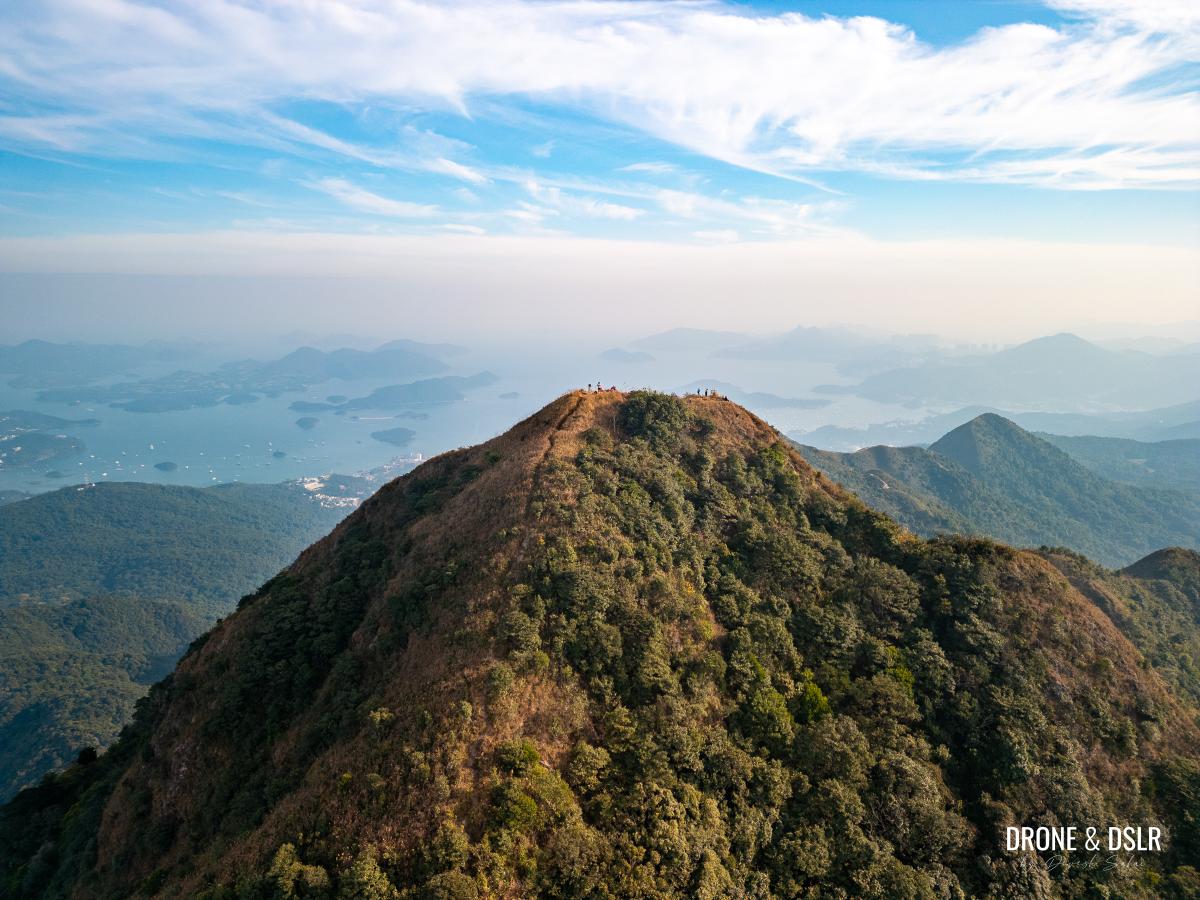
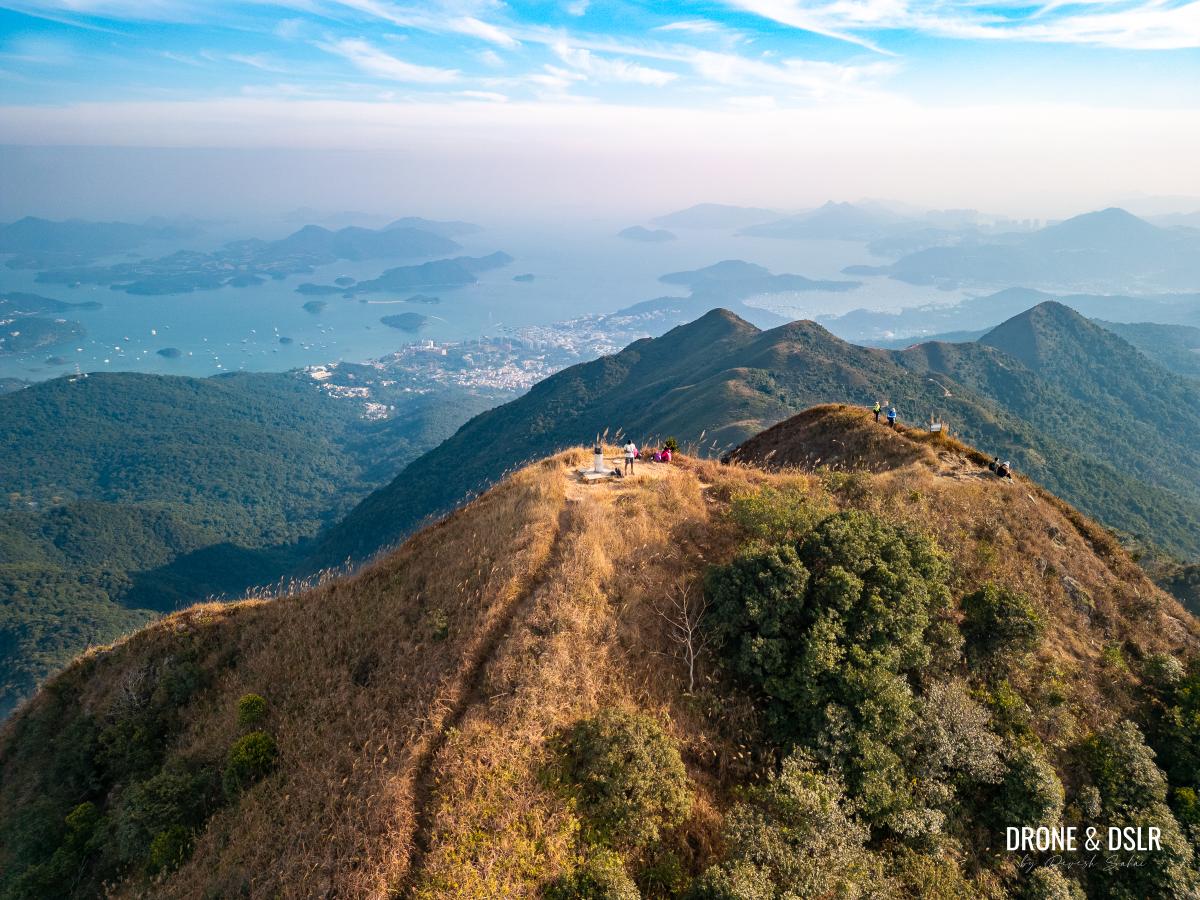
The first thing that struck me from the top of Ma On Shan (702 metres above sea level) were the stunning views in all directions! No matter where I looked, I was in awe. And this was despite it being a hazy day.

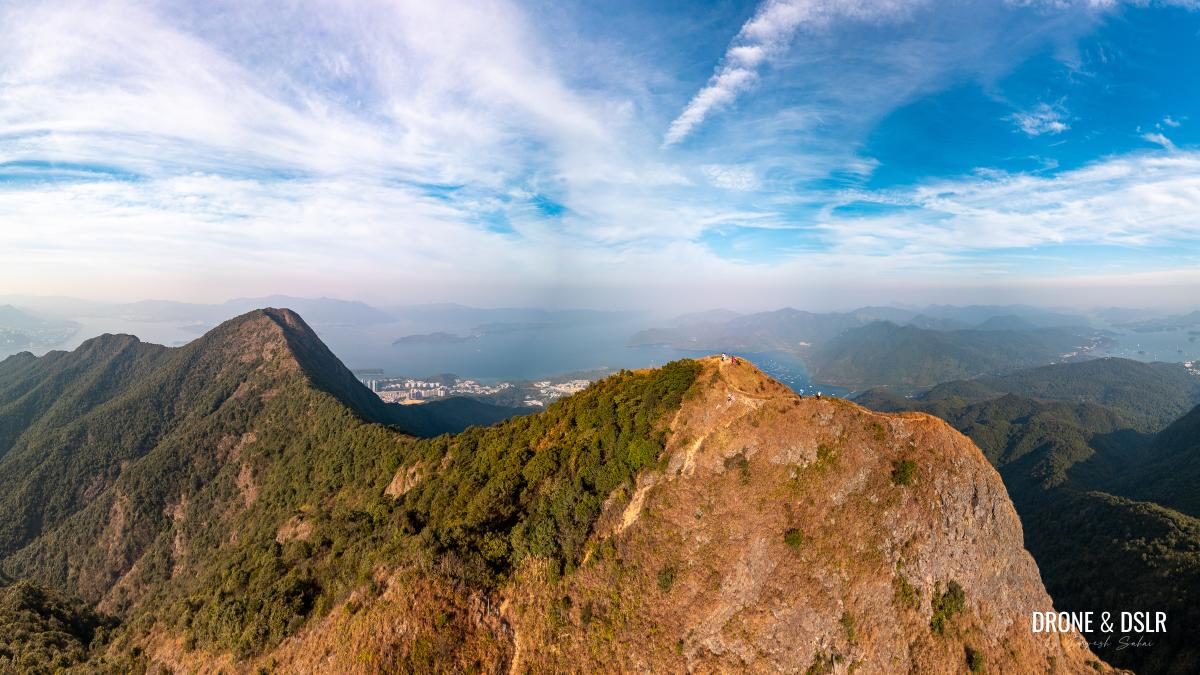
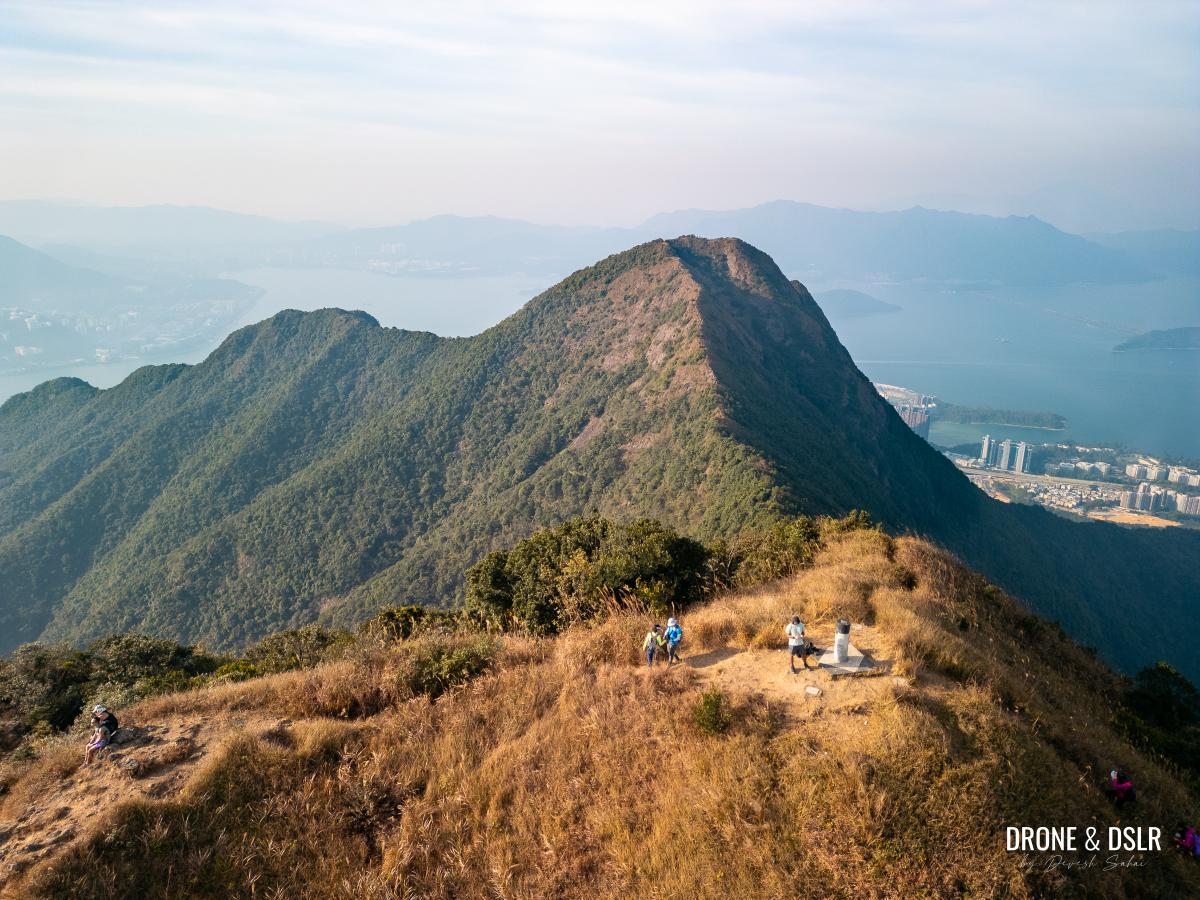
Ma On Shan Peak aerial view
To the north, the views of Tolo Harbour, Plover Cove Reservoir, Pat Sin Leng, and Three Fathoms Cove offered a glimpse into the massive size of these water bodies and the scale of the landscape.
-
- Views of Three Fathoms Cove and Tolo Harbour from Ma On Shan
-
- Ma On Shan is one of the tallest peaks in Hong Kong

To the south, you can see the layers of hills within Ma On Shan Country Park stretching all the way down to Kowloon Peak.
-
- View from Ma On Shan Peak looking south
-
- Layers of hills in the Ma On Shan Country Park
-
- A couple of hikers admiring the view from Ma On Shan

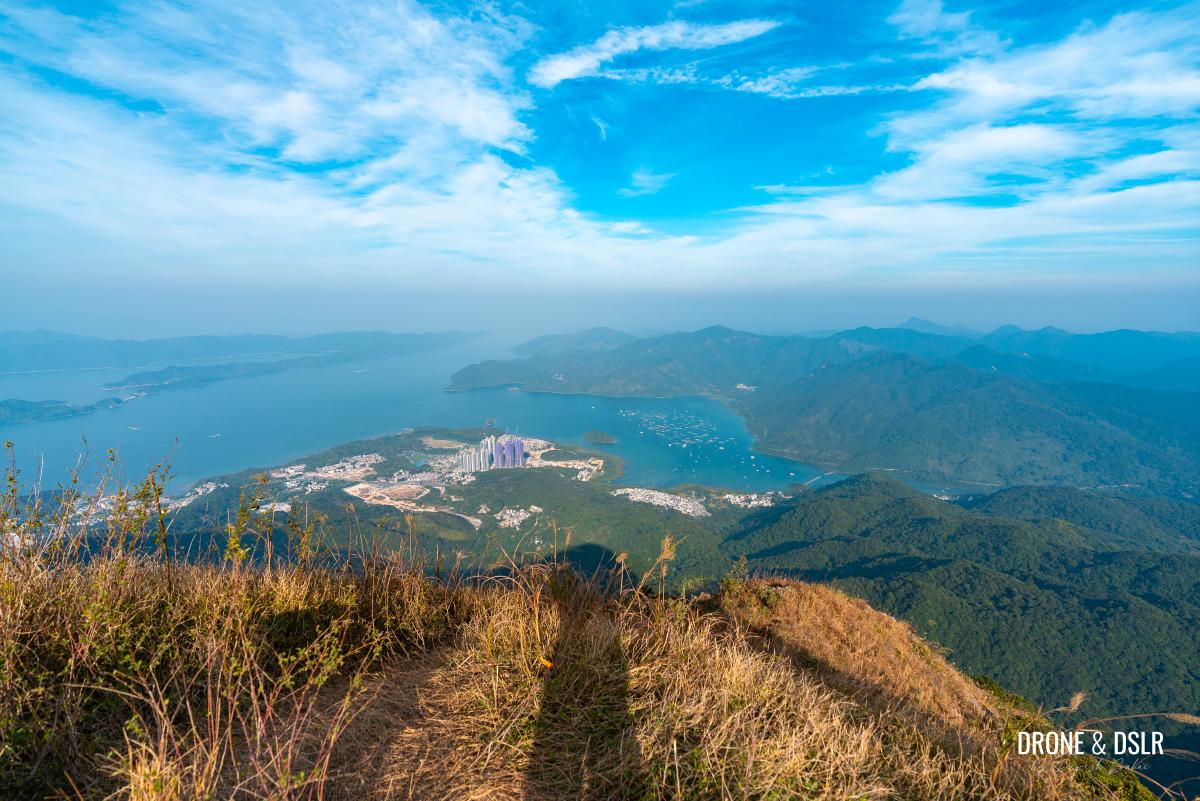
The views of Sai Kung town and Sai Kung Country Park to the east serve as a reminder of the destination at the end of this hike.
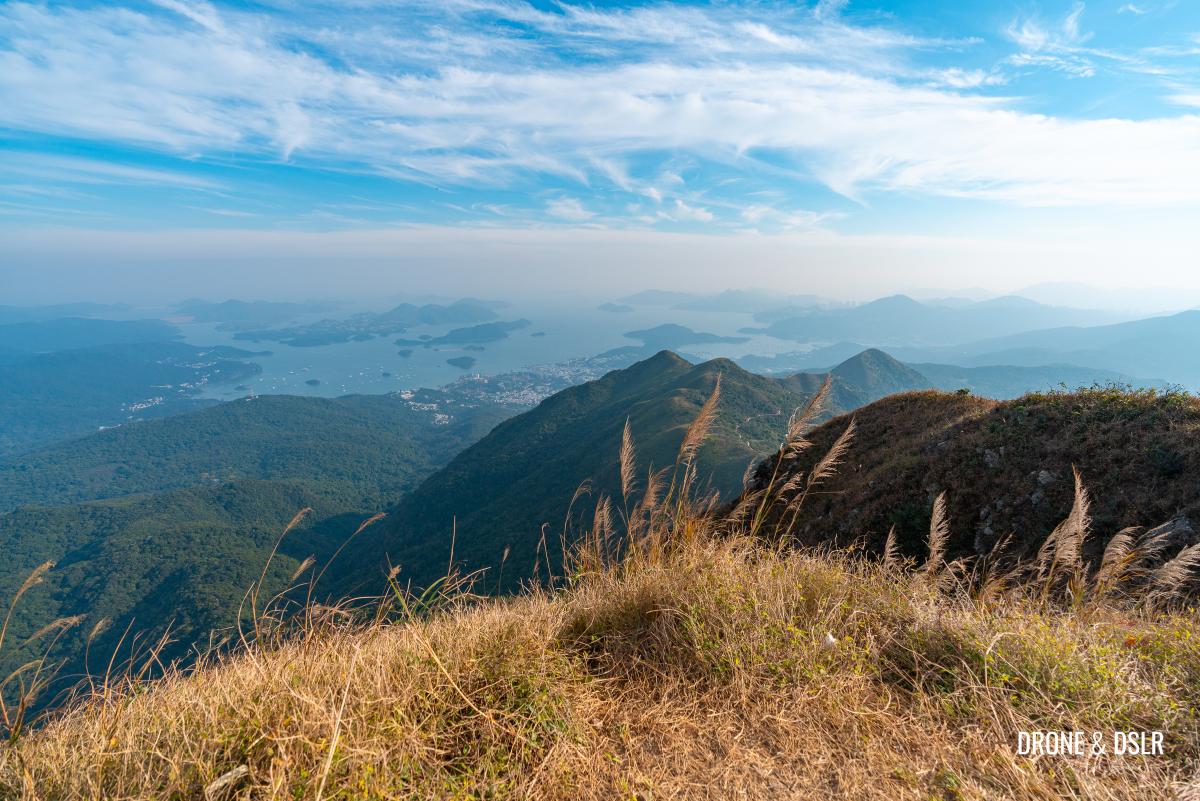
Views of Sai Kung from Ma On Shan
And of course to the west, you can admire with pride the hills that you’ve just conquered to make it here.
The range of hills leading to Ma On Shan
Take your time to soak in the views before you start your journey downhill. But remember, the most scenic section of the trail is yet to come!
-
- The mighty Ma On Shan Peak
-
- The summit of Ma On Shan

To Ma On Au
To begin your downhill journey from Ma On Shan Peak, follow the trail on the opposite side of the triangulation station.
The trail continues from Ma On Shan Peak
As you approach the edge of the cliff, the trail will split in two. To head downhill, follow the trail on the right-hand side.
-
- Do not take the trail on the left

-
- Follow the trail on the right to descend from Ma On Shan
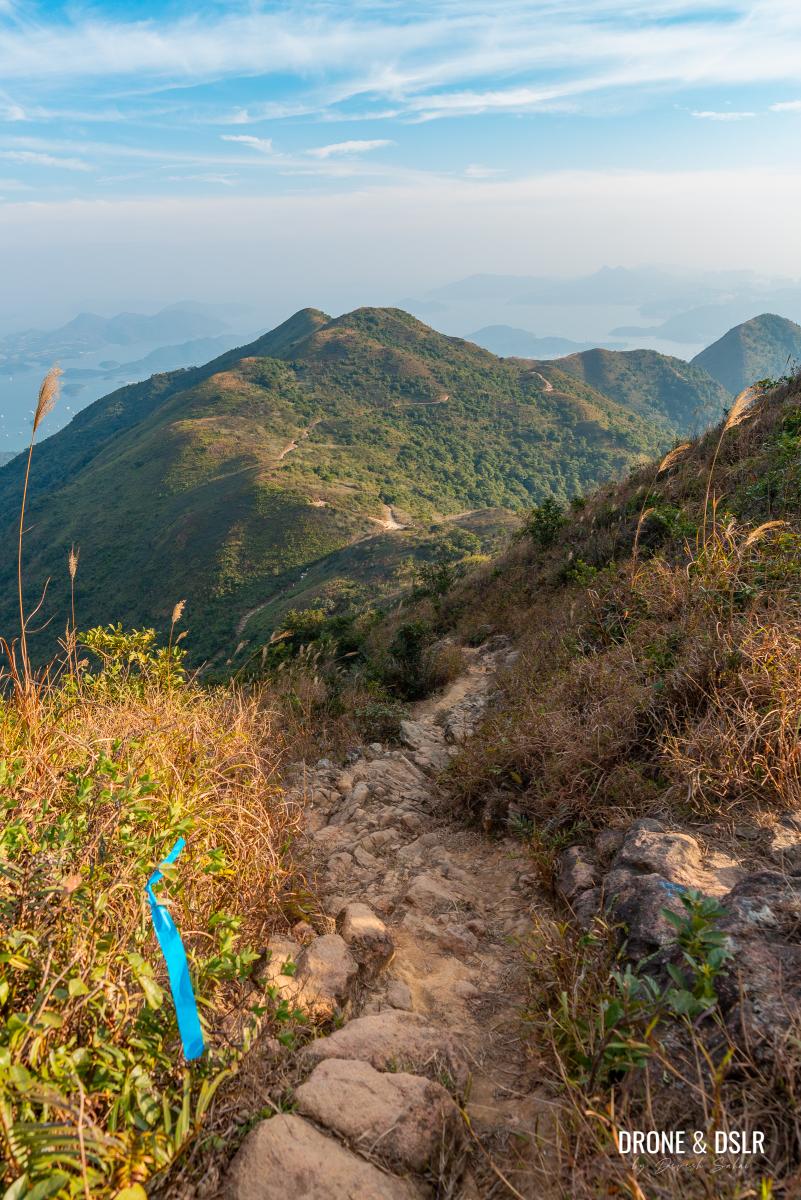
If you had brought gloves on this hike, now is a good time to break them out. The trail ahead features a sharp descent on a dry and rocky surface, which may require some extra support.
The descent from Ma On Shan
I found that lowering my body, and using my hands to grab onto the rocks and vegetation on the side helped me control my speed and descent more efficiently.
-
- Going downhill from Ma On Shan can be quite challenging

-
- Descend slowly and cautiously
Once the section with the steep descent comes to an end, you can turn around and admire the saddle-shaped Ma On Shan from here.

Have a look at the saddle-shaped Ma On Shan Peak from here
As you continue along the trail, you’ll reach another junction where the path splits off in different directions. Turn right and follow the ribbon markers to guide you through the next section of the hike.
-
- The trail flattens after the steep descent
-
- At this point, turn right
-
- Follow the ribbon markers
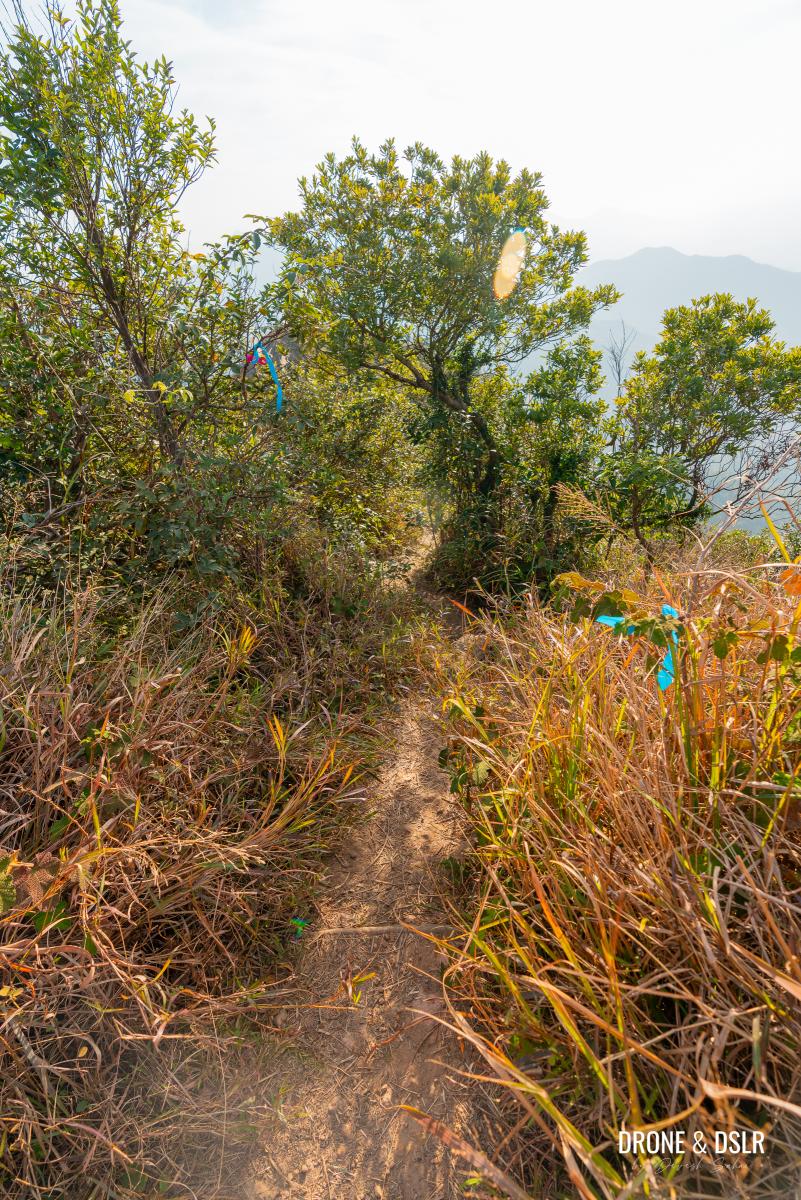
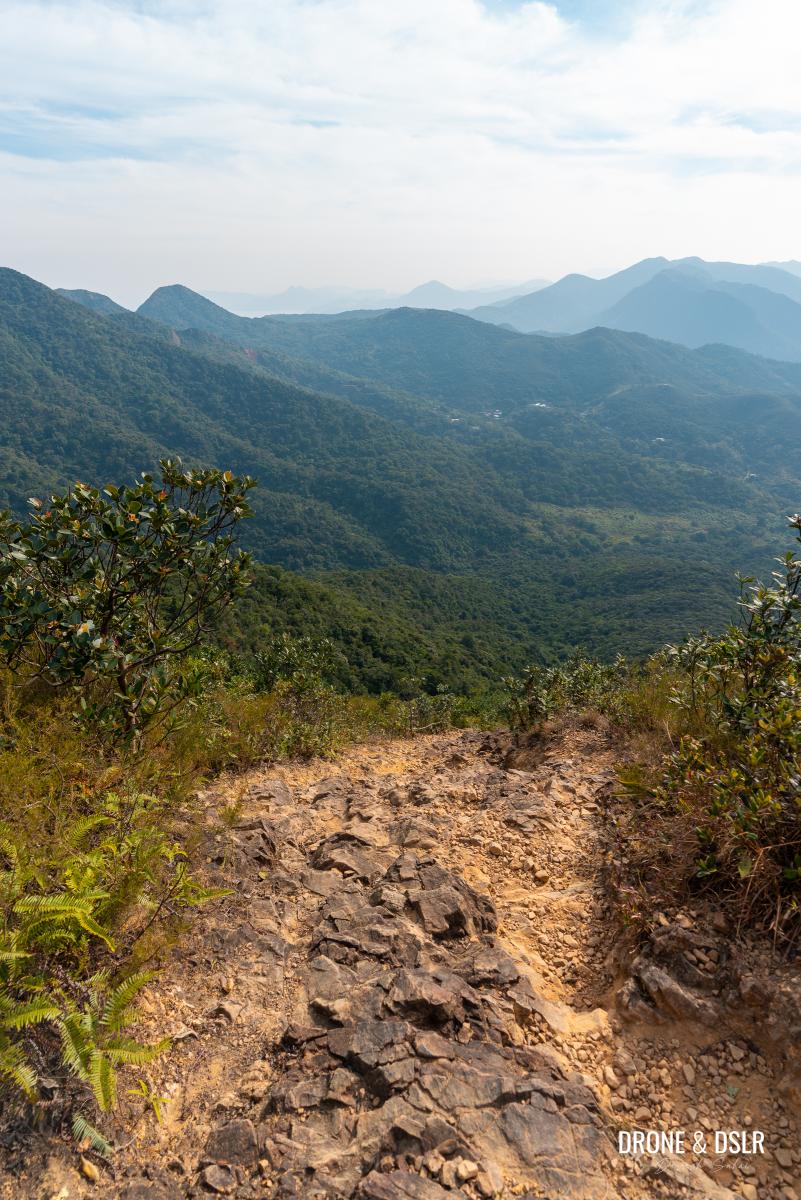
The trail will then pass through some more vegetation before reaching a left turn, which marks the start of another steep descent. Be aware that this initial section can be just as challenging.

Stop and take the trail headed downhill on the left
I found the initial section of this descent to be equally challenging, but having gloves helped. Go slow and be careful not to trip on any loose rocks.
-
- Begin the final descent from Ma On Shan
-
- Be careful while descending this section too

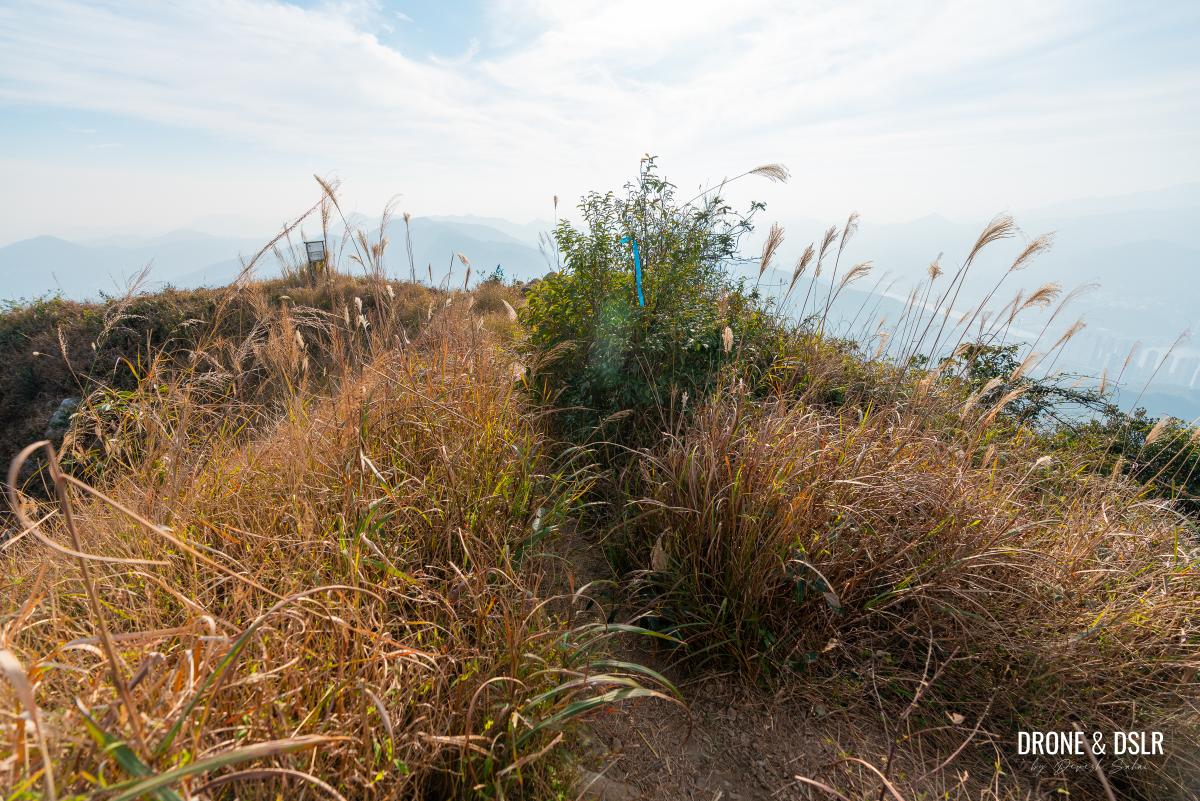
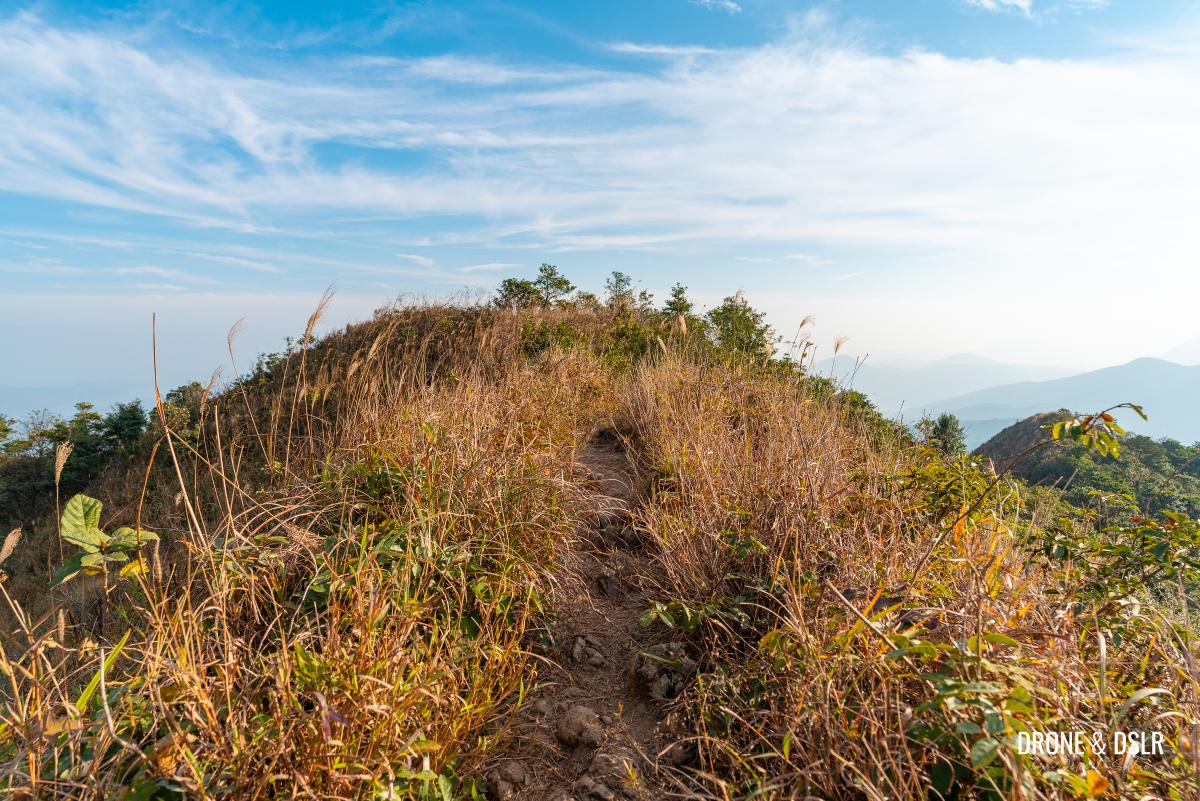
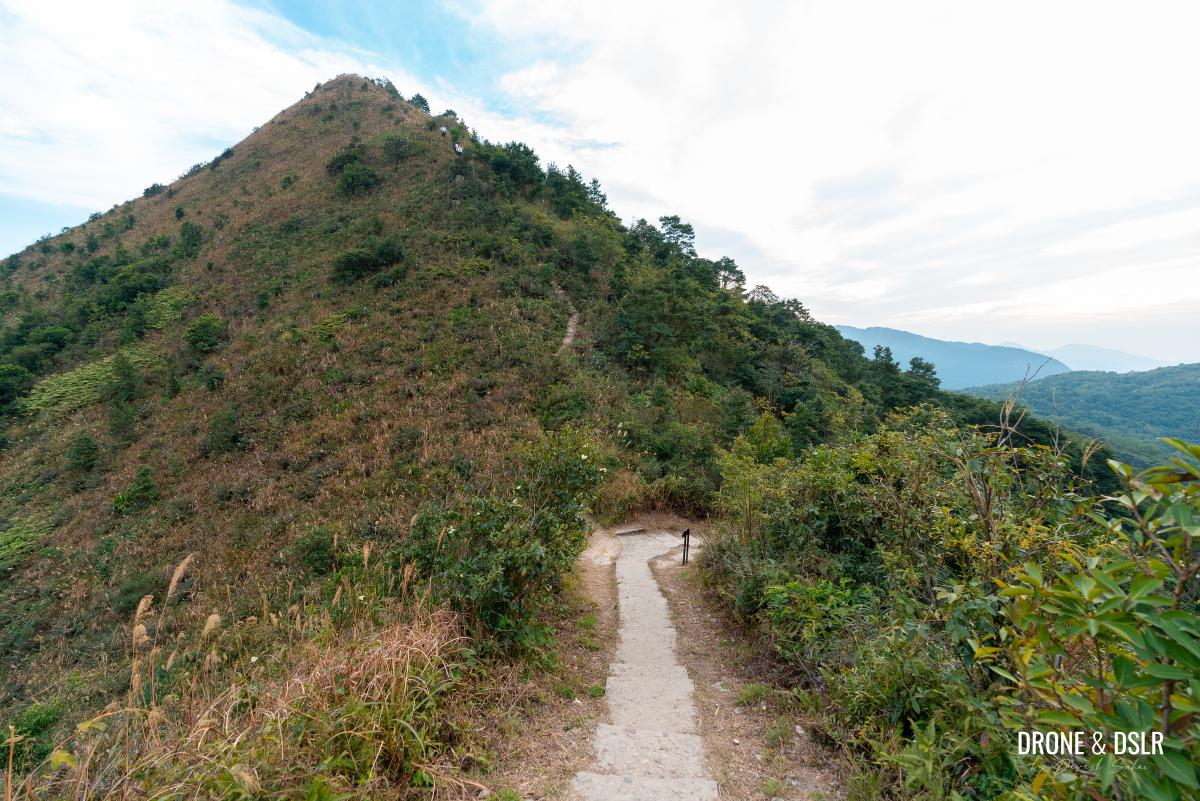
After the steep descent, the trail narrows and meanders before finally cutting through an area of silvergrass to connect with MacLehose Trail Section 4 at Ma On Au.
-
- After the downhill section, the trail flattens and cuts through silvergrass
-
- And you finally merge with Maclehose Trail Section 4 at Ma On Au
Congratulations! The hardest section of the hike is now behind you.

Ma On Shan viewed from Maclehose Trail Section 4
And what comes next is a gem of a trail!
Continue on MacLehose Trail Section 4
There is a small scenic lookout at the beginning of this section of MacLehose Trail, but to be honest, you’ve likely seen even better views from above. Feel free to skip it.
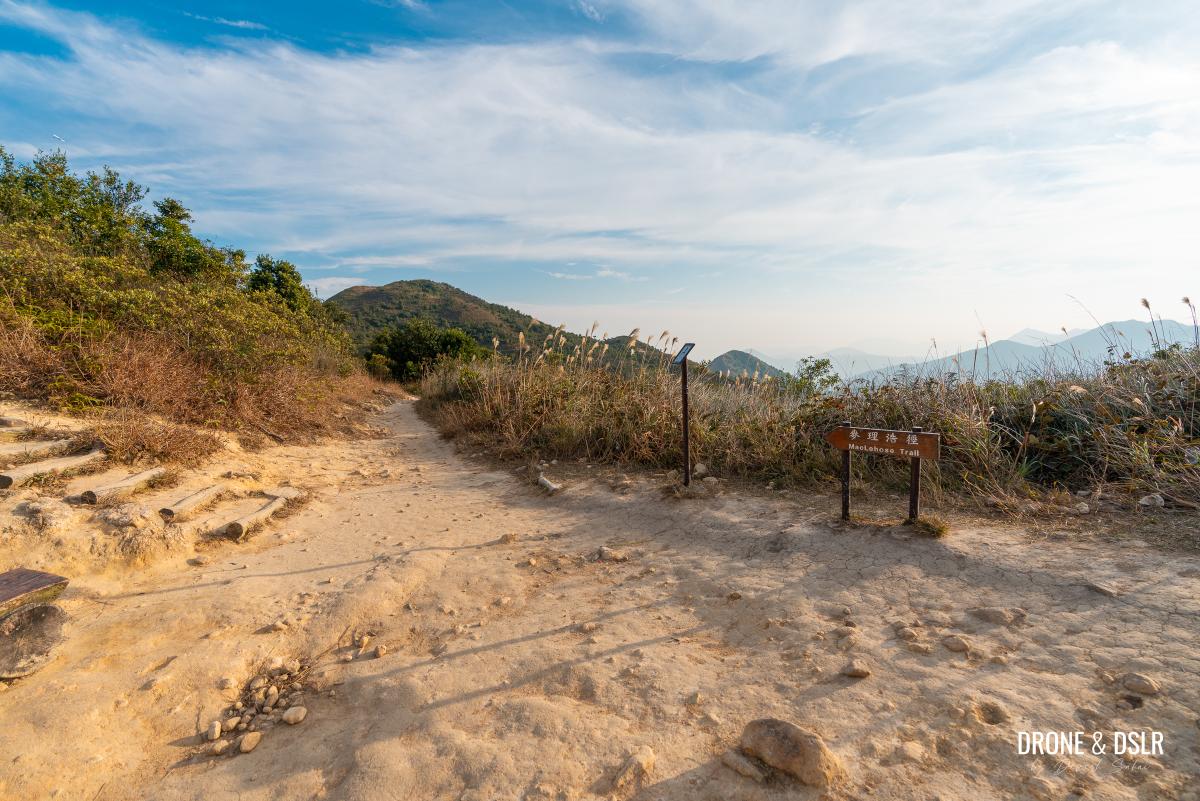
Follow the signs for Maclehose Trail to continue your hike
Continue your journey by walking ahead on MacLehose Trail. After hiking across a rough, unmarked trail, it feels good to be on a maintained trail.

It feels good to be on a maintained trail after coming down from Ma On Shan
The trail is fairly uneventful at this stage as it skirts the base of Wan Kuk Shan.
Keep following the trai las it skirts Wan Kuk Shan
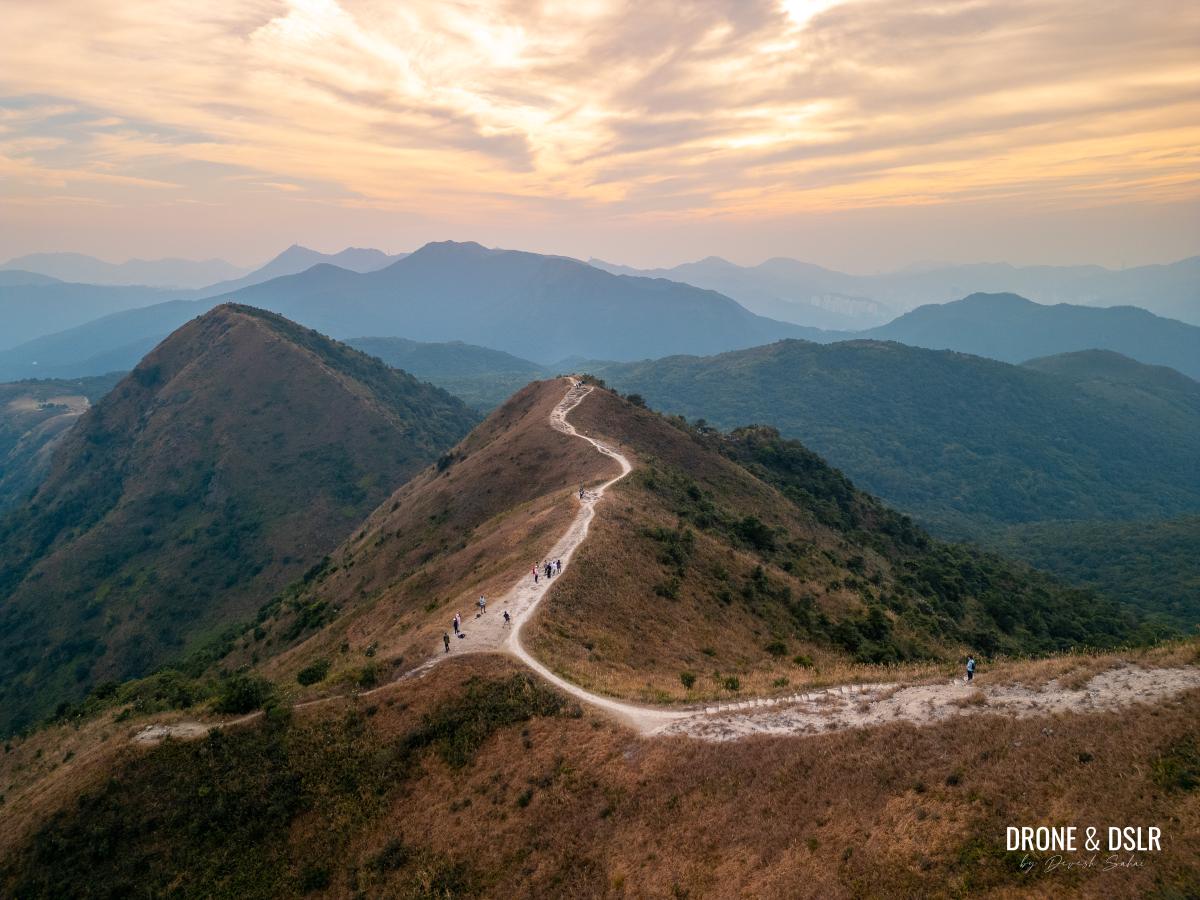
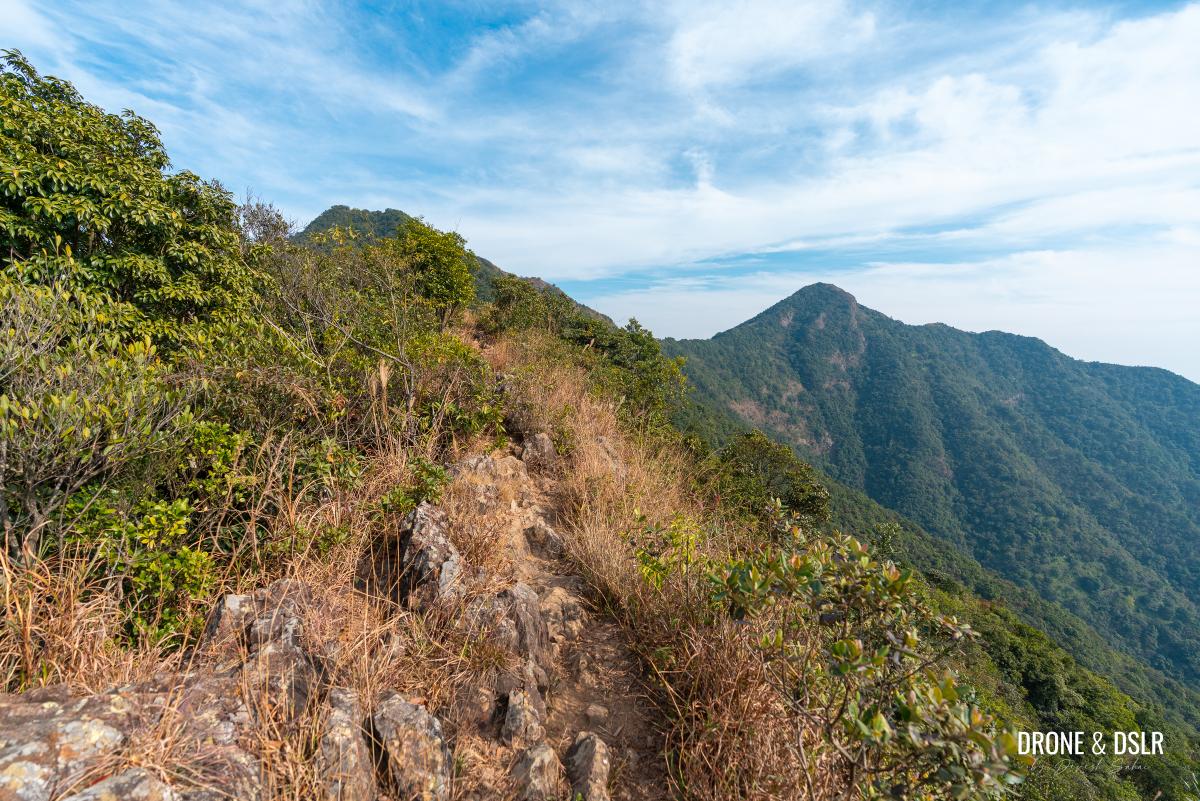
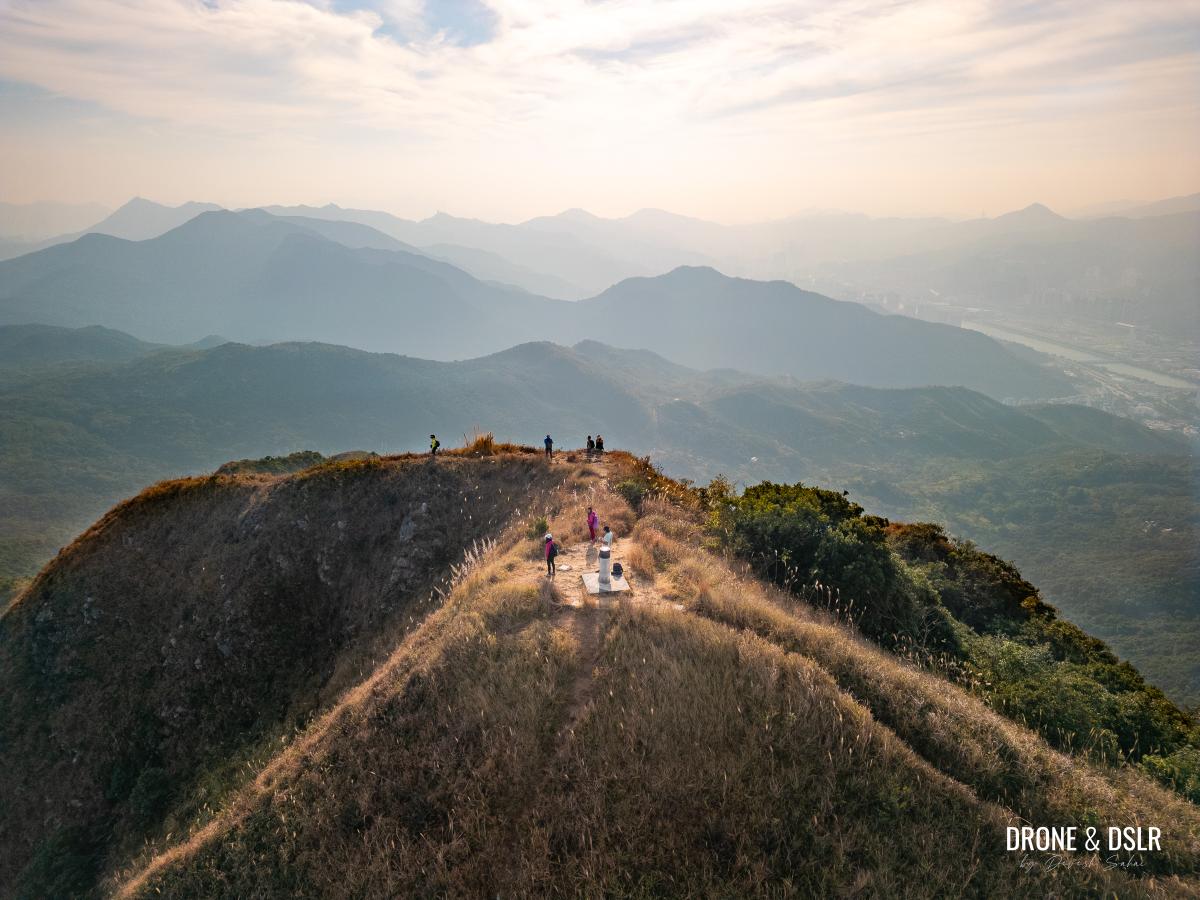
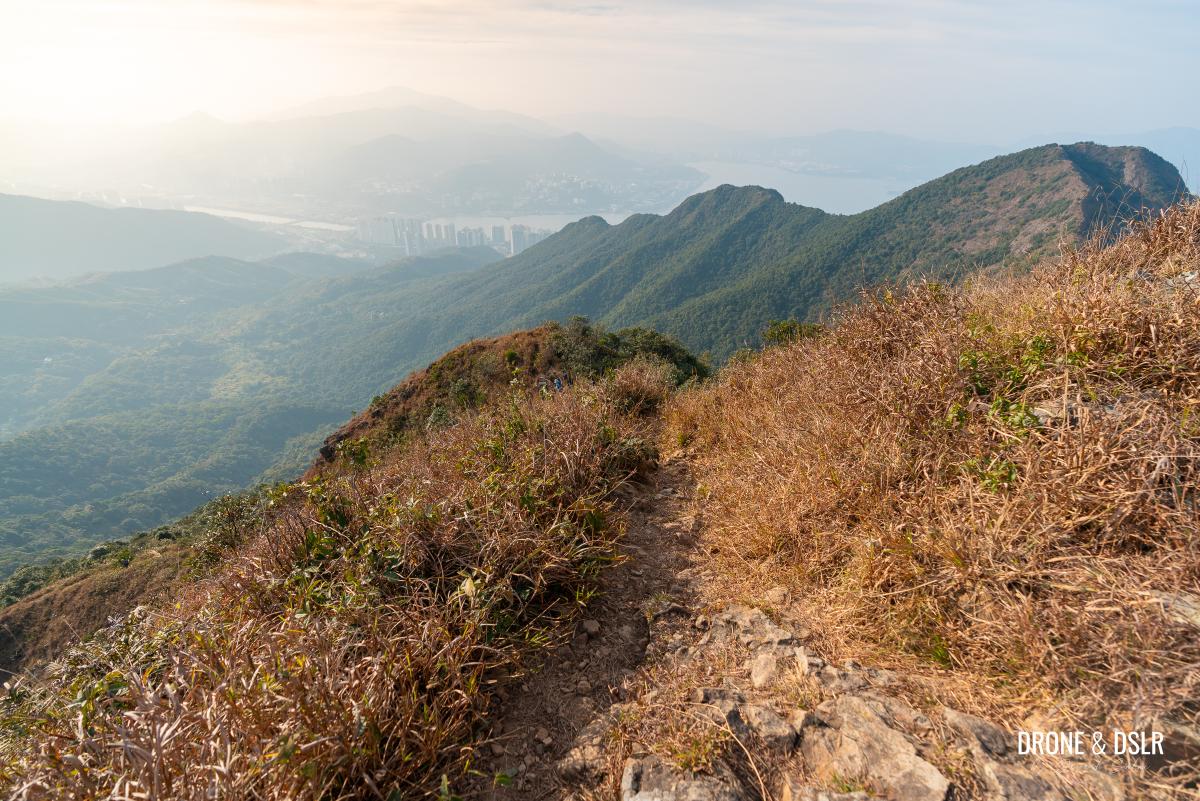
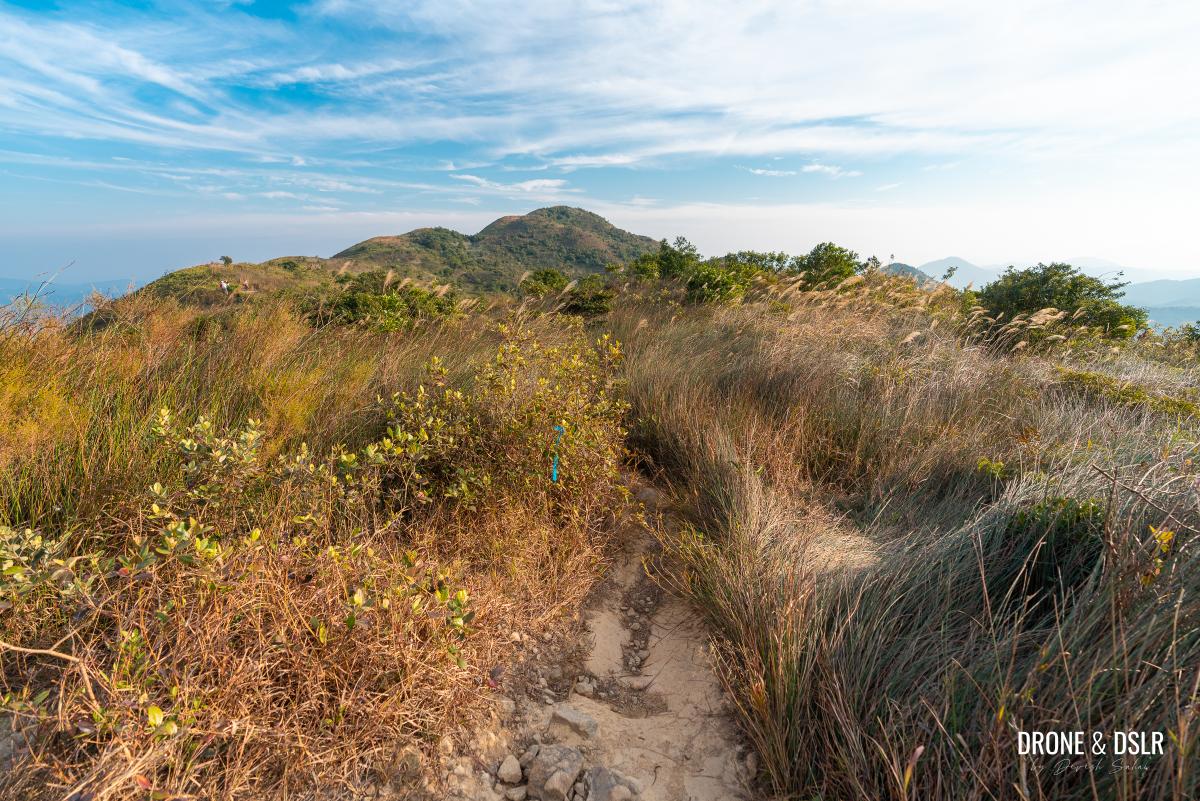
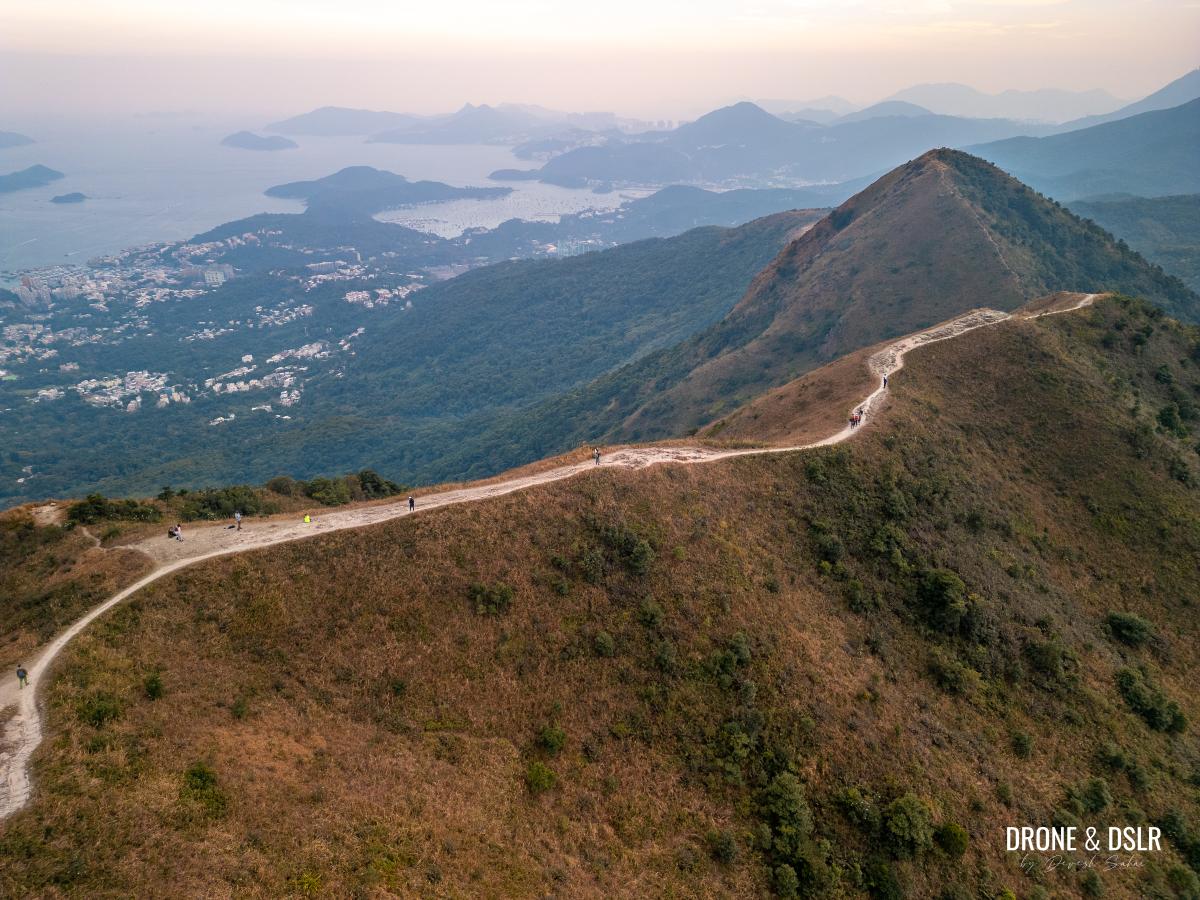
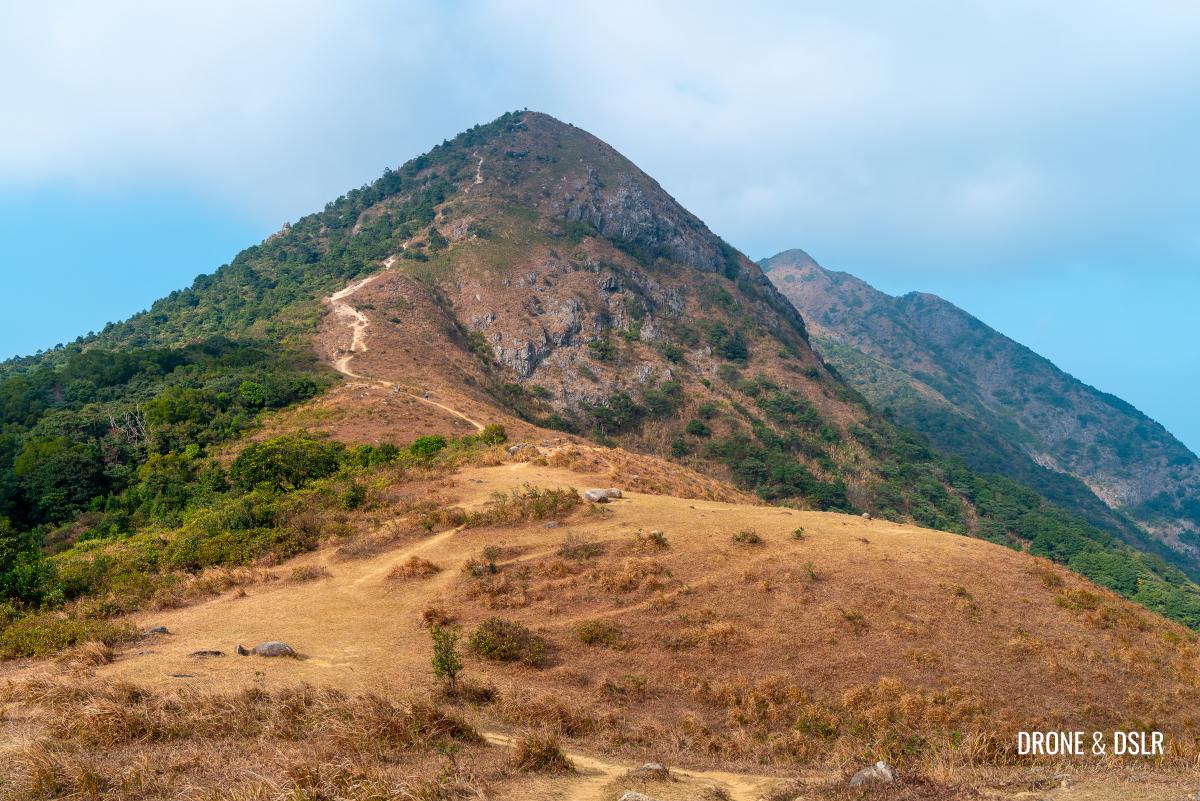
But after approximately 600 metres, you’ll arrive at one of the most scenic sections of any hike in Hong Kong — a photogenic trail that runs across a ridge overlooking Sai Kung, and Pyramid Hill.

And just around the corner is this scenic spot
This ridge is not only a stunning spot for panoramic views of Ma On Shan Country Park and Sai Kung but also is an attraction in its own right.
-
- Expect lots of hikers and photographers on this ridge
-
- The ridge offers gorgeous views of Sai Kung
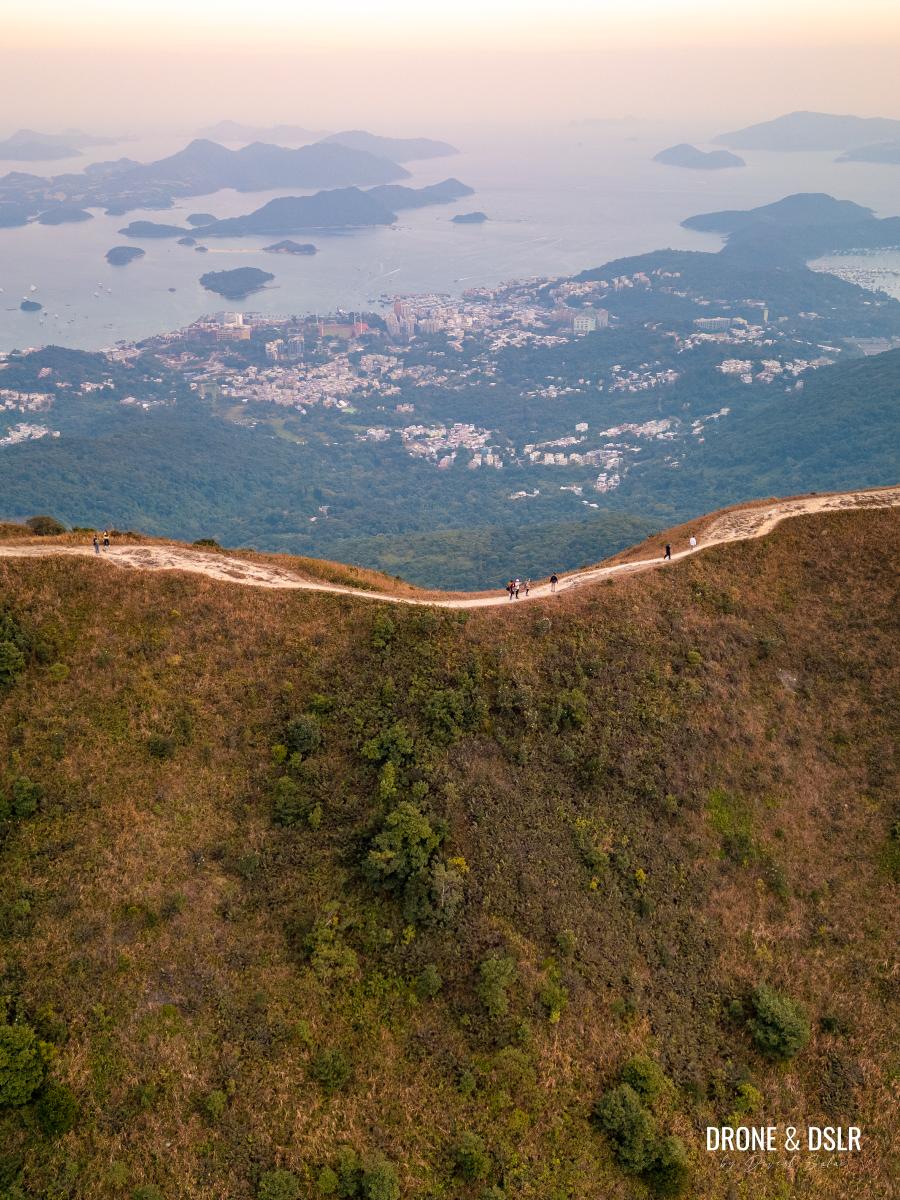
For much of the time, it’s crowded with hikers who have come to capture the perfect photo opportunity.
-
- The scenic ridge along Maclehose Trail Section 4
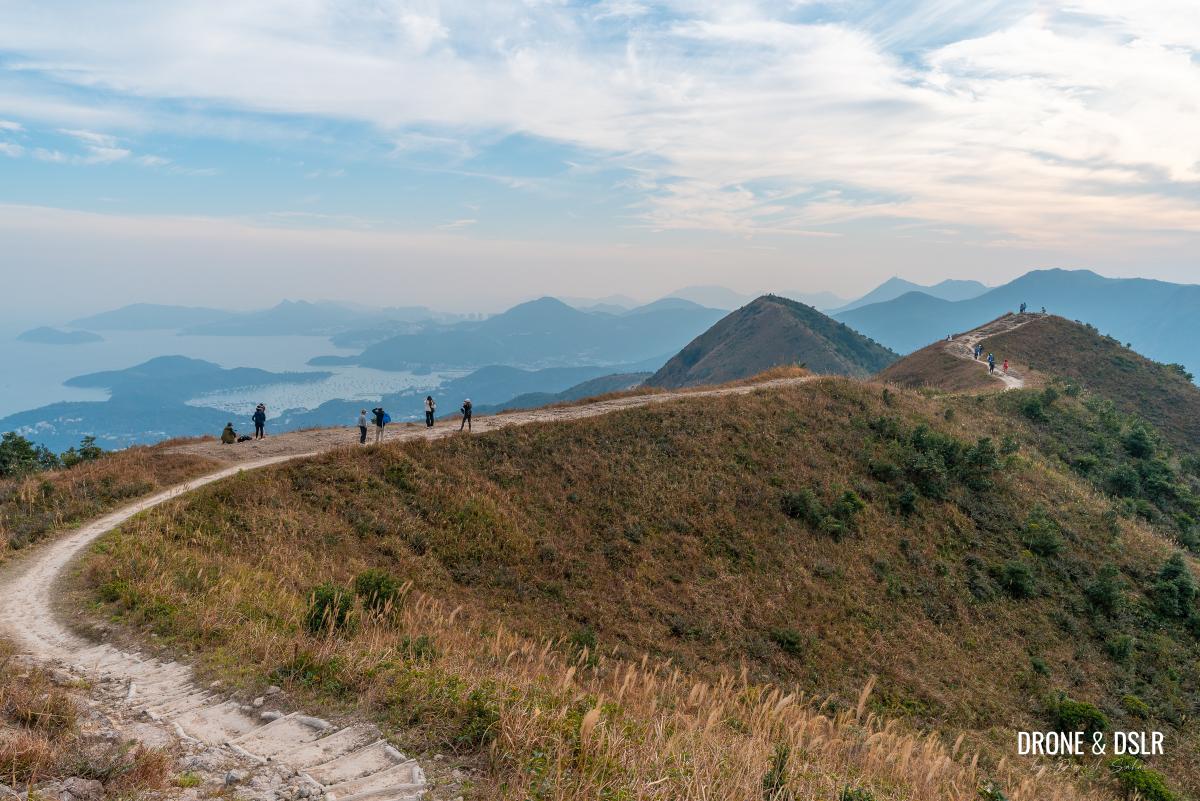
-
- MacLehose Trail Section 4

Enjoy your time and make sure you get all the photos you want from and on this ridge.

Get as many shots along the ridge
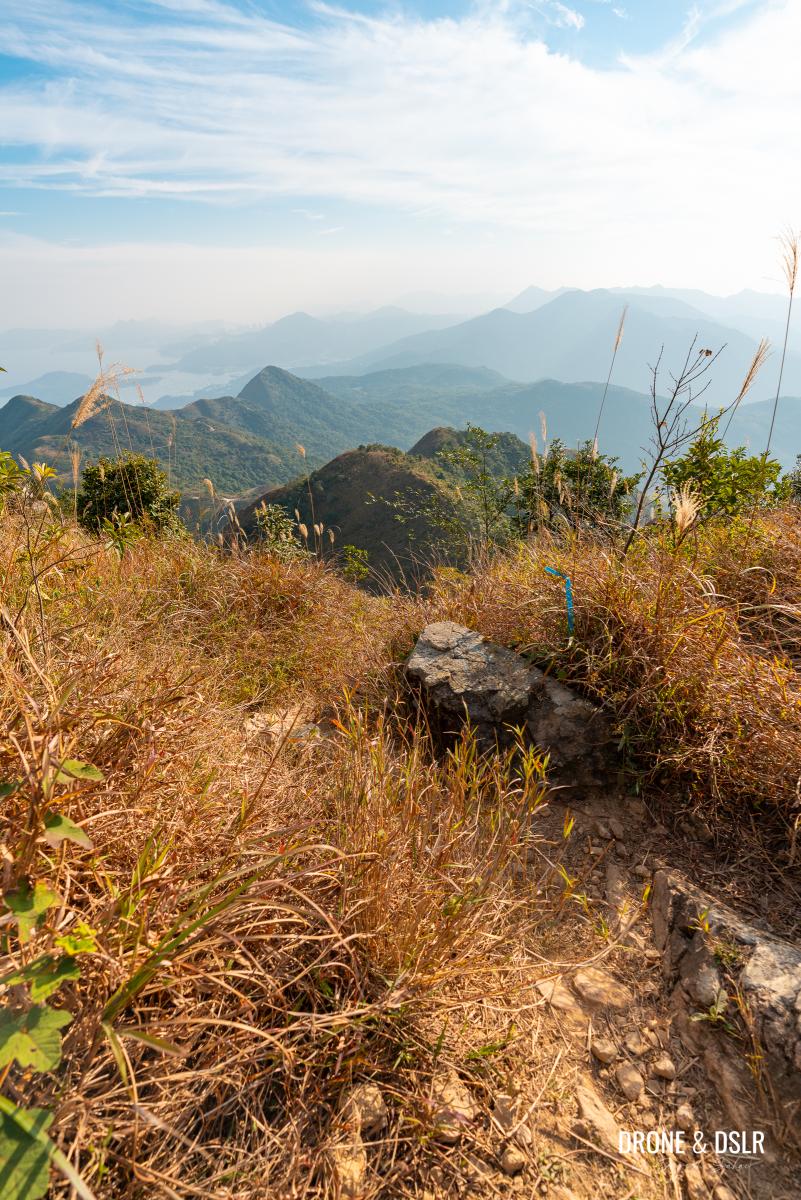
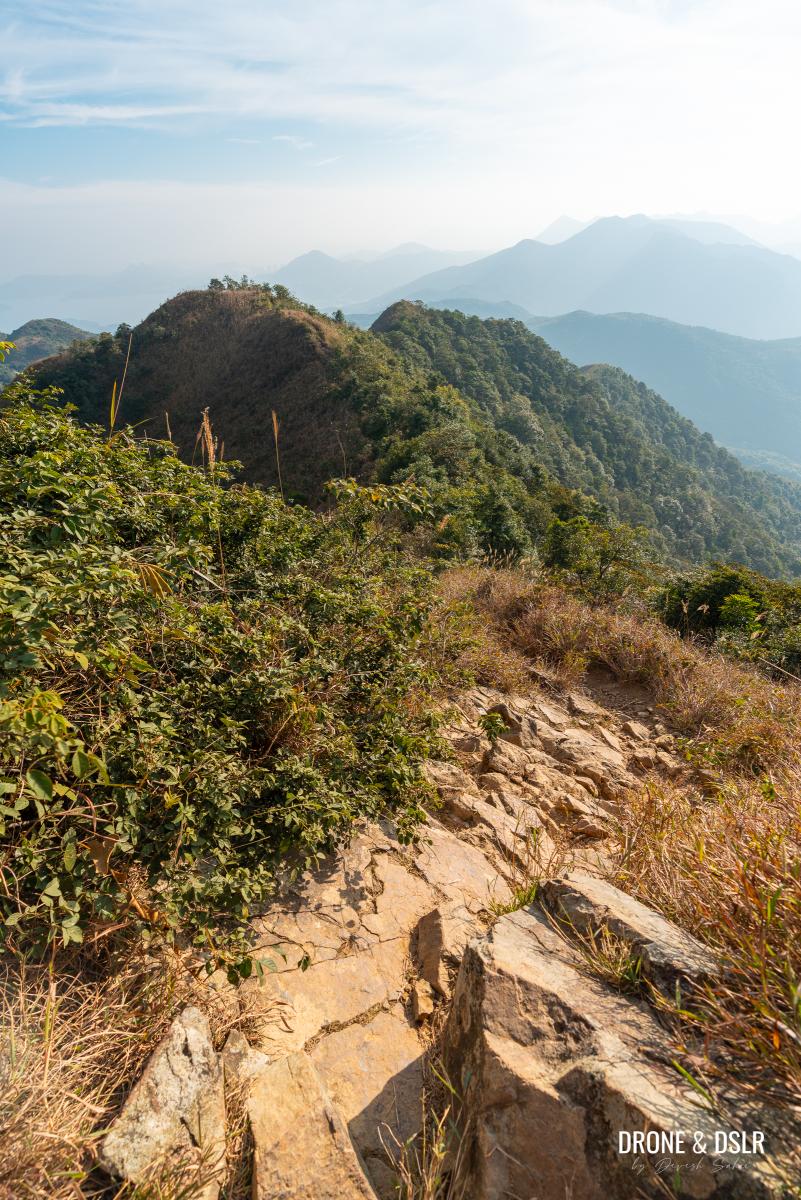
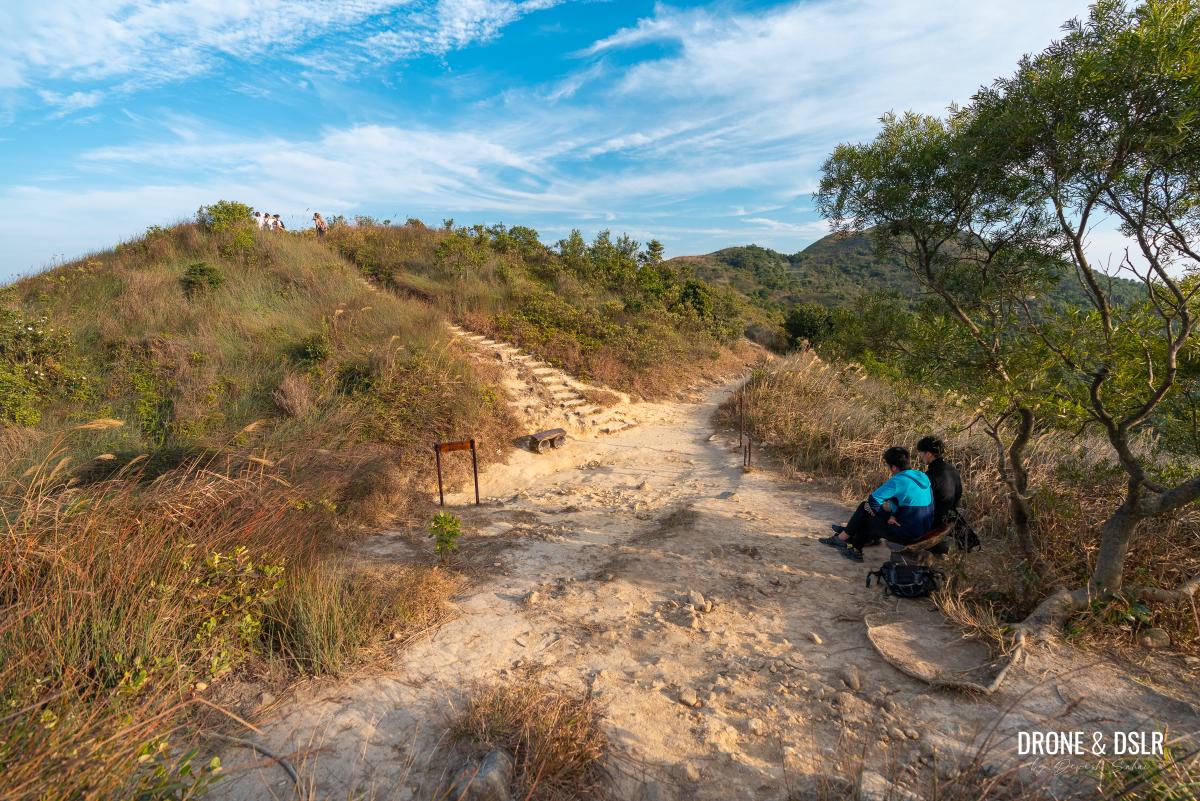
After that, walk along the ridge till the trail takes a sharp curve right and heads downhill.
-
- Walk down the ridge to continue your hike

-
- Take the steps down
-
- Keep climbing down towards Pyramid Hill

Follow the steps downhill for another 250 metres, till you arrive at the base of Pyramid Hill.
Pyramid Hill straight ahead, whereas Maclehose Trail Section 4 continues to the right
Pyramid Hill Decision Point
At the base of Pyramid Hill, you have a decision to make.
The Pyramid Hill decision point — go left or right? Choice is yours.
Consider your options:
- Climb Pyramid Hill and descend onto Ngong Ping Plateau (Hard Option): This challenging route involves climbing and descending Pyramid Hill on an unmaintained trail for approximately 500 metres. You’ll be ascending from around 450 metres above sea level (where you stand) to 536 metres, then descending back down.
- Follow MacLehose Trail to arrive at Ngong Ping Plateau (Easy Option): Alternatively, you can follow the MacLehose Trail to reach Ngong Ping Plateau. This route is relatively flat and maintained throughout the entire distance of approximately 1 km. There’s no climbing involved in this option.
I decided to opt for option 2 as I was already quite tired, and it was getting dark. And that’s what this guide will follow.
To Ma On Shan Country Trail (Easy Option)
At the base of Pyramid Hill, turn right and follow the signs to continue on the MacLehose Trail.
Continuing downhill along Maclehose Trail Section 4
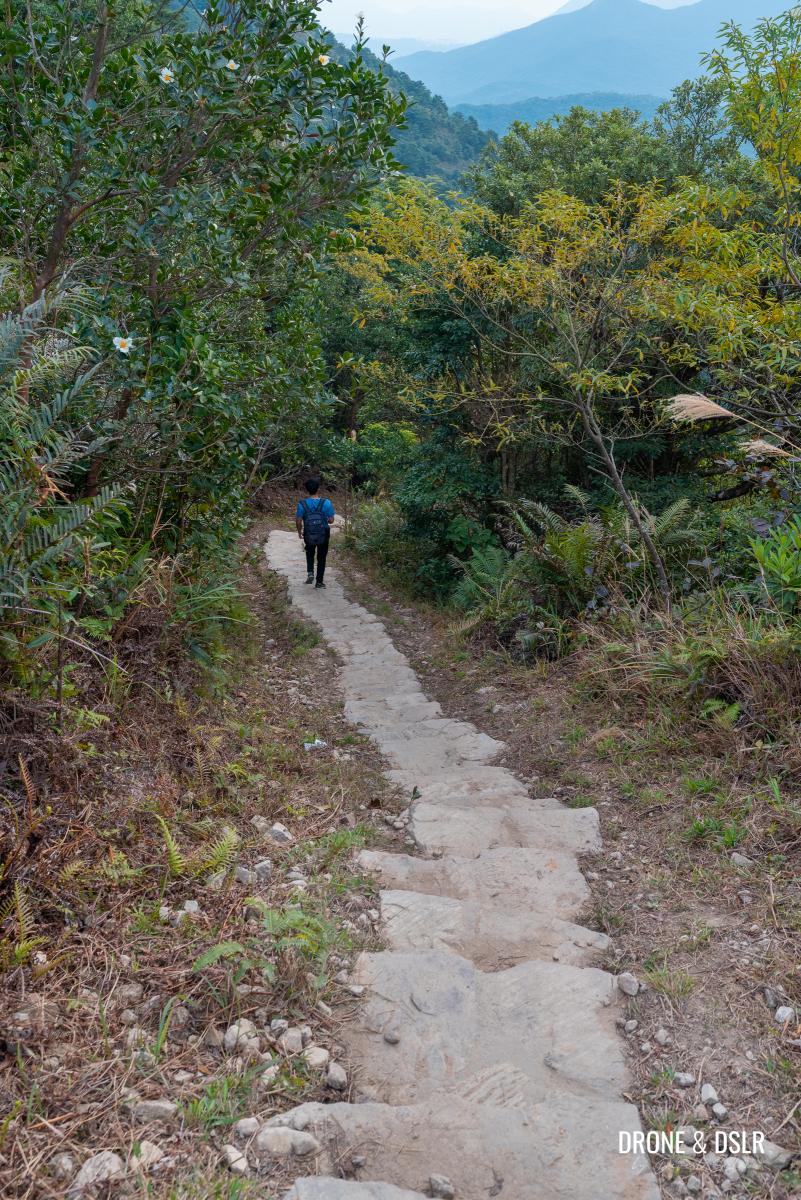
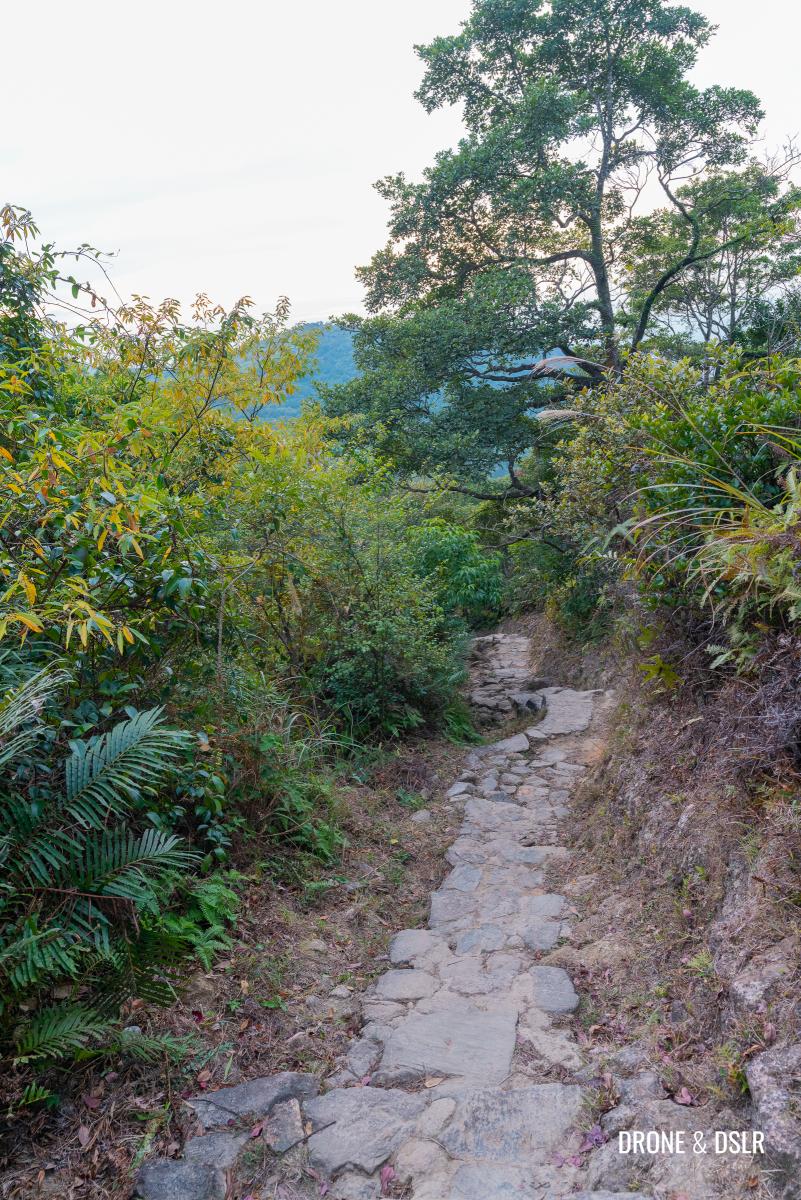
The trail continues downhill on stone steps till it descends below the tree line.
Stay on the trail as it comes below the tree line
Once beneath the canopy of trees, the path shifts from stone to dirt and continues along.
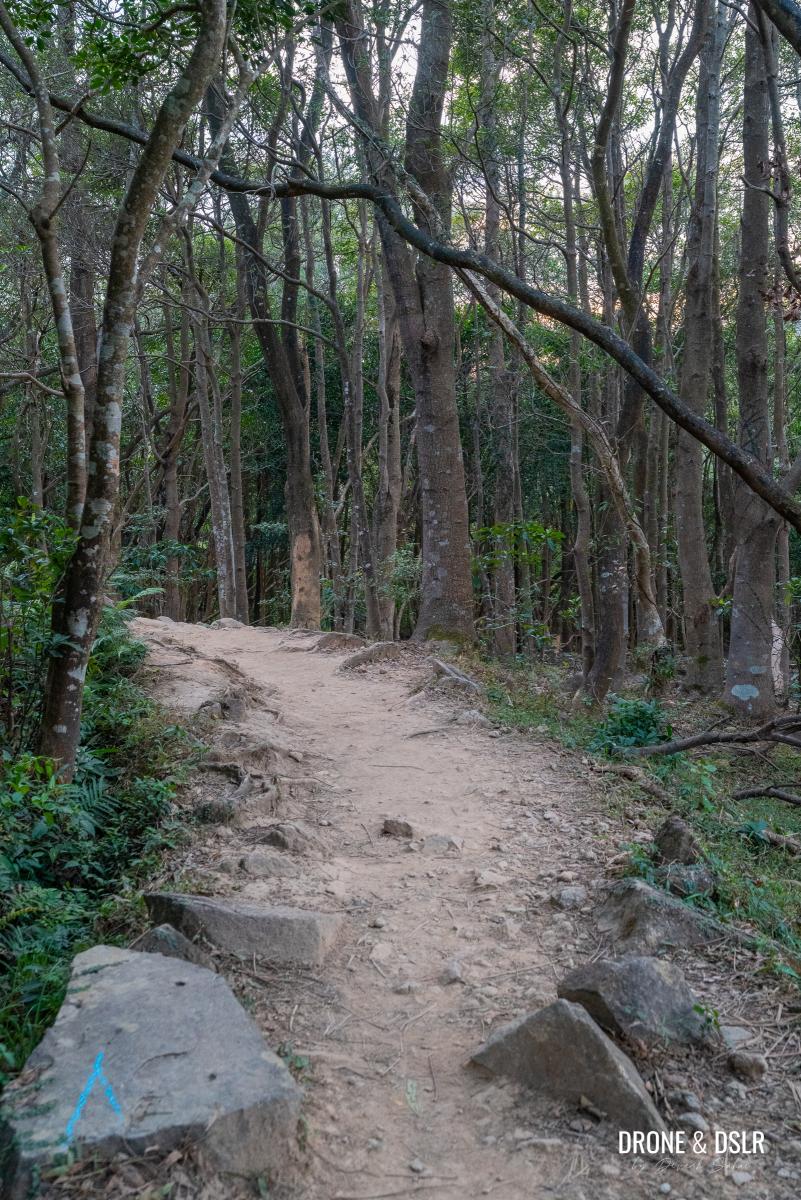
No surprises along this option. Just a straightforward trail.
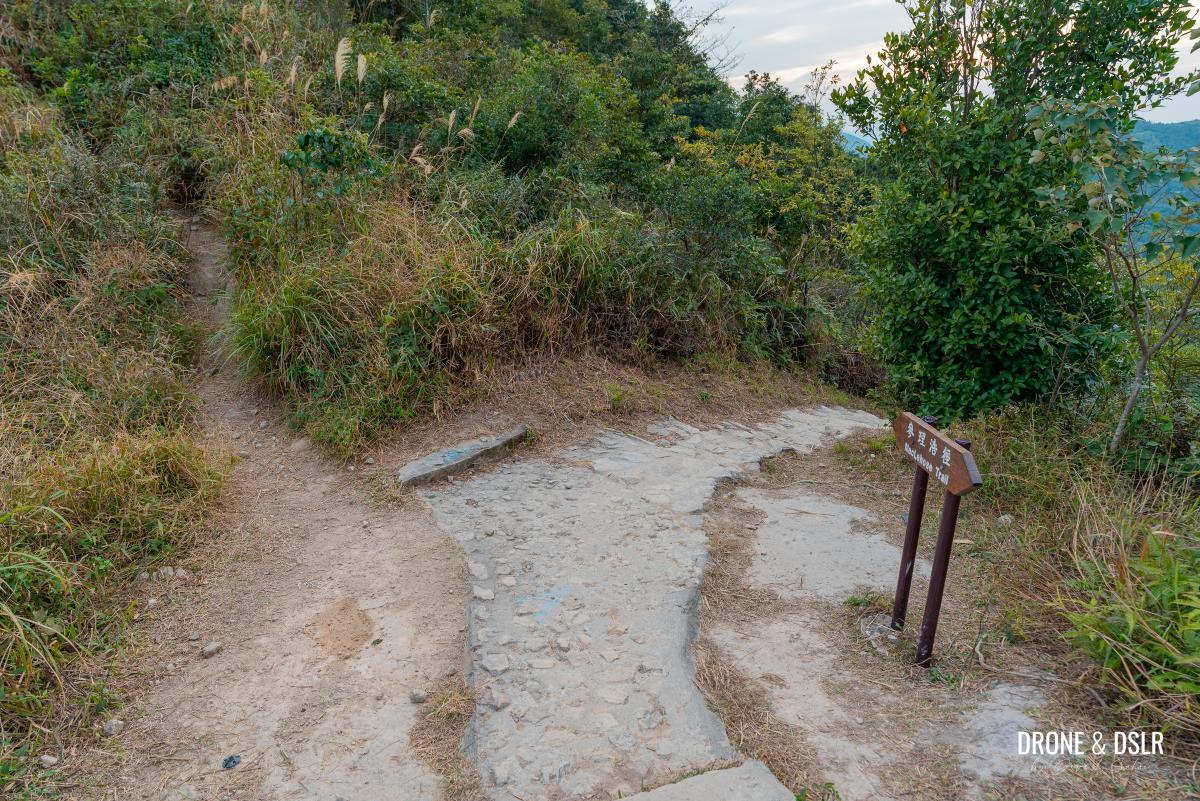
As you make your way along this trail, it will eventually arrive at a large clearing with a pavilion. This is where the MacLehose Trail and the Ma On Shan Country Trail start their overlap.
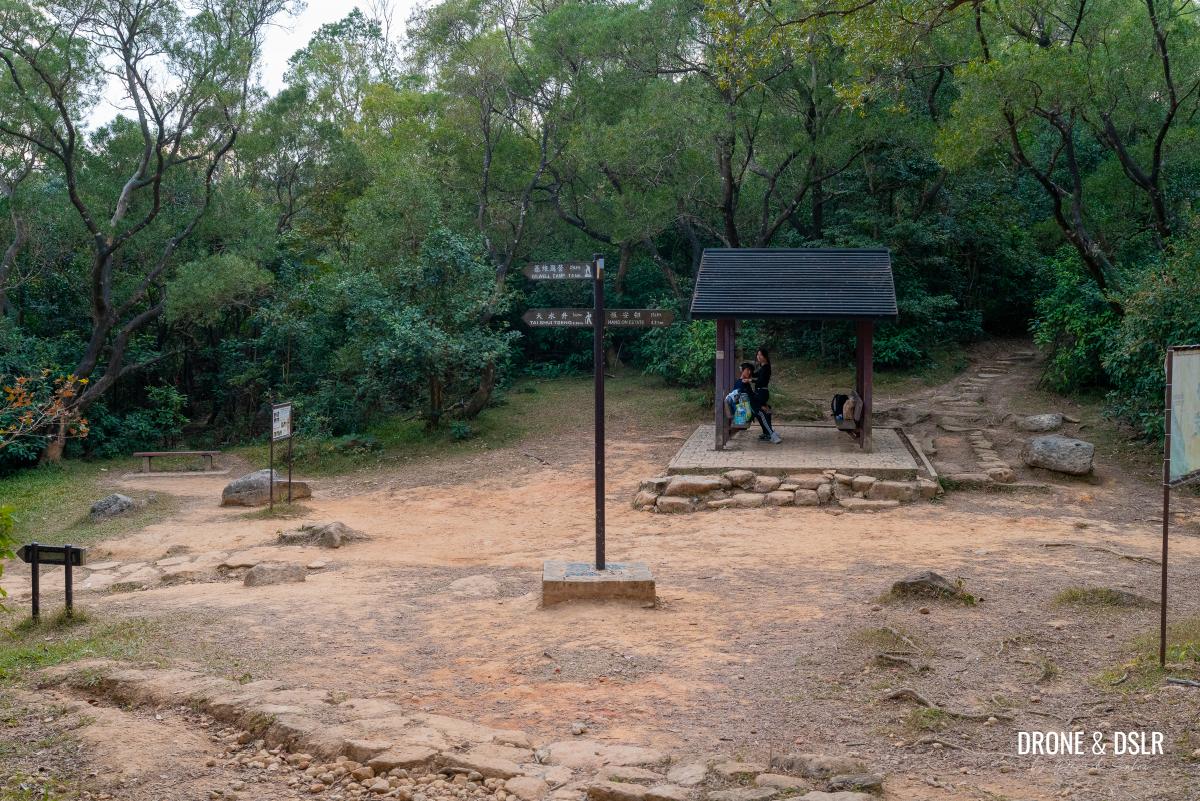
The trail reaches this resting point where it begins its overlap with Ma On Shan Country Trail
To continue your journey, turn left (follow signs for Gilwell Camp and Tai Shui Tseng) onto Ma On Shan Country Trail/MacLehose Trail Section 4.
-
- Turn left and follow the signs for Gilwell Camp and Tai Shui Tseng to keep hiking
-
- Continue walking on the trail to the left
Ma On Shan Country Trail to Ngong Ping Plateau
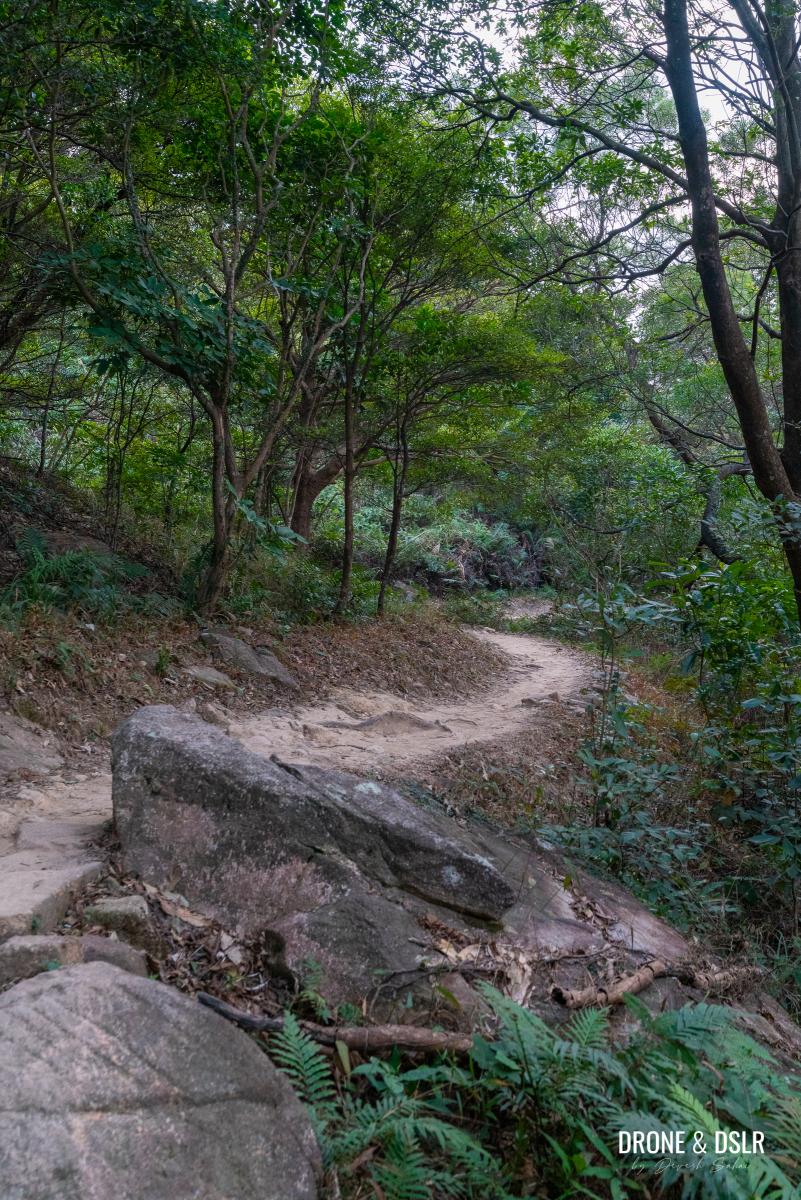
As you turn left onto the Ma On Shan Country Trail, the path begins to gently descend on stone steps before transitioning onto a dirt track.
-
- Maclehose Trail Section 4 / Ma On Shan Country Trail head downhill

-
- Transitioning onto a dirt track
For the initial part of your journey, the trail remains shaded under a canopy of trees. If you encounter any cows along this section, it’s best to let them be and continue on your way.
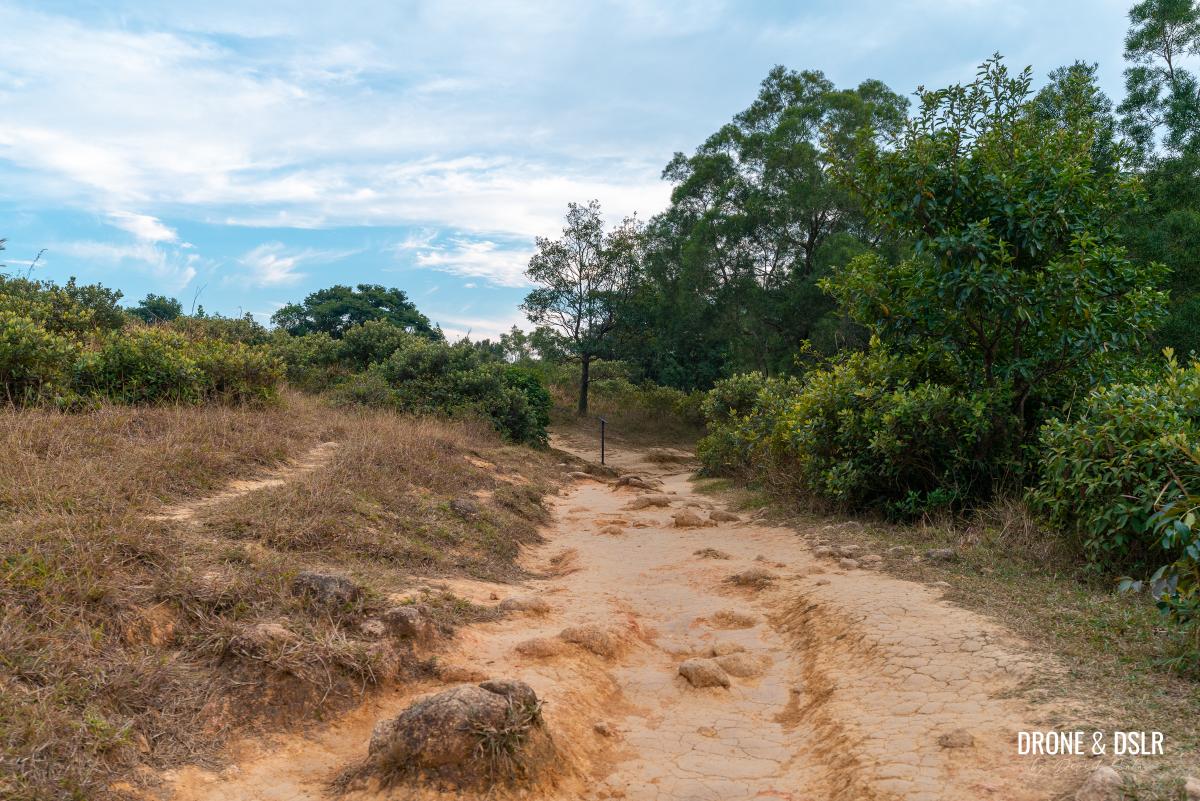
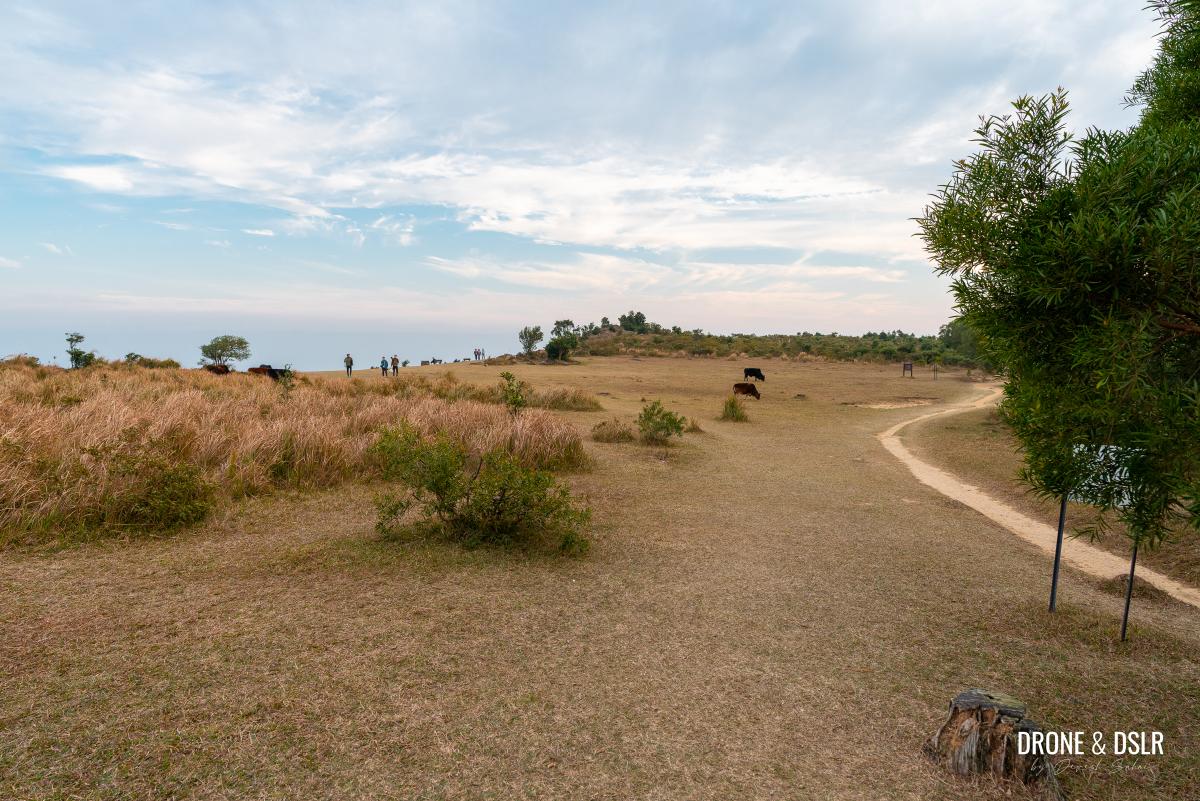
As you exit the shaded area, the trail becomes flatter and begins its approach to the Ngong Ping Plateau. Keep walking until the trail starts to curve to the right.
-
- Keep walking along the trail as it exits the shade
-
- No approaching Ngong Ping Plateau
At this point, you’ll notice several paths cutting across the grass.

Take any path to the left, towards the plateau
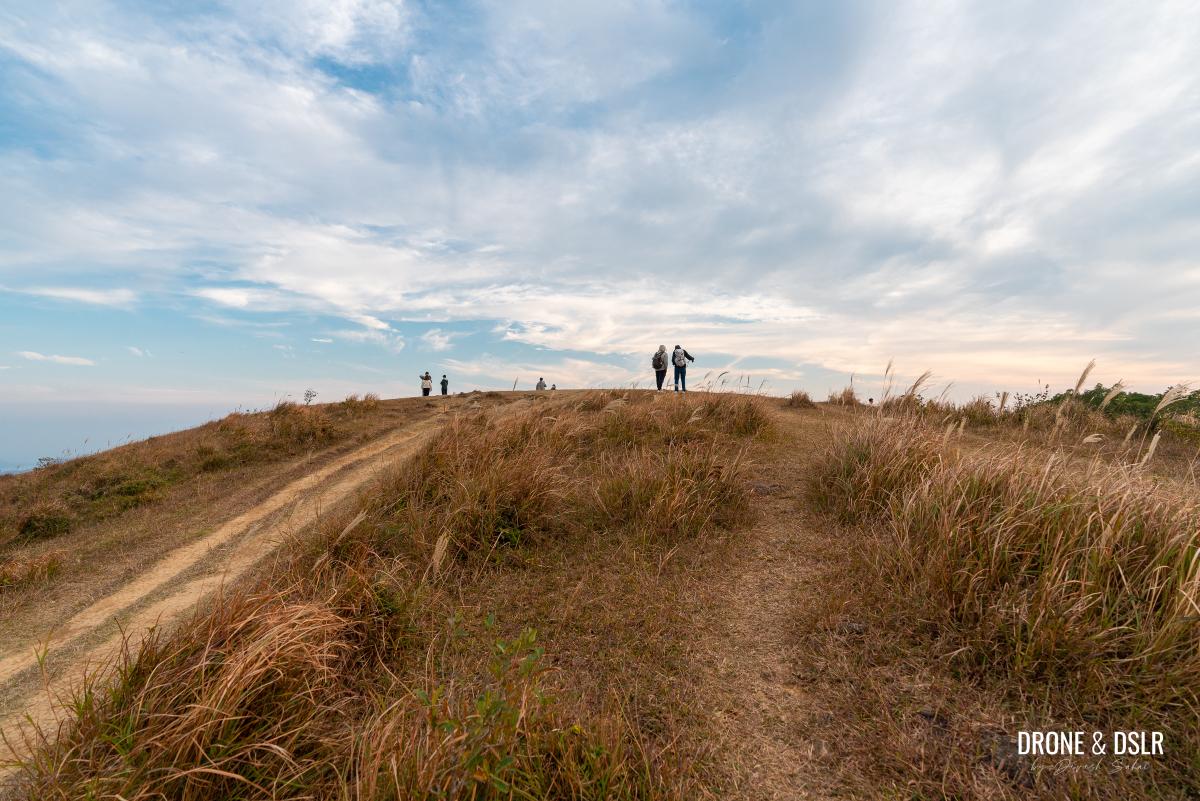
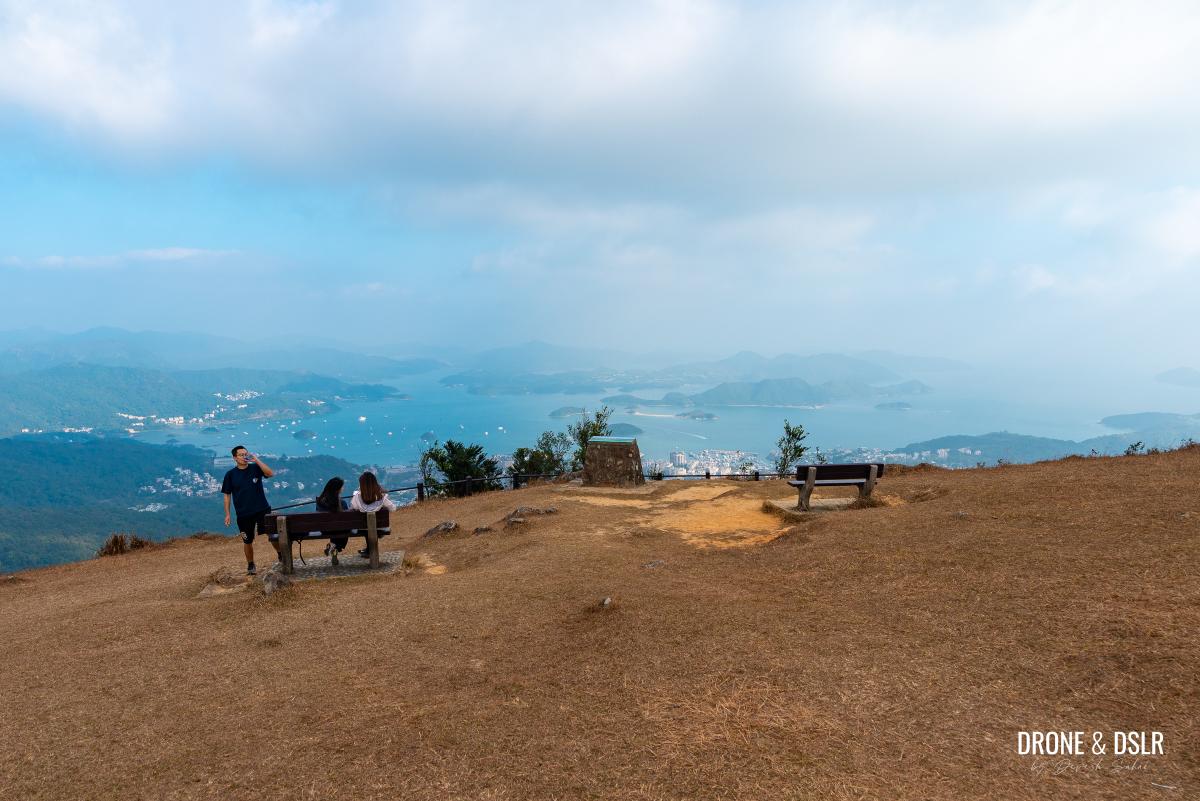
Simply cut across to the plateau, where you’ll be stunned not only of the views of Sai Kung from up here, but also by the plateau itself!
-
- Views of Sai Kung from Ngong Ping Plateau

-
- Exploring Ngong Ping
-
- More views of Sai Kung from Ngong Ping

Ngong Ping (not to be confused by the cable car on Lantau) is a popular destination among hikers and campers who come here to appreciate its sweeping views of the surrounding landscape below.
-
- The Ngong Ping Viewing Point offers panoramic views of Sai Kung and Clearwater Bay
-
- Ngong Ping is extremely popular with campers
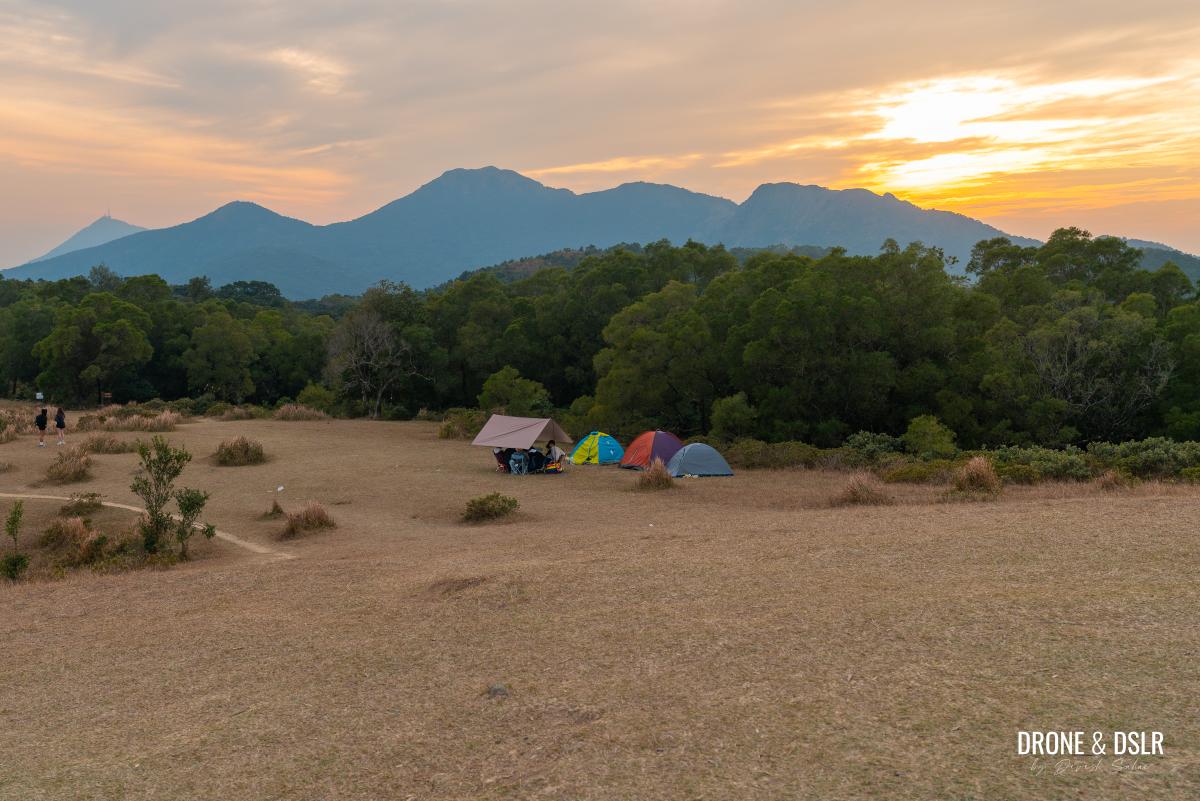
The plateau itself is also home to a campsite and often used by paragliders as a launch point for their thrilling adventures.
-
- Ngong Ping is a popular paragliding spot
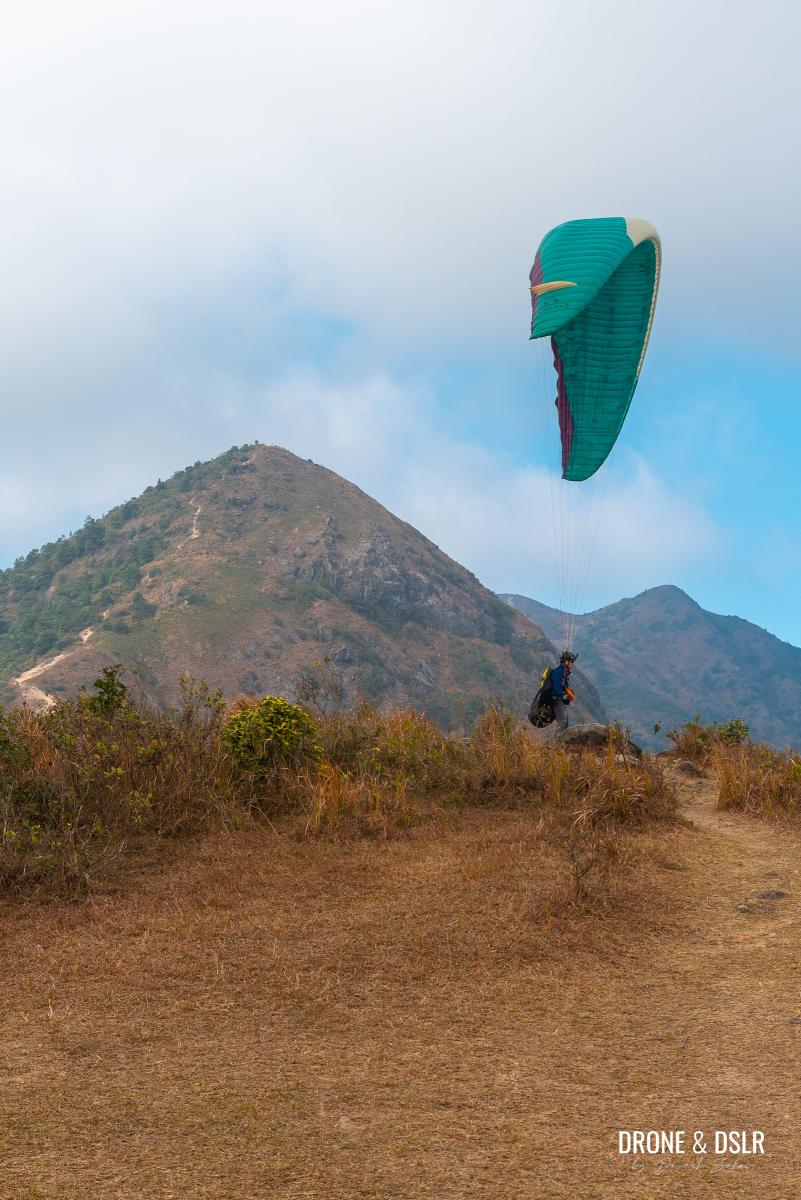
-
- The Ngong Ping plateau offers some of the most scenic views in Hong Kong
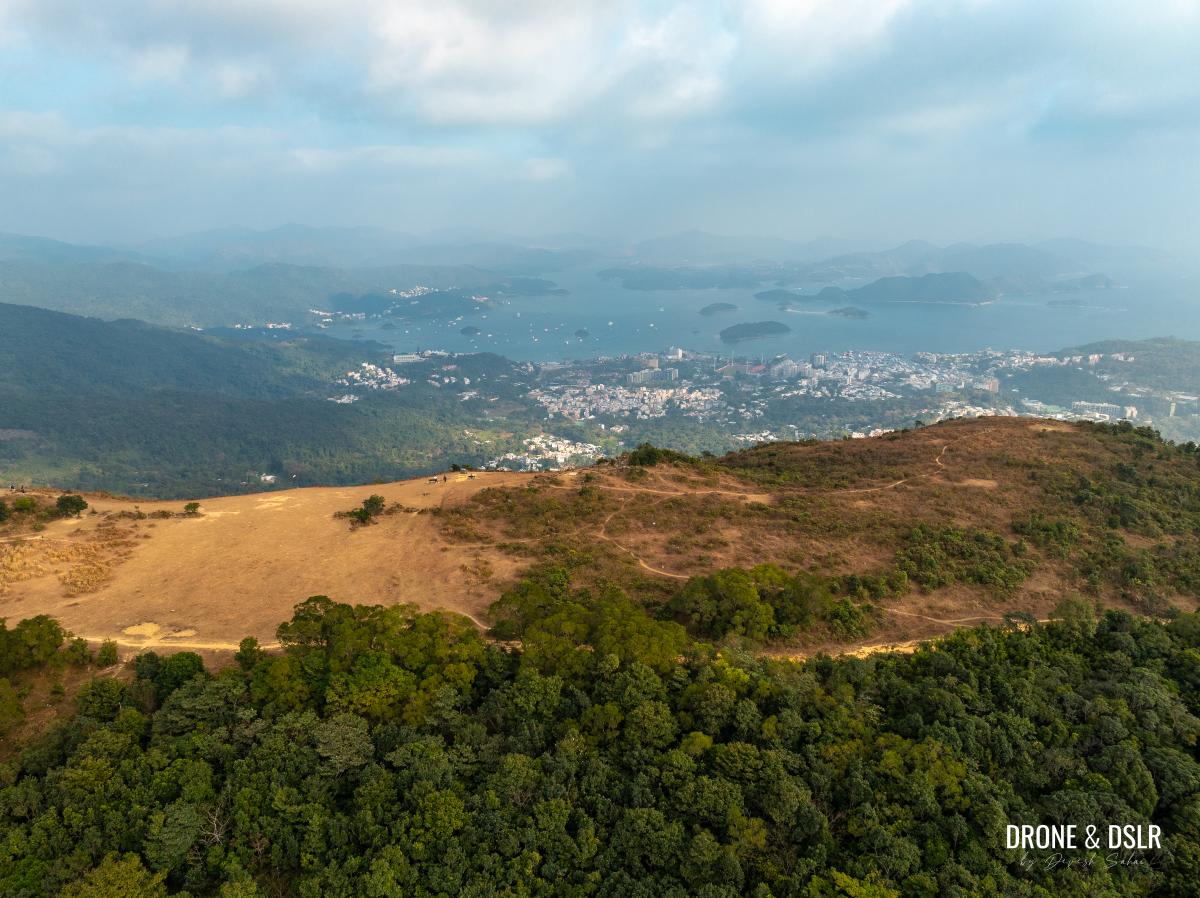
Take some time to walk around the plateau and absorb the views. You can also appreciate the views of Pyramid Hill from this vantage point.
-
- View of Pyramid Hill from Ngong Ping
-
- One of the most scenic sites in Hong Kong – Ngong Ping

Continue on Ma On Shan Country Trail / MacLehose Trail
After taking in the views from Ngong Ping, head back to join the Ma On Shan Country Trail / MacLehose Trail behind the plateau.
Return to the trail behind the plateau after you’re done exploring it
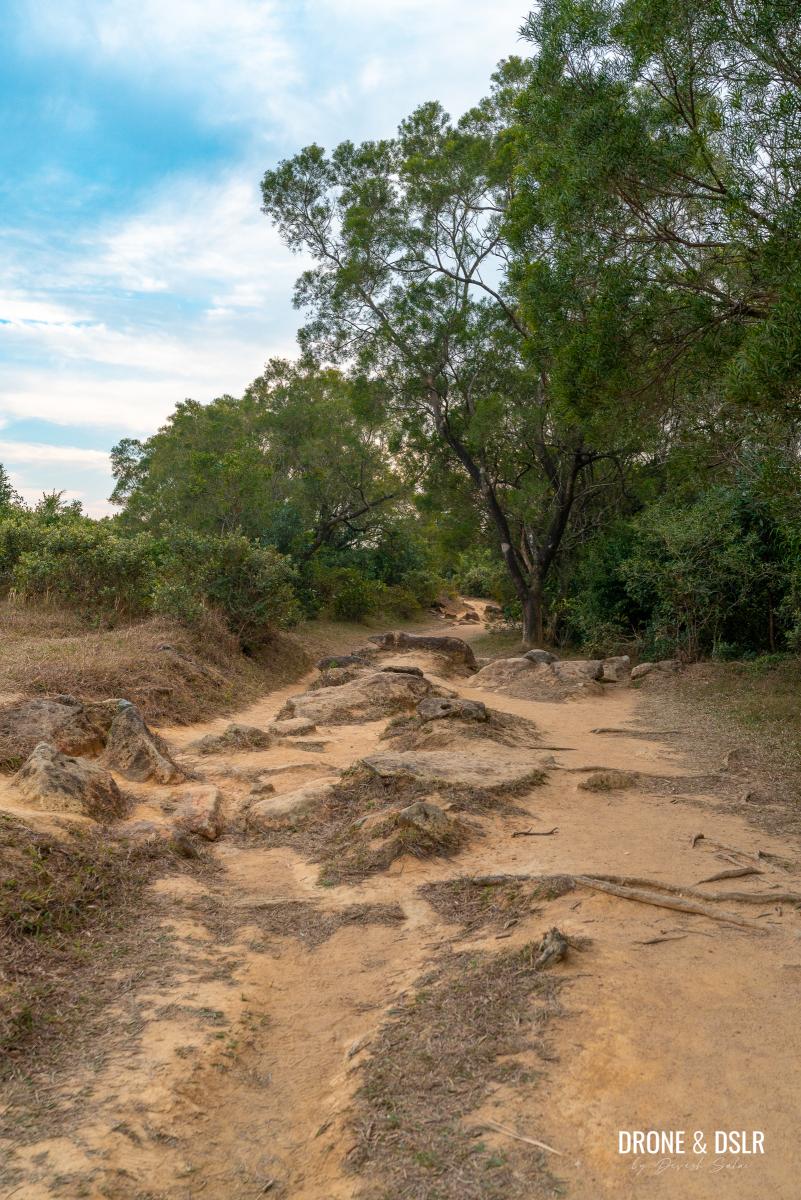
As you continue on the trail, it will gradually transform into a rugged and rocky path.
-
- The trail turns a bit rocky
-
- Stay on Ma On Shan Country Trail / MacLehose Trail

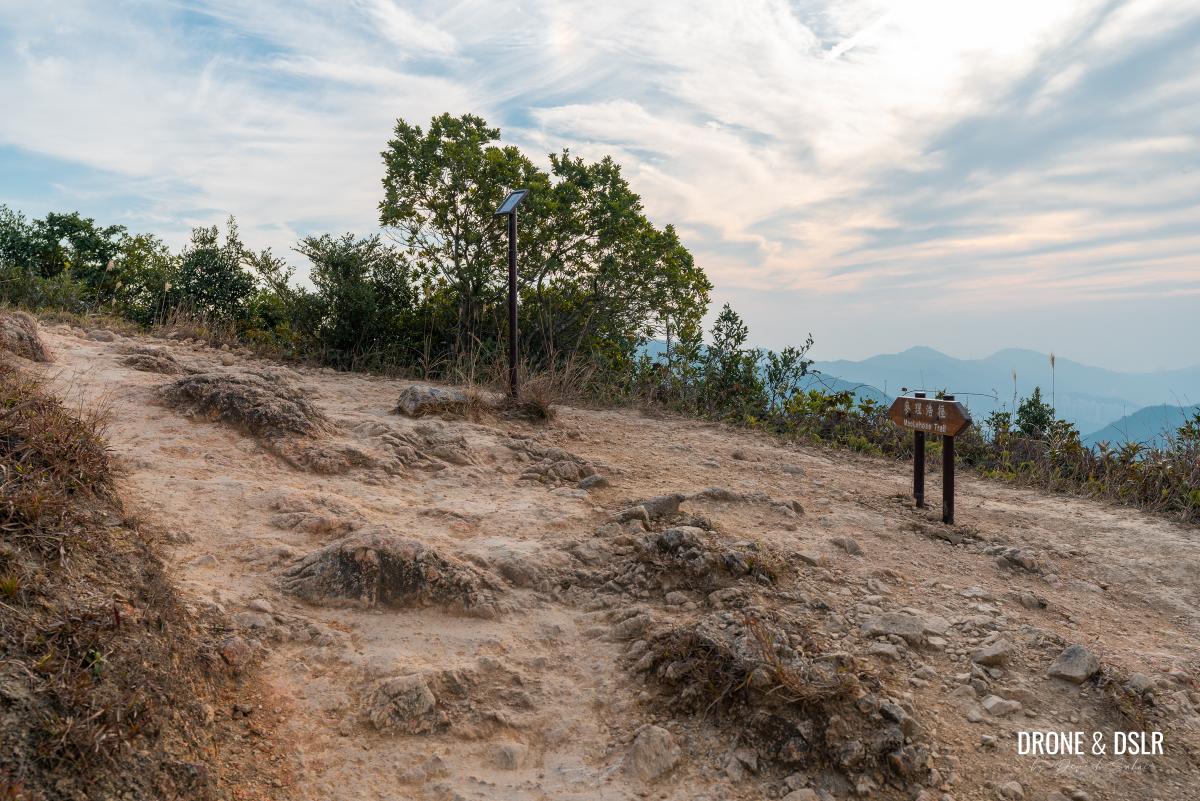
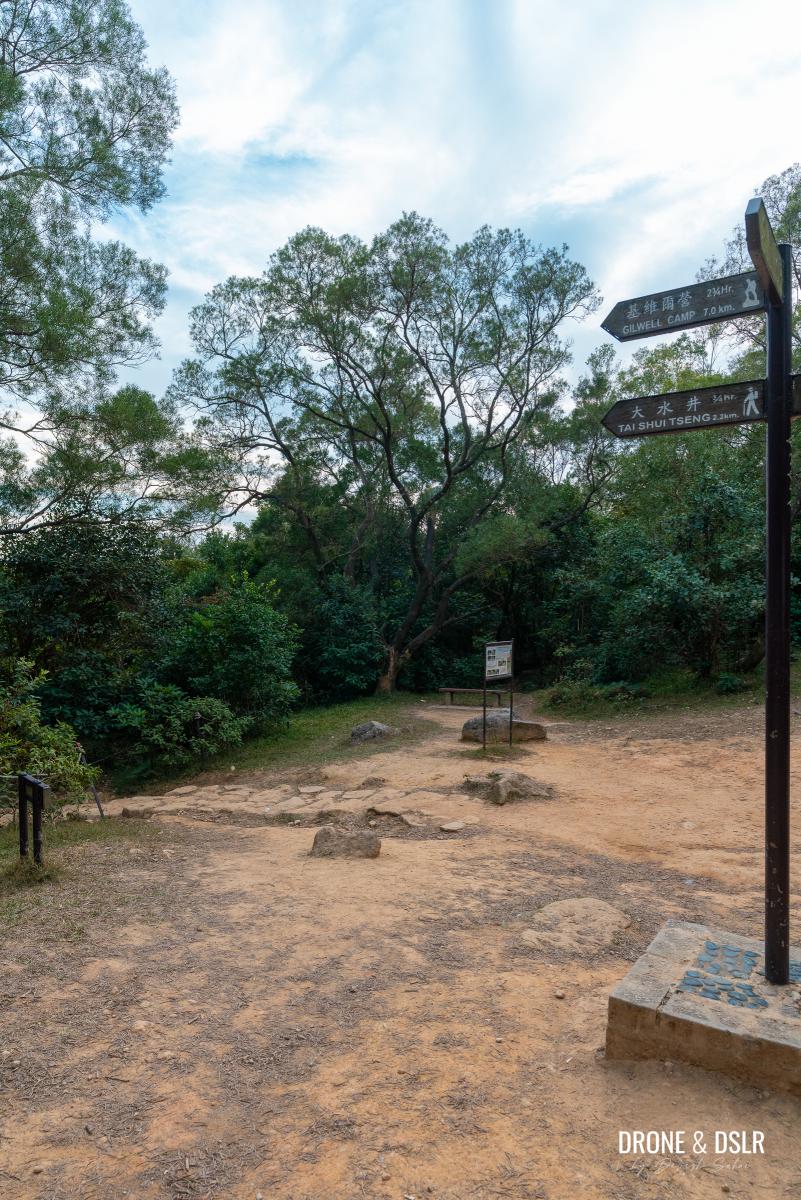
Keep walking for a short distance until you reach a three-way intersection marked by an information board.
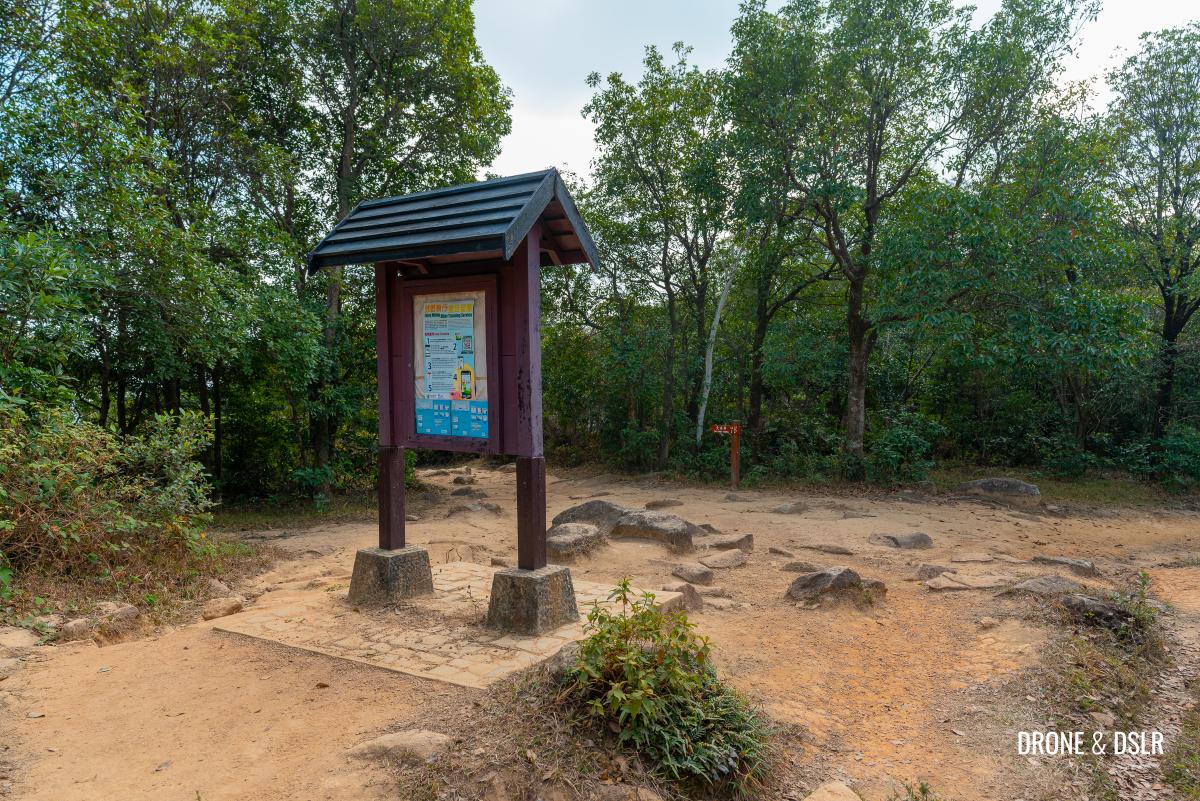
The point where Ma On Shan Country Trail and MacLehose Trail Section 4 diverge
At this point, the Ma On Shan Country Trail and the MacLehose Trail Section 4 diverge. The MacLehose Trail continues straight ahead, while the Ma On Shan Country Trail turns left towards Tai Shui Tseng.
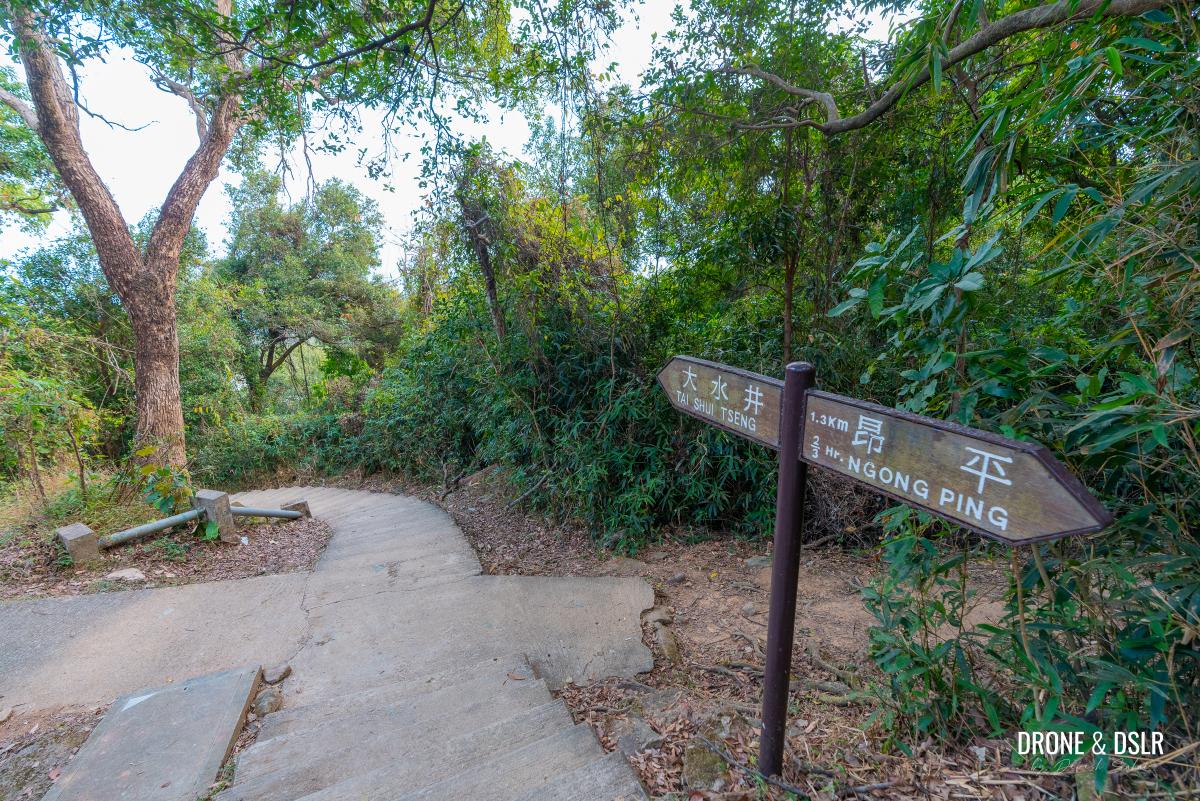
To complete your hike, stay on Ma On Shan Country Trail and turn left to head towards Tai Shui Tseng.
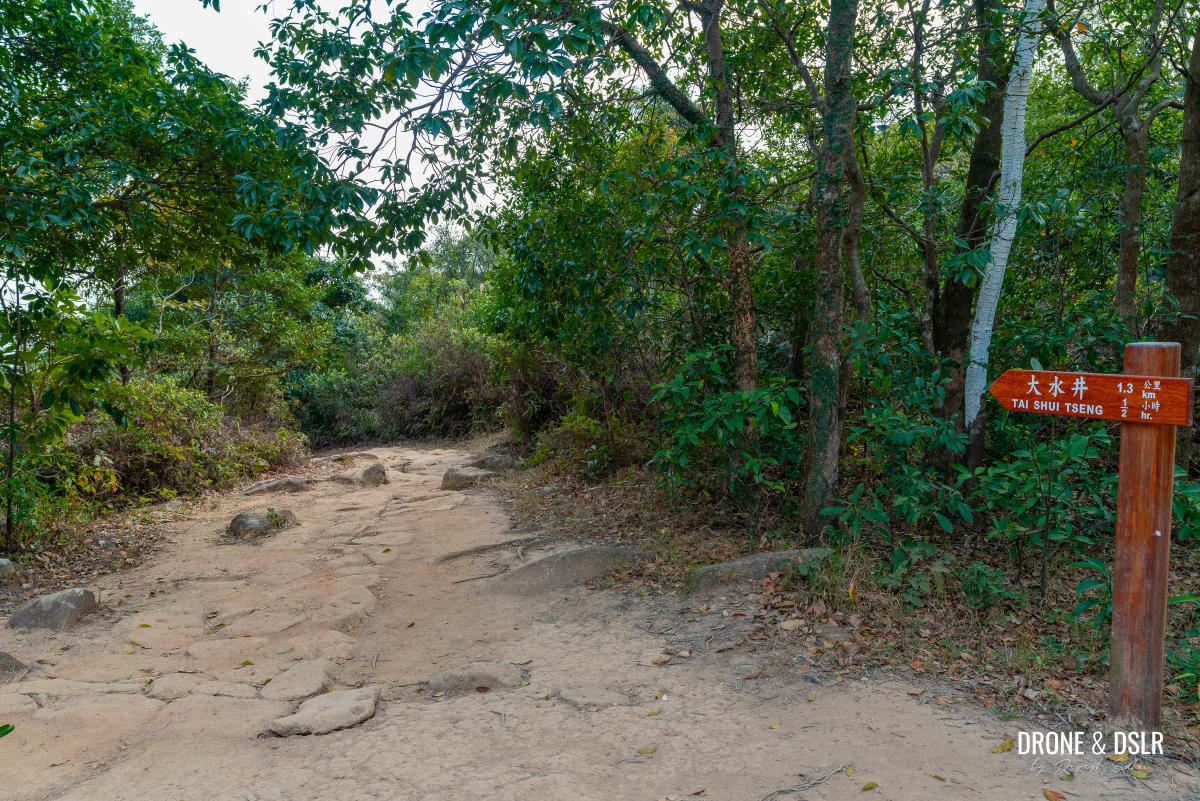
To continue on Ma On Shan Country Trail, turn left and follow the signs for Tai Shui Tseng
The Final Descent to Tai Shui Tseng
The final 1.3 km descent to Tai Shui Tseng felt like a never ending ordeal. I was exhausted and couldn’t wait to step back into civilization.
Begin the final descent
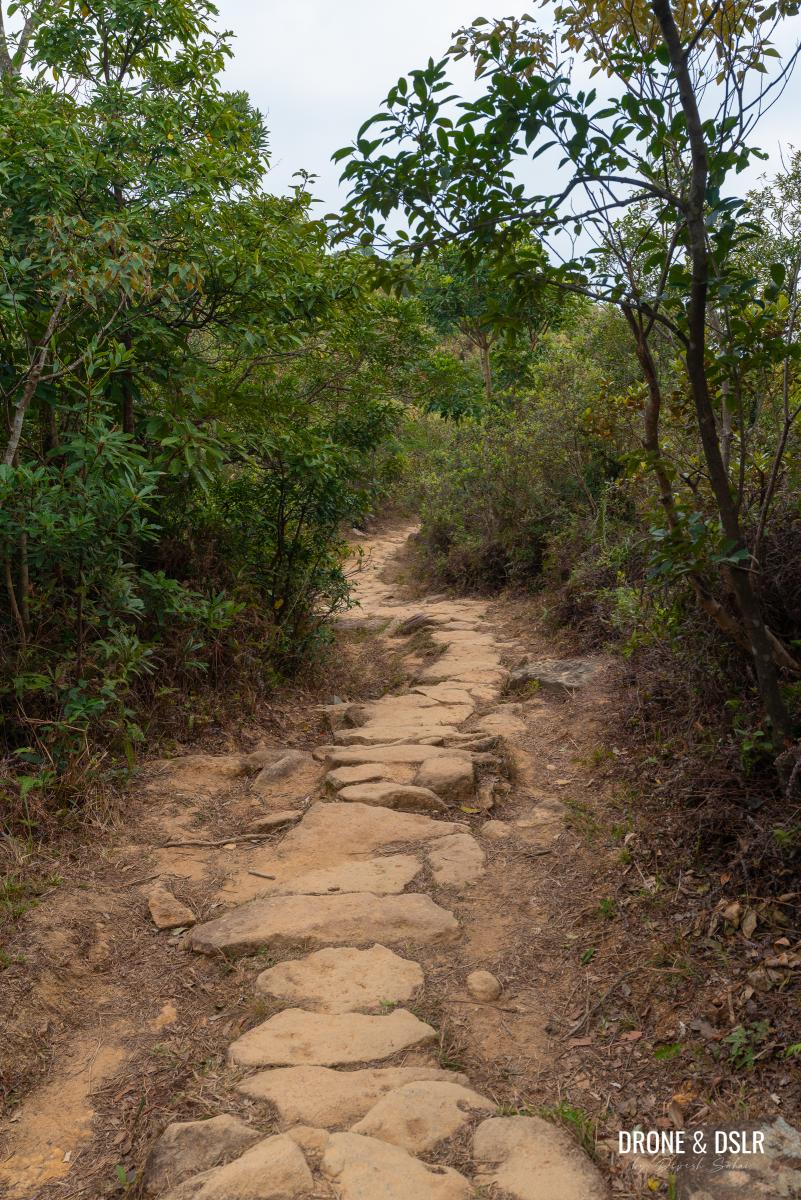
The trail begins its descent on a narrow and rocky trail. And as you continue downhill, the views of Sai Kung and Clearwater Bay stay in focus.
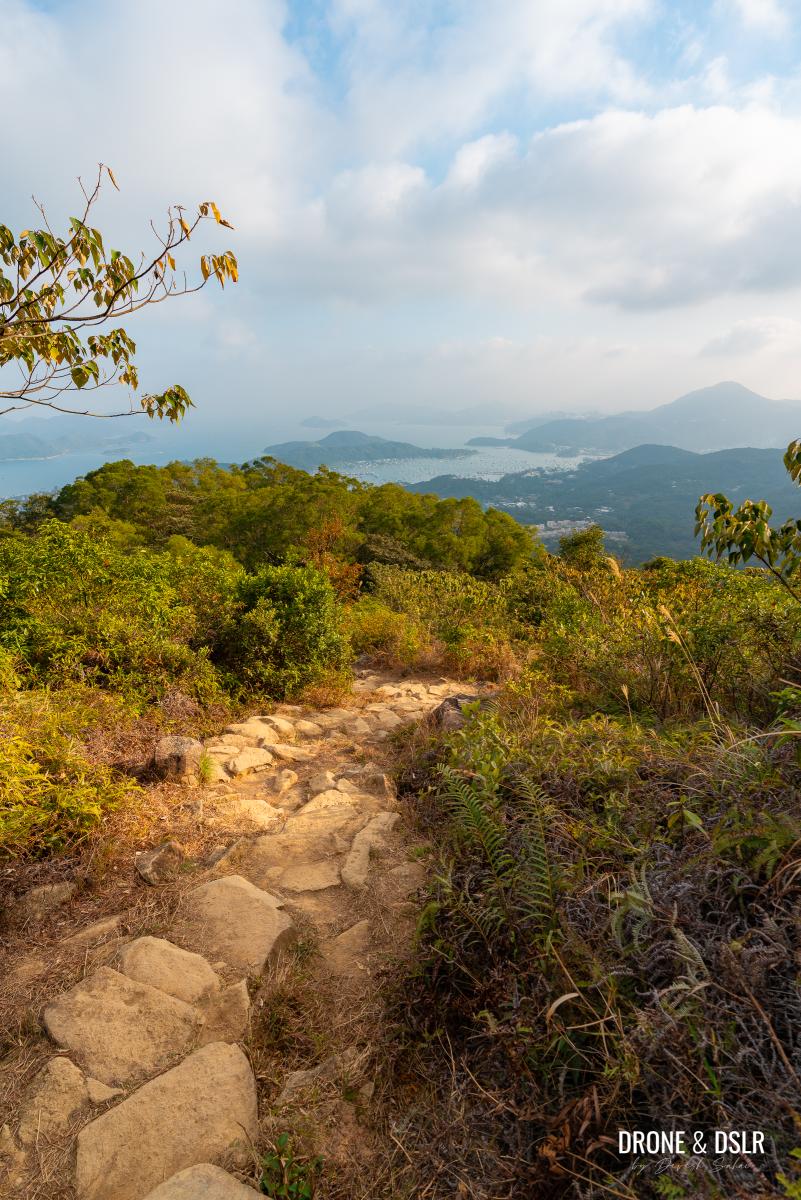
Gorgeous views as you finish the Ma On Shan Country Trail
The trail’s initial stretch is characterized by these stunning views, which are soon eclipsed by a dense canopy of trees at the midpoint.
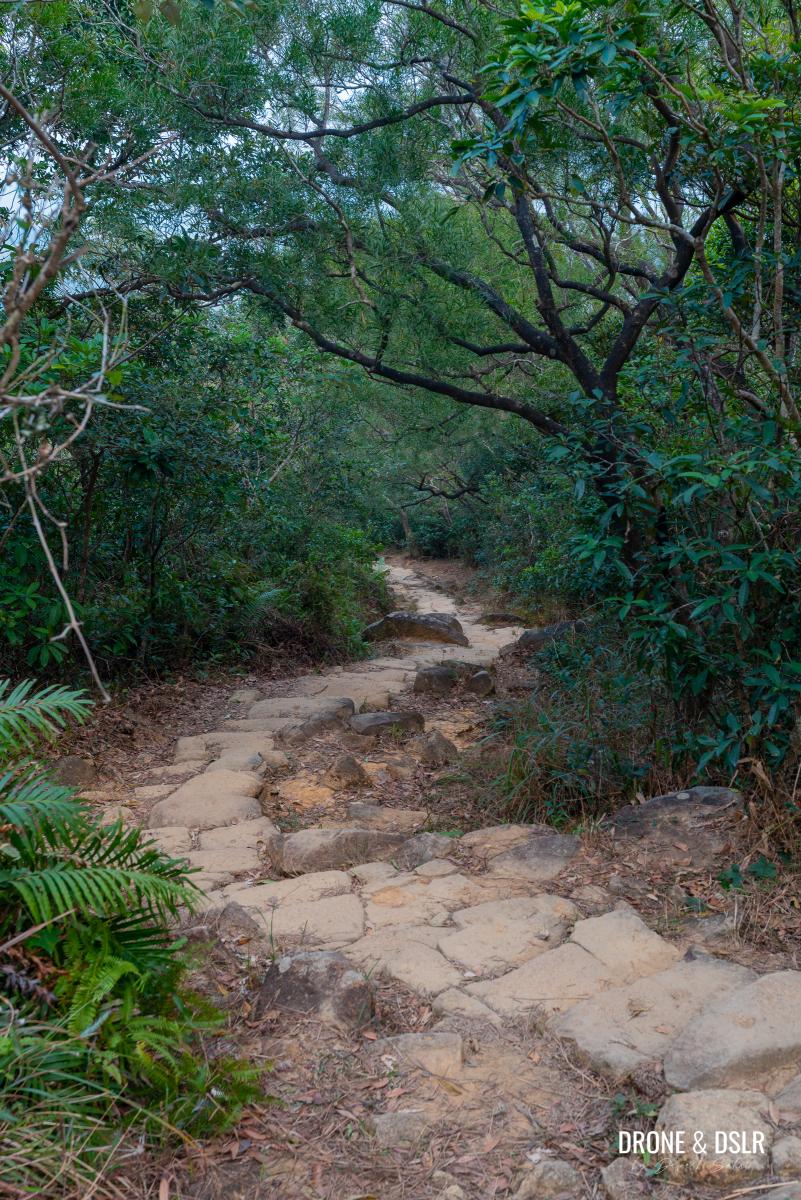
The trail descends below the treeline
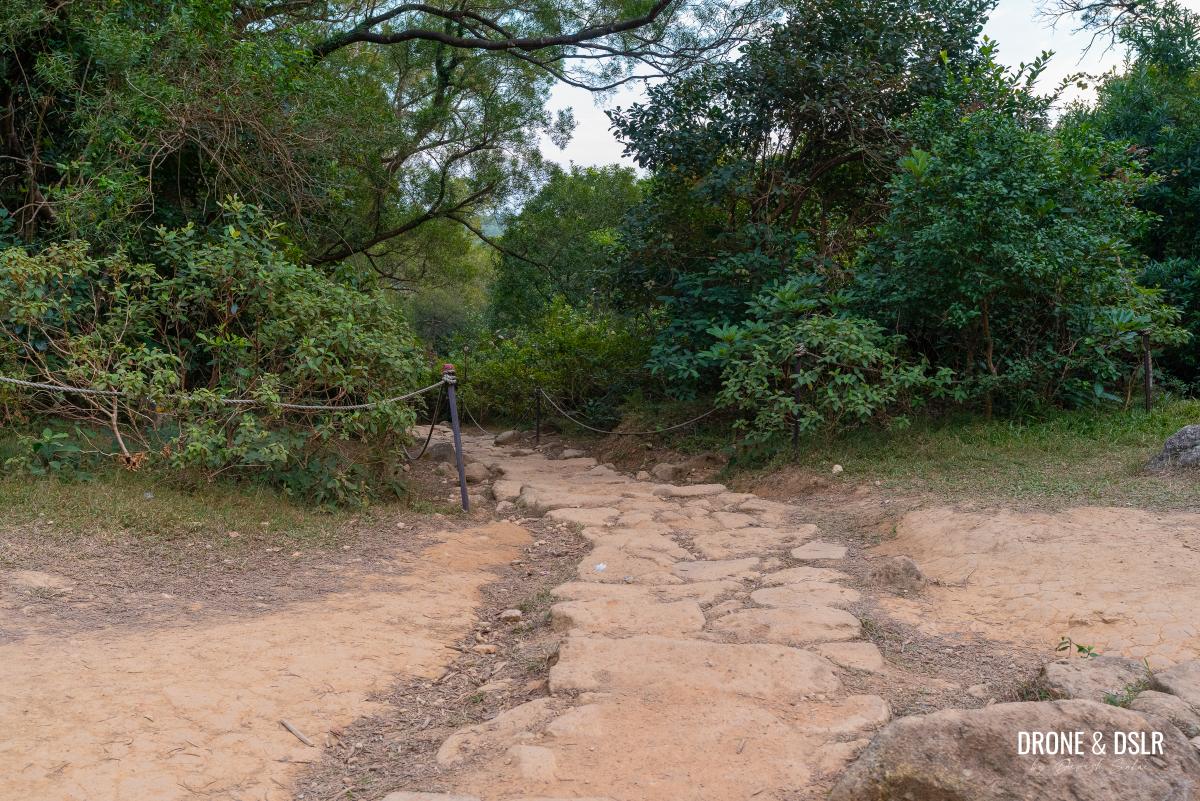
As you continue downward, the path becomes increasingly steep and rocky, requiring careful footing to navigate safely.
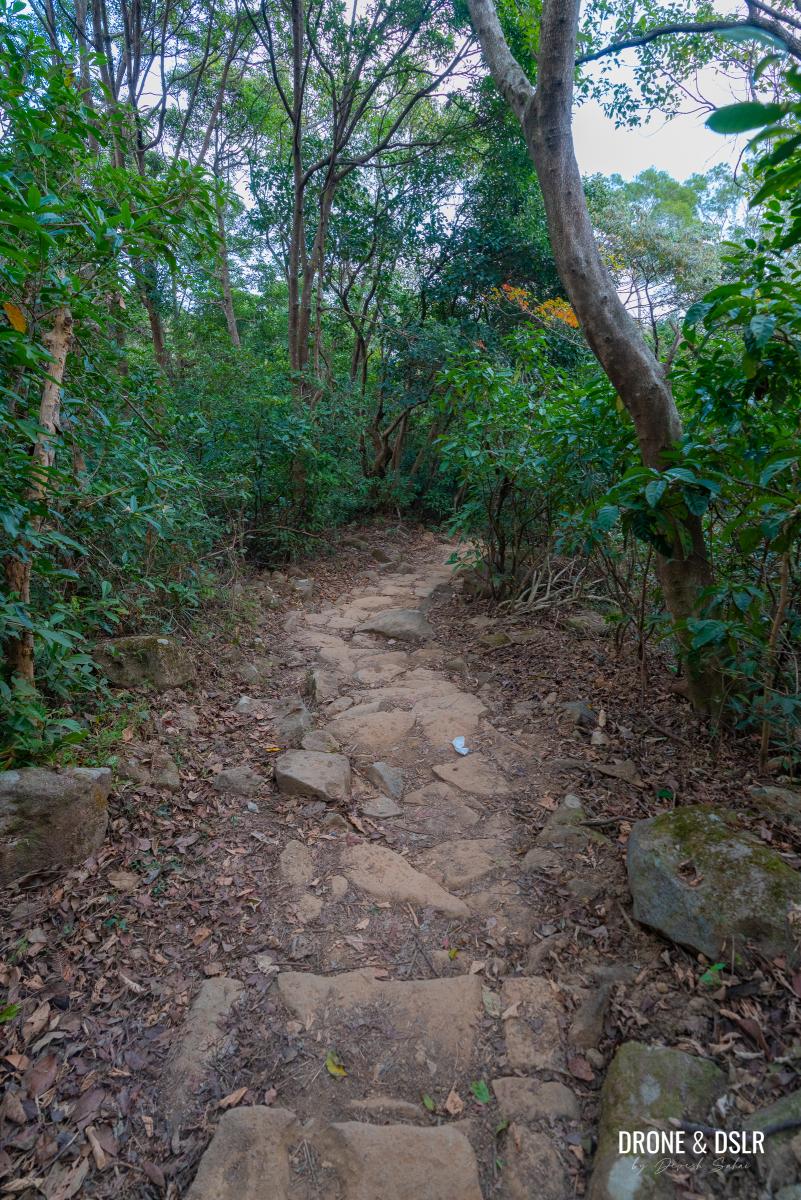
The descent becomes a bit steeper
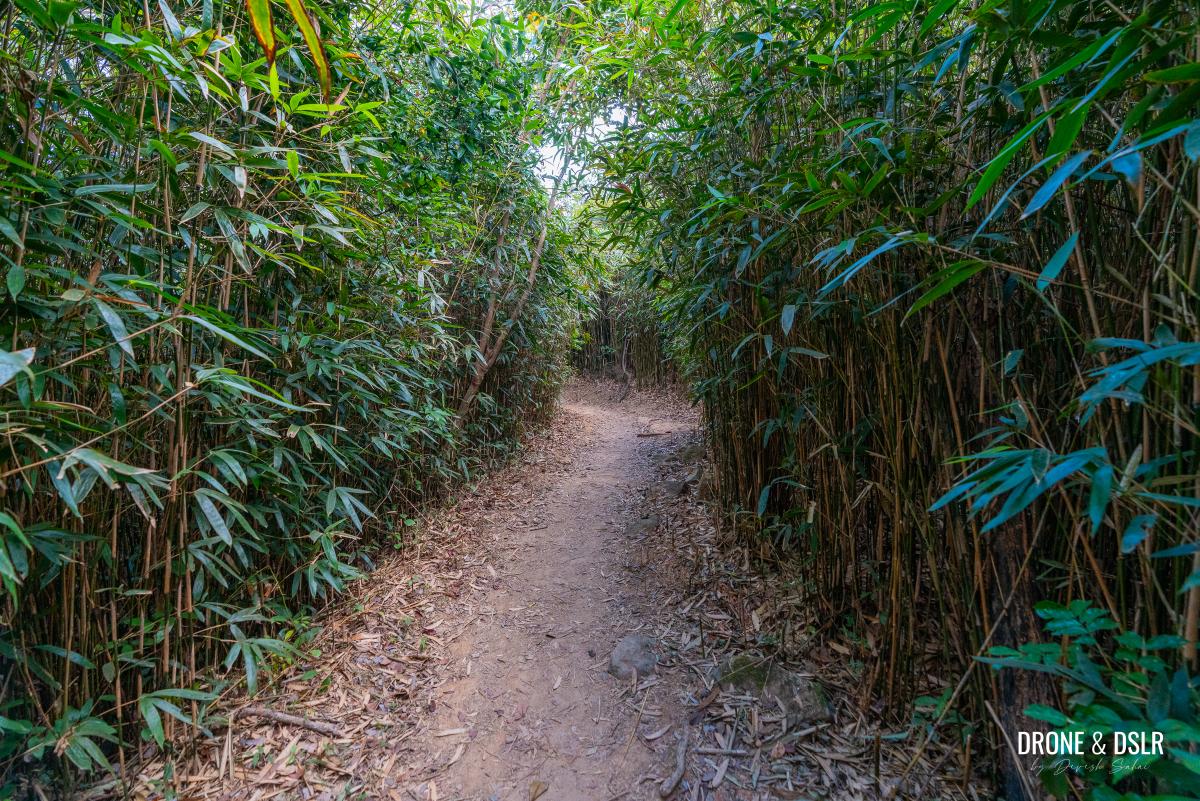
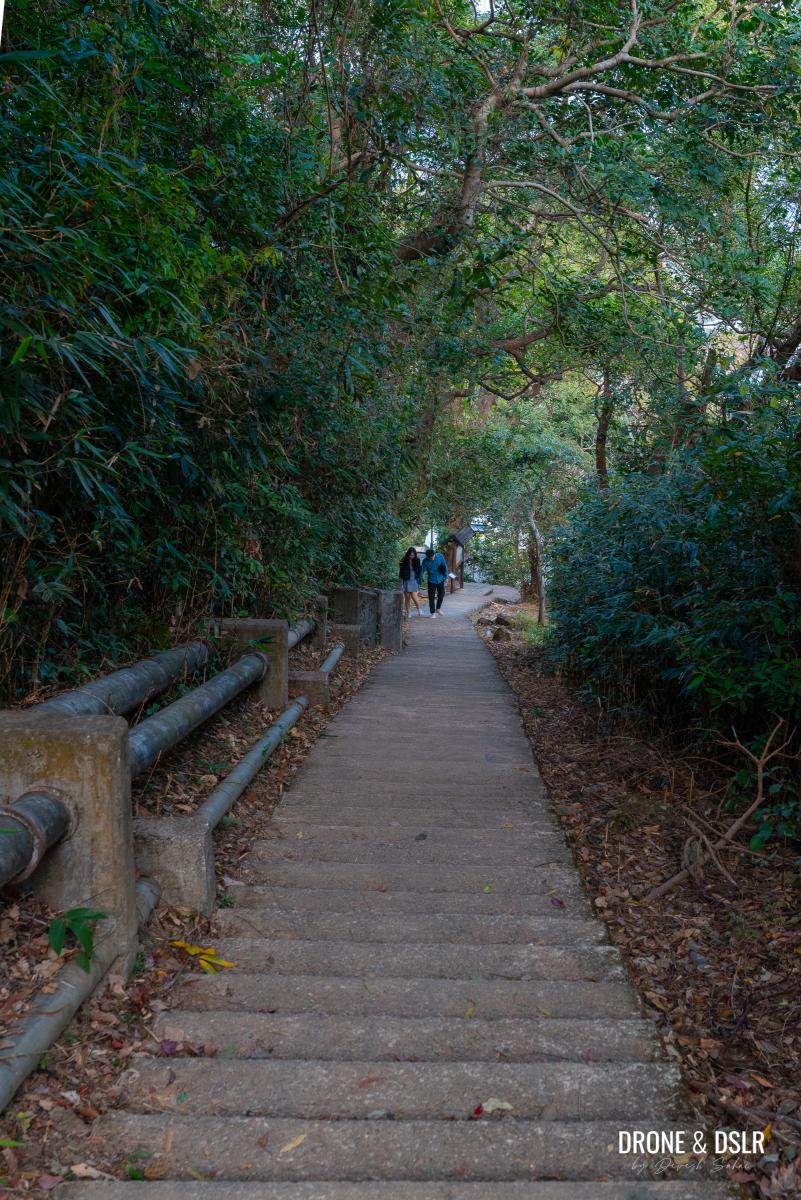
Eventually, the trail gives way to a bamboo forest that envelops the path, and lasts until the rocky section ends, and the trail transitions onto a cemented path.
-
- Bamboos surround the Ma On Shan Country Trail
-
- The stone path ends and the cement path begins
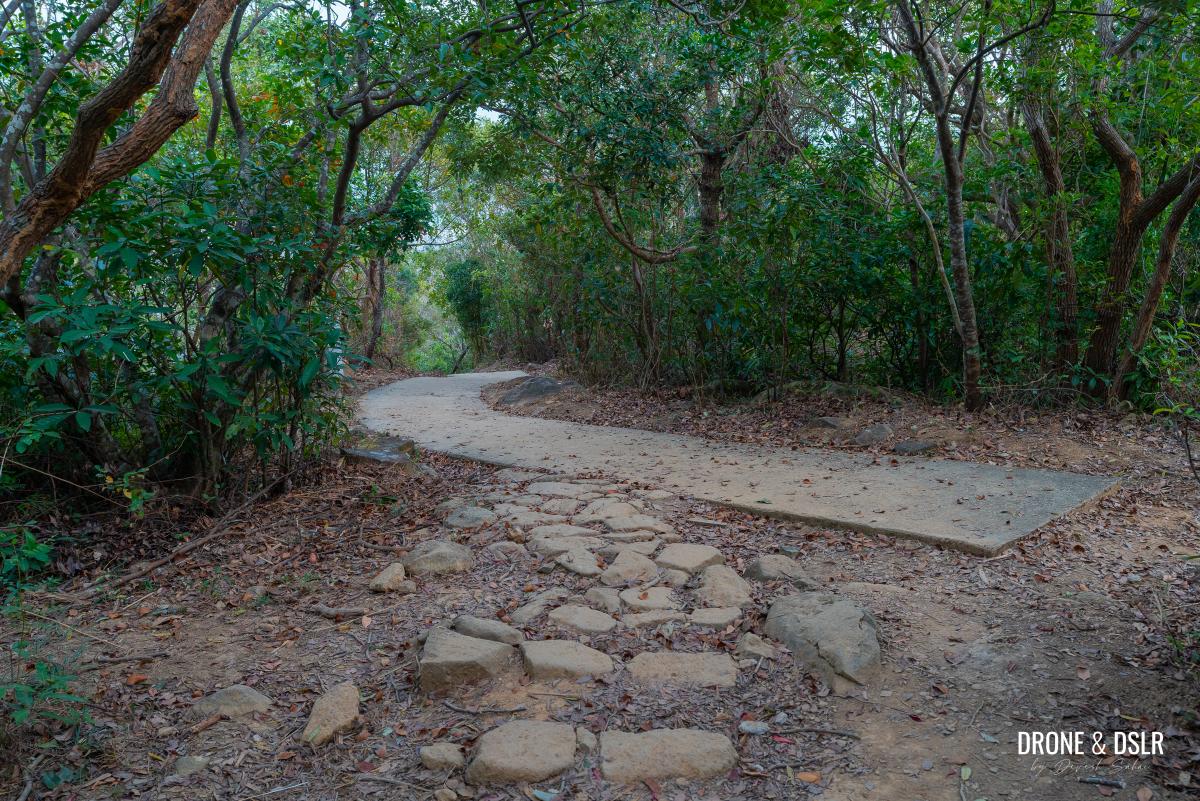
From here, follow the cemented path as it makes its way downhill, ultimately leading you to the village of Tai Shui Tseng in Sai Kung.
-
- Just follow the signs for Tai Shui Tseng
-
- The end of the Ma On Shan Country Trail in sight
-
- And we’ve arrived at Tai Shui Tseng
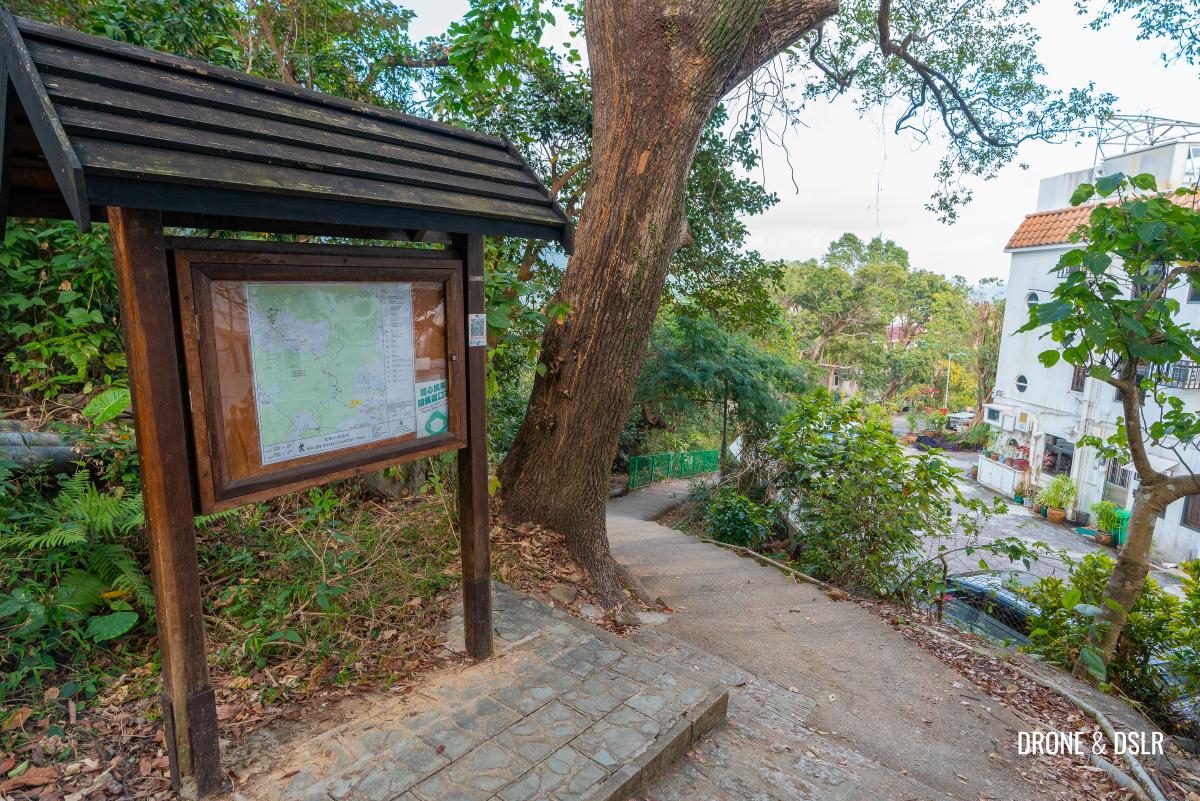
-
- Exit the trail and walk towards the houses in Tai Shui Tseng
Options to End the Hike
Once at Tai Shui Tseng, you have a couple of options to end the Ma On Shan Hike.
I would however advise you to first follow the signs for “Sai Kung Town Centre” and walk downhill along the road.
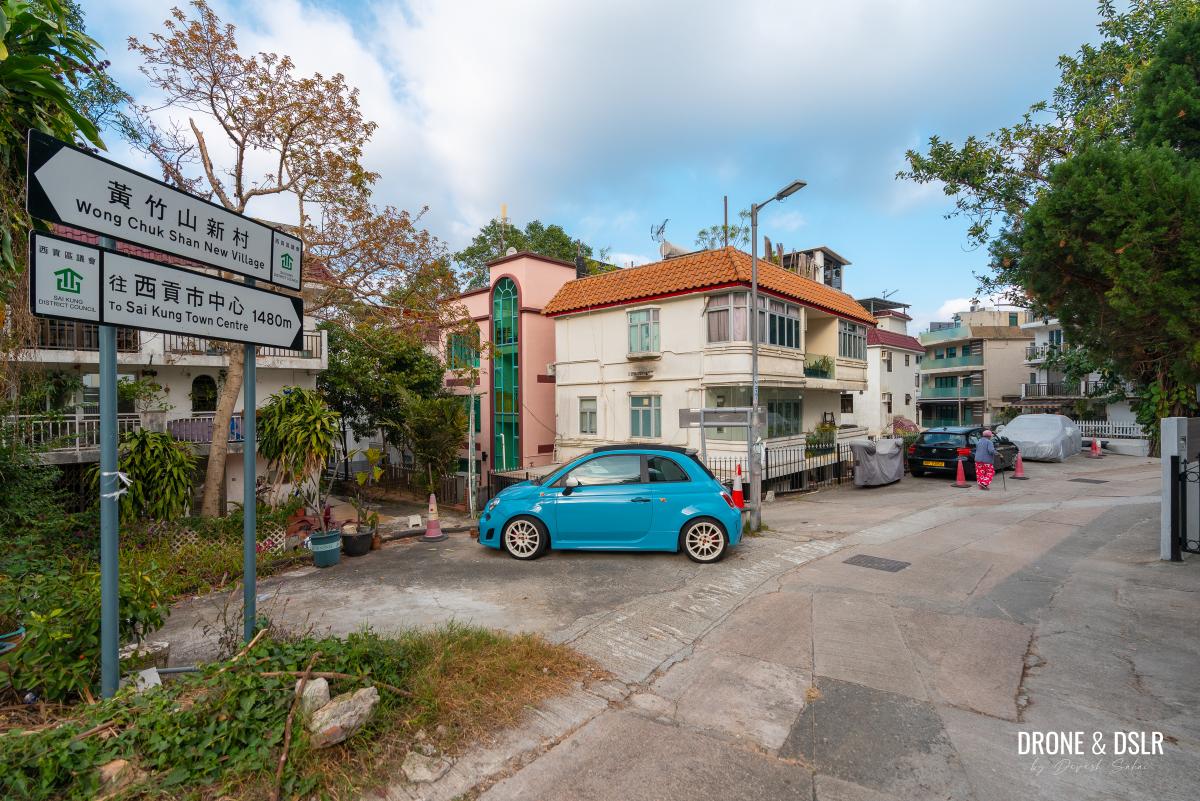
Follow the sign for Sai Kung Town Centre
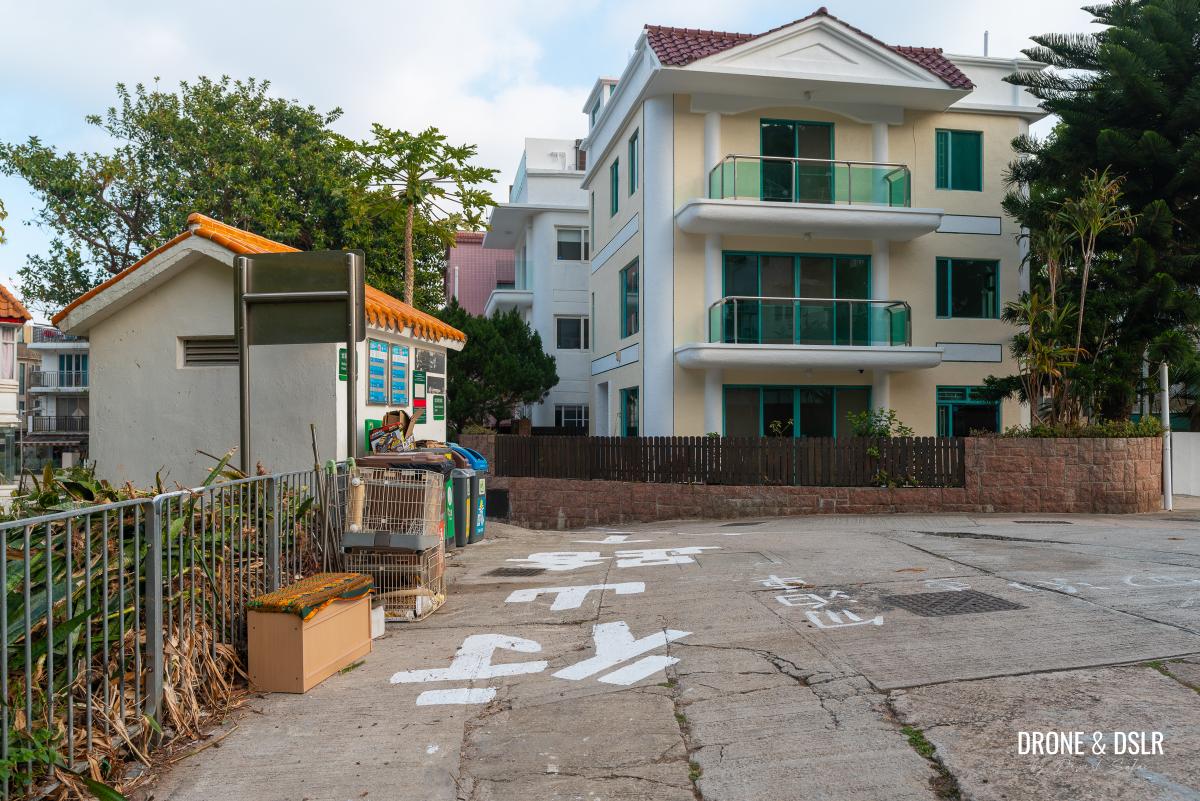
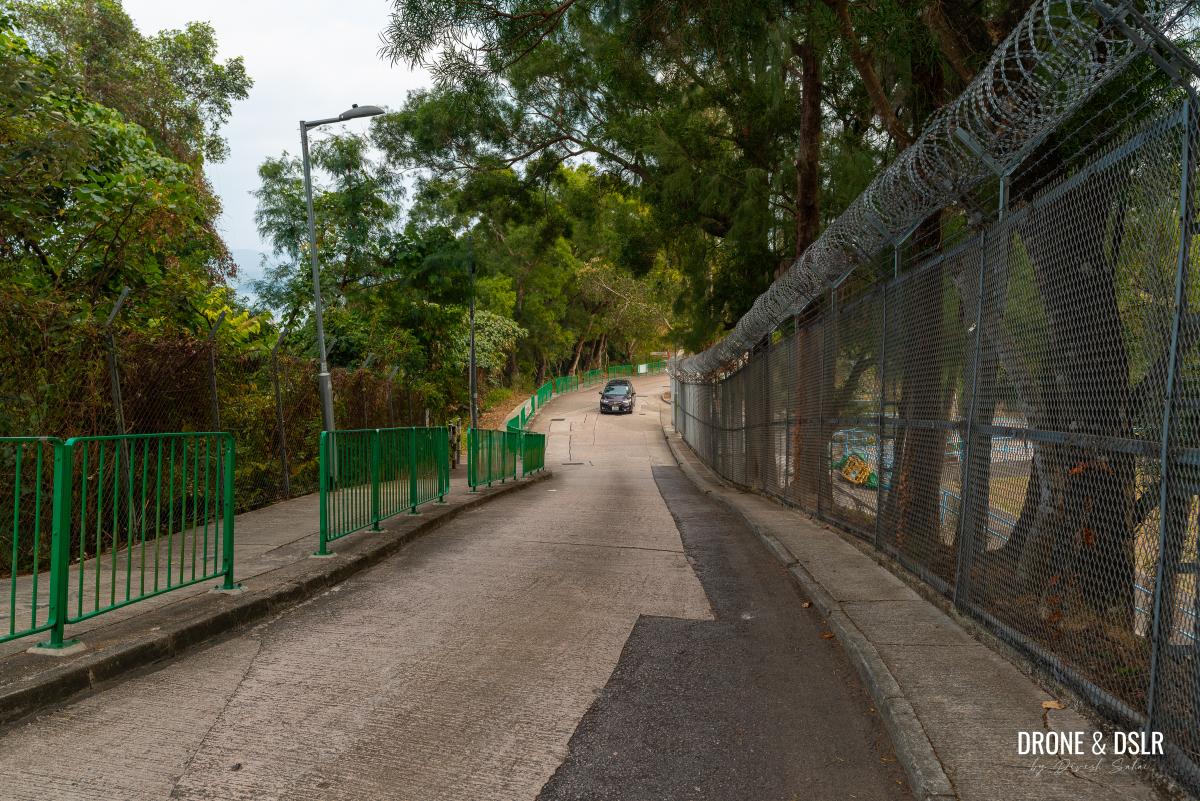
You’ll subsequently pass a section with a fence and then some houses before arriving at a four-way intersection.
-
- Walk past the fenced section of the road
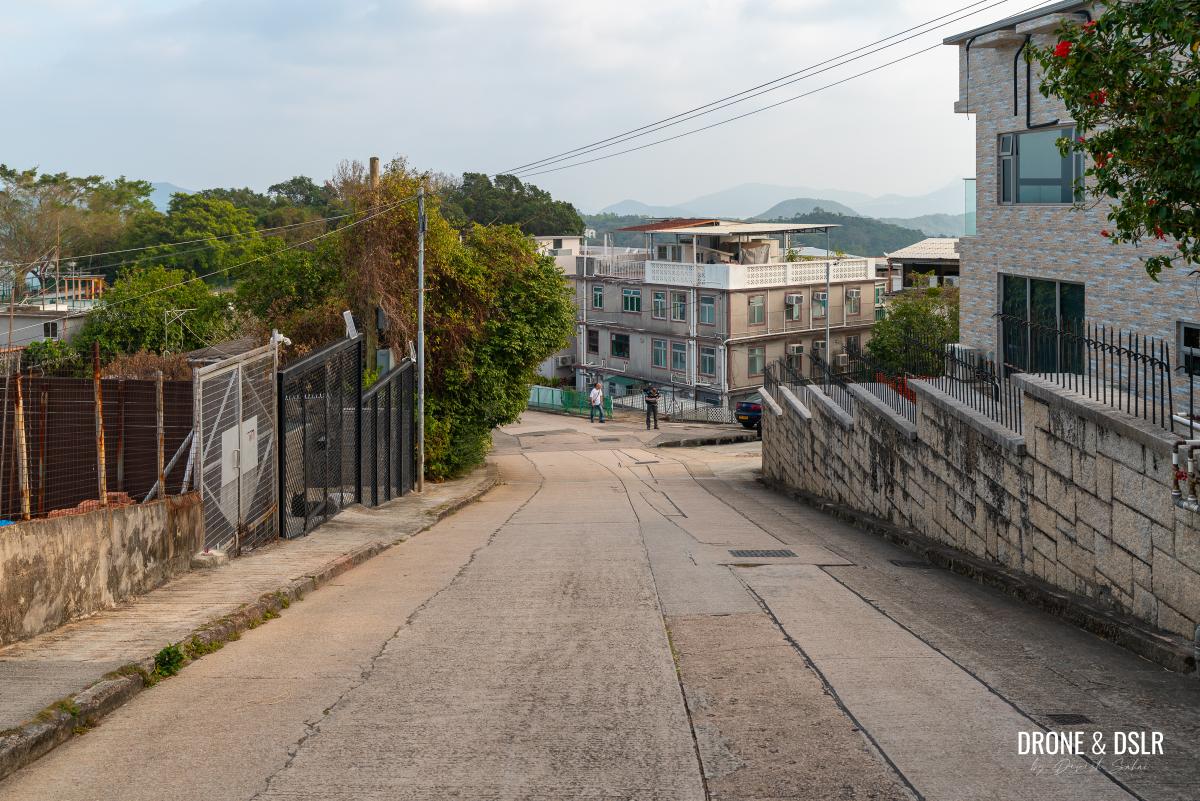
-
- Walk past these houses at Hung Fa Tsuen
At this intersection, you have two options: take a minibus to Sai Kung town / Hiram’s Highway or walk down to the town centre. Or if you prefer walking, cross the intersection to Tan Cheung Road and follow the road (and the steps that follow) to Hiram’s Highway.
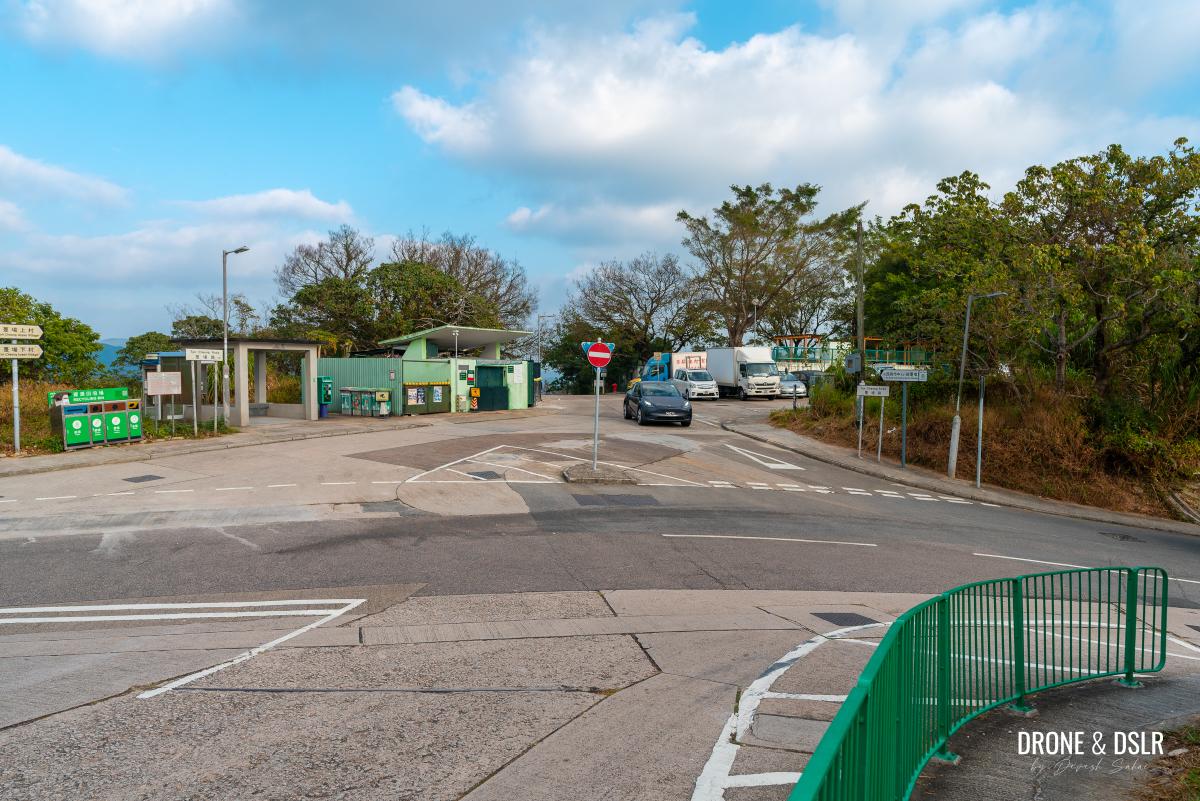
The four way intersection marks the end of the hike – catch a minibus from the opposite side of the road or keep walking down to Hiram’s Highway
Alternatively, you can find or call for a taxi.
Ma On Shan – The Saddleback Mountain
The hike to Ma On Shan Peak isn’t for beginners. It’s a hike that you undertake once you’ve conquered a few challenging hikes in Hong Kong.
Ma On Shan in the background
It’s a demanding hike that keeps on rewarding you with the most incredible views right till the very end. There is never a dull moment while completing the Ma On Shan Hike.
Needless to say that Ma On Shan is one of my favourite hikes in Hong Kong.
Aerial panoramo of Ma On Shan from The Hunch Backs
If you’re looking for other easier hikes in the Ma On Shan Country Park, we highly recommend Ma On Shan Country Trail, Penis Rock (yes, that’s a hike), Mau Ping Ancient Trail, or Buffalo Hill.
I hope you enjoyed this guide or found it resourceful. Please drop us a comment below or share it on the social media channel of your choice.
If you enjoy our work, come join us on Instagram and YouTube 🙂


You might also like


Leave a reply